Popular Woodworking 2006-08 № 156, страница 18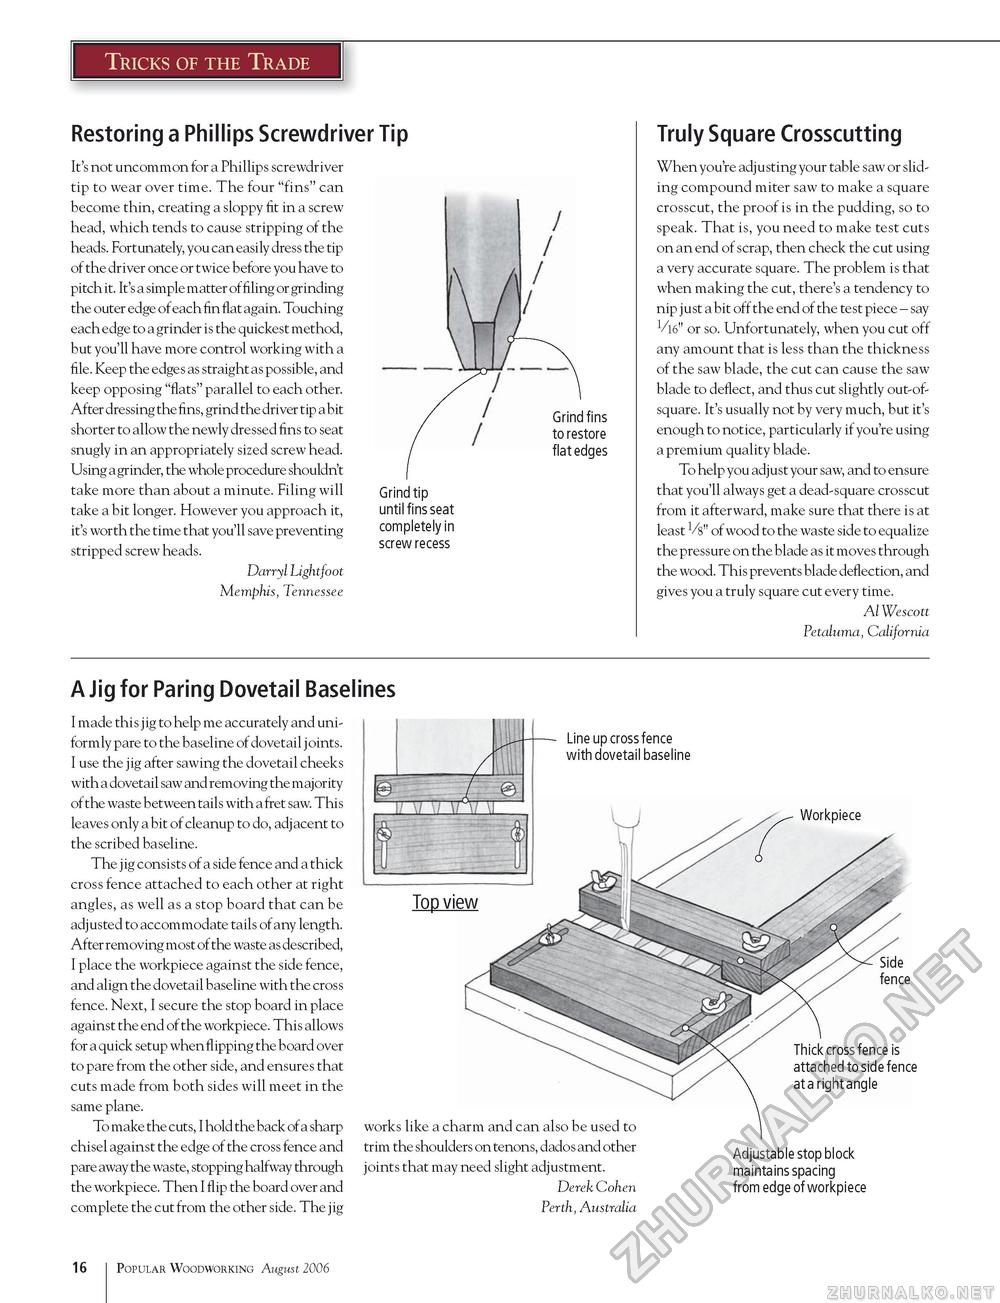
Tricks of the Trade Truly Square Crosscutting When you're adjusting your table saw or sliding compound miter saw to make a square crosscut, the proof is in the pudding, so to speak. That is, you need to make test cuts on an end of scrap, then check the cut using a very accurate square. The problem is that when making the cut, there's a tendency to nip just a bit off the end of the test piece - say or so. Unfortunately, when you cut off any amount that is less than the thickness of the saw blade, the cut can cause the saw blade to deflect, and thus cut slightly out-of-square. It's usually not by very much, but it's enough to notice, particularly if you're using a premium quality blade. To help you adjust your saw, and to ensure that you'll always get a dead-square crosscut from it afterward, make sure that there is at least V8" of wood to the waste side to equalize the pressure on the blade as it moves through the wood. This prevents blade deflection, and gives you a truly square cut every time. Al Wescott Petaluma, California A Jig for Paring Dovetail Baselines I made this j ig to help me accurately and uniformly pare to the baseline of dovetail j oints. I use the jig after sawing the dovetail cheeks with a dovetail saw and removing the majority of the waste between tails with a fret saw. This leaves only a bit of cleanup to do, adjacent to the scribed baseline. The j ig consists of a side fence and a thick cross fence attached to each other at right angles, as well as a stop board that can be adjusted to accommodate tails of any length. After removing most of the waste as described, I place the workpiece against the side fence, and align the dovetail baseline with the cross fence. Next, I secure the stop board in place against the end of the workpiece. This allows for a quick setup when flipping the board over to pare from the other side, and ensures that cuts made from both sides will meet in the same plane. To make the cuts, I hold the back of a sharp chisel against the edge of the cross fence and pare away the waste, stopping halfway through the workpiece. Then I flip the board over and complete the cut from the other side. The jig Restoring a Phillips Screwdriver Tip It's not uncommon for a Phillips screwdriver tip to wear over time. The four "fins" can become thin, creating a sloppy fit in a screw head, which tends to cause stripping of the heads. Fortunately, you can easily dress the tip of the driver once or twice before you have to pitch it. It's a simple matter of filing or grinding the outer edge of each fin flat again. Touching each edge to a grinder is the quickest method, but you'll have more control working with a file. Keep the edges as straight as possible, and keep opposing "flats" parallel to each other. After dressing the fins, grind the driver tip a bit shorter to allow the newly dressed fins to seat snugly in an appropriately sized screw head. Using a grinder, the whole procedure shouldn't take more than about a minute. Filing will take a bit longer. However you approach it, it's worth the time that you'll save preventing stripped screw heads. Darryl Lightfoot Memphis, Tennessee Grind fins to restore fl at edges Grind tip until fins seat completely in screw recess Line up cross fence with dovetail baseline Workpiece Top view Side fence Thick cross fence is attached to side fence at a right angle works like a charm and can also be used to trim the shoulders on tenons, dados and other joints that may need slight adjustment. Derek Cohen Perth, Australia Adjustable stop block maintains spacing from edge of workpiece 16 Popular Woodworking August 2006 |


