Popular Woodworking 2006-08 № 156, страница 34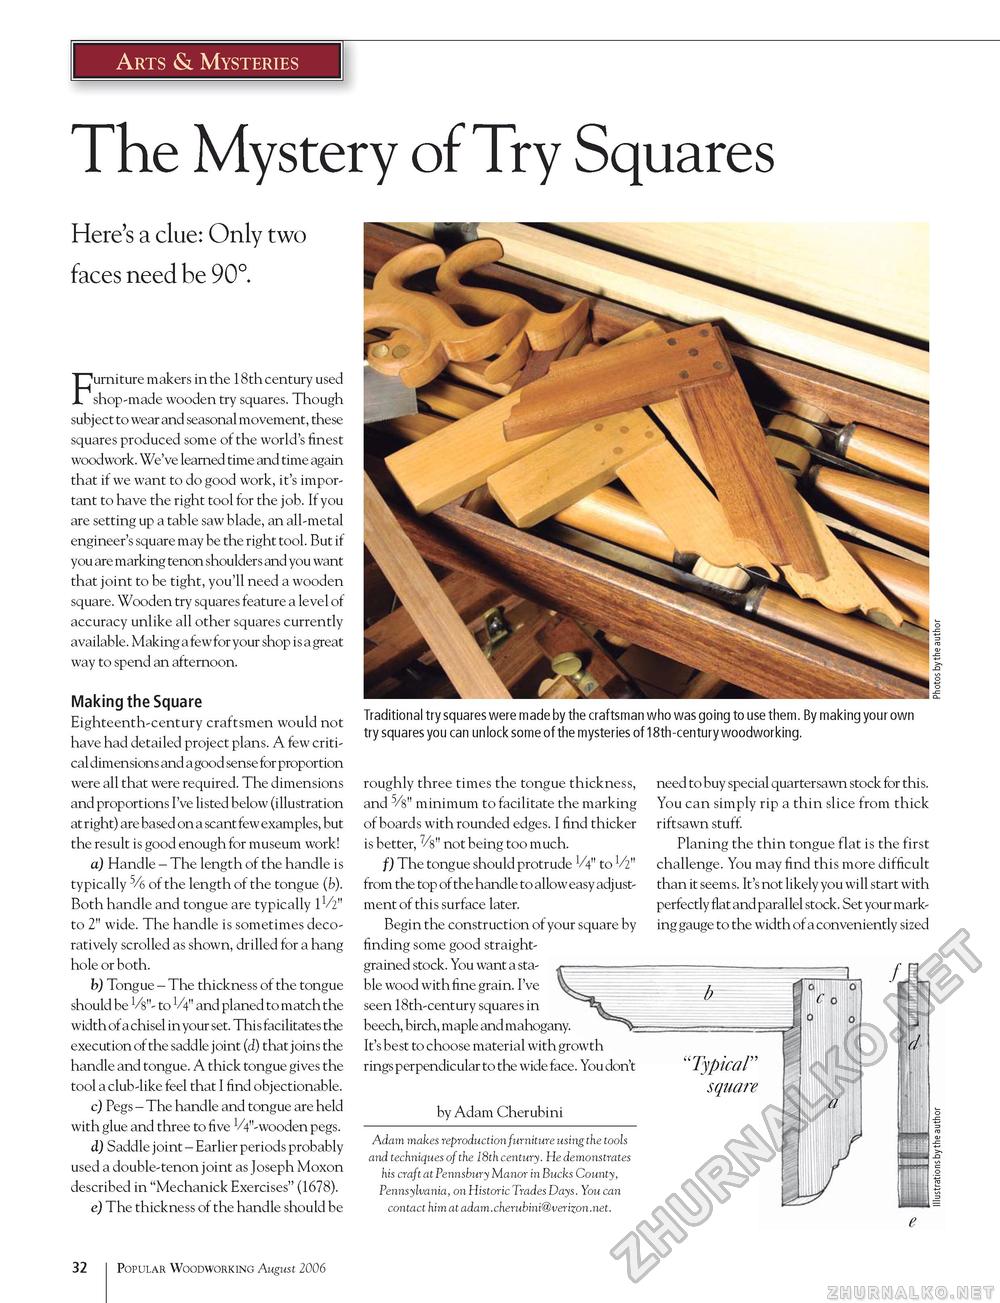
Arts & Mysteries The Mystery of Try Squares Here's a clue: Only two faces need be 90°. Furniture makers in the 18 th century used shop-made wooden try squares. Though subject to wear and seasonal movement, these squares produced some of the world's finest woodwork. We've learned time and time again that if we want to do good work, it's important to have the right tool for the job. If you are setting up a table saw blade, an all-metal engineer's square may be the right tool. But if you are marking tenon shoulders and you want that joint to be tight, you'll need a wooden square. Wooden try squares feature a level of accuracy unlike all other squares currently available. Making a few for your shop is a great way to spend an afternoon. Making the Square Eighteenth-century craftsmen would not have had detailed project plans. A few critical dimensions and a good sense for proportion were all that were required. The dimensions and proportions I've listed below (illustration at right) are based on a scant few examples, but the result is good enough for museum work! a) Handle - The length of the handle is typically 5/6 of the length of the tongue (b). Both handle and tongue are typically IV2" to 2" wide. The handle is sometimes deco-ratively scrolled as shown, drilled for a hang hole or both. b) Tongue - The thickness of the tongue should be Ms"- to V4" and planed to match the width of a chisel in your set. This facilitates the execution of the saddle j oint (d) that j oins the handle and tongue. A thick tongue gives the tool a club-like feel that I find objectionable. c) Pegs - The handle and tongue are held with glue and three to five 4"-wooden pegs. d) Saddle joint - Earlier periods probably used a double-tenon joint as Joseph Moxon described in "Mechanick Exercises" (1678). e) The thickness of the handle should be Traditional try squares were made by the craftsman who was going to use them. By making your own try squares you can unlock some of the mysteries of 18th-century woodworking. roughly three times the tongue thickness, and 5/s" minimum to facilitate the marking of boards with rounded edges. I find thicker is better, 7/s" not being too much. f) The tongue should protrude V4" to V2" from the top of the handle to allow easy adj ust-ment of this surface later. Begin the construction of your square by finding some good straight-grained stock. You want a stable wood with fine grain. I've seen 18th-century squares in beech, birch, maple and mahogany. It's best to choose material with growth rings perpendicular to the wide face. You don't by Adam Cherubini Adam makes reproduction furniture using the tools and techniques of the 18th century. He demonstrates his craft at Pennsbury Manor in Bucks County, Pennsylvania, on Historic Trades Days. You can contact him at adam.cherubini@verizon.net. need to buy special quartersawn stock for this. You can simply rip a thin slice from thick riftsawn stuff. Planing the thin tongue flat is the first challenge. You may find this more difficult than it seems. It's not likely you will start with perfectly flat and parallel stock. Set your marking gauge to the width of a conveniently sized e 32 Popular Woodworking August 2006 |


