Popular Woodworking 2006-08 № 156, страница 79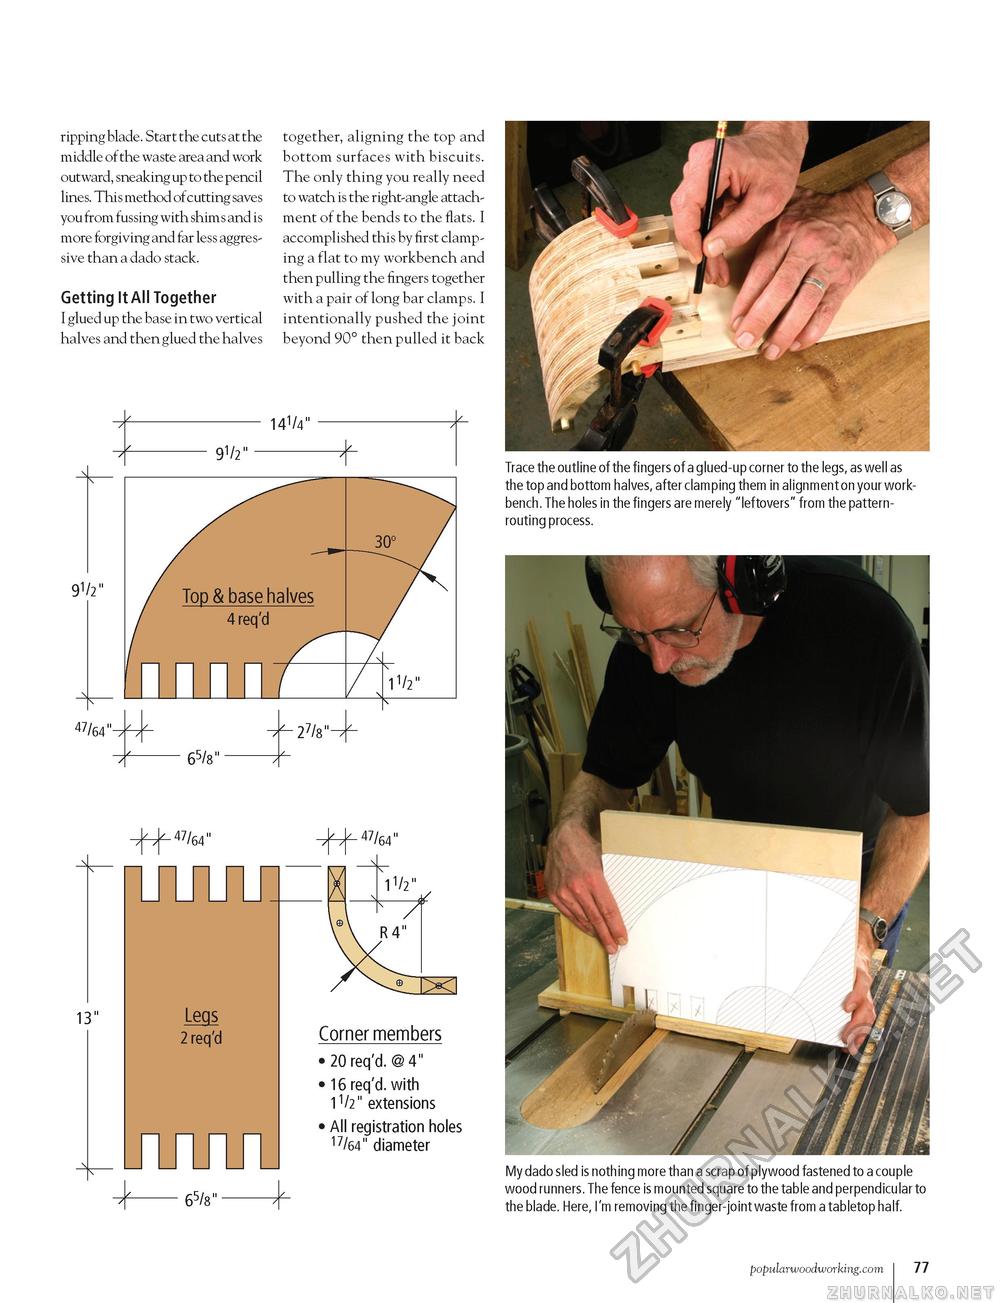
ripping blade. Start the cuts at the middle of the waste area and work outward, sneaking up to the pencil lines. This method of cutting saves you from fussing with shims and is more forgiving and far less aggressive than a dado stack. Getting It All Together I glued up the base in two vertical halves and then glued the halves together, aligning the top and bottom surfaces with biscuits. The only thing you really need to watch is the right-angle attachment of the bends to the flats. I accomplished this by first clamping a flat to my workbench and then pulling the fingers together with a pair of long bar clamps. I intentionally pushed the joint beyond 90° then pulled it back I4V4" 91/2" + 9V2" 91/2"
47/64"- 47/64"-
65/8" 27/8"" 13" Legs 2 req'd Corner members •20req'd.@4" • 16 req'd. with 1V2" extensions • All registration holes 17/64" diameter 65/8" + Trace the outline of the fingers of a glued-up corner to the legs, as well as the top and bottom halves, after clamping them in alignment on your workbench. The holes in the fingers are merely "leftovers" from the pattern-routing process. My dado sled is nothing more than a scrap of plywood fastened to a couple wood runners. The fence is mounted square to the table and perpendicular to the blade. Here, I'm removing the finger-joint waste from a tabletop half. popularwoodworking.com I 77 |
|||||||||||||


