Popular Woodworking 2006-08 № 156, страница 85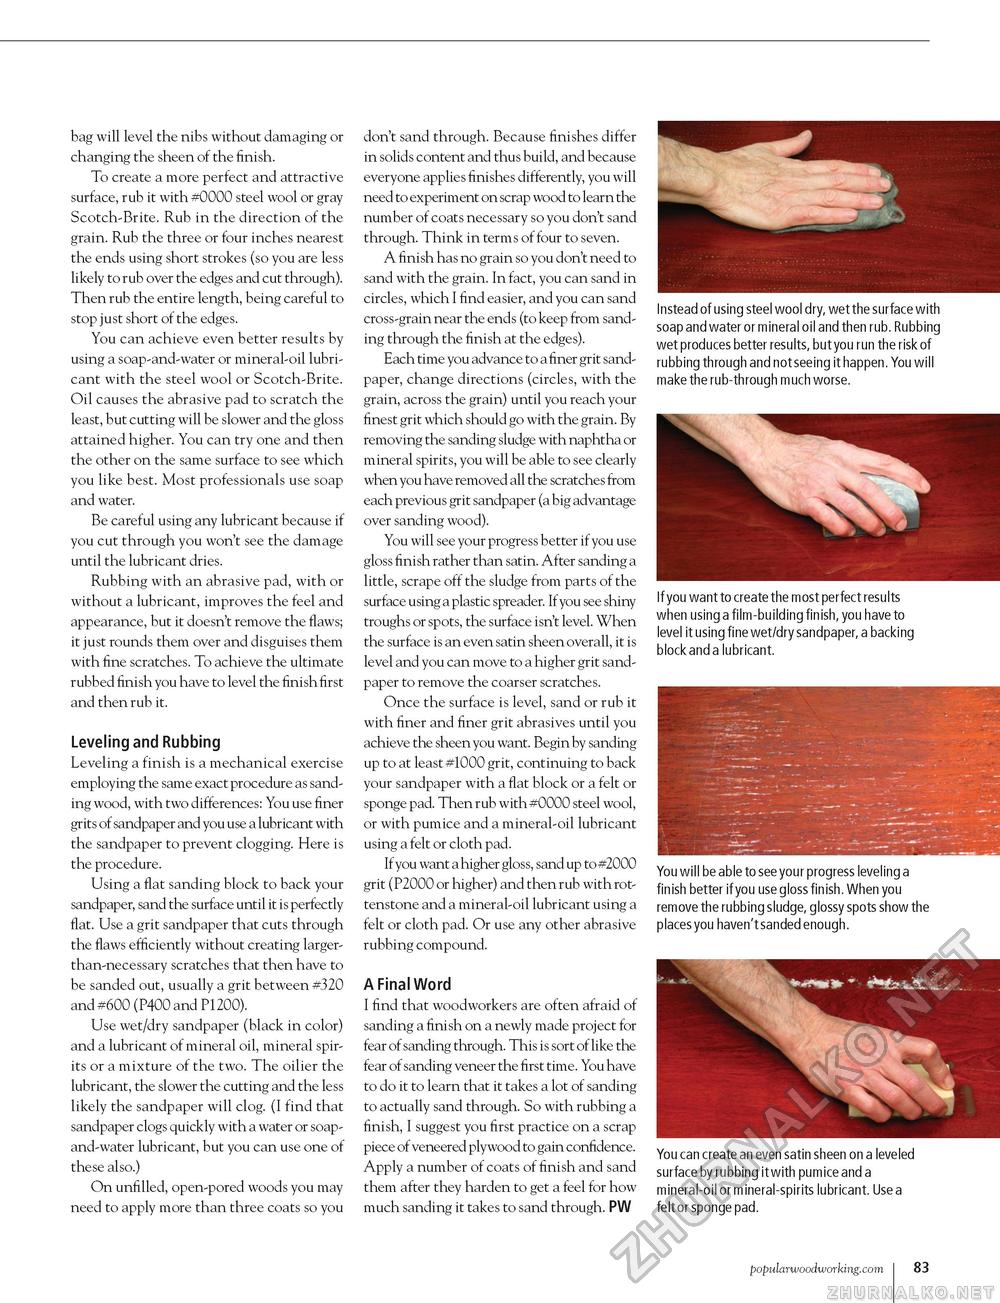
bag will level the nibs without damaging or changing the sheen of the finish. To create a more perfect and attractive surface, rub it with #0000 steel wool or gray Scotch-Brite. Rub in the direction of the grain. Rub the three or four inches nearest the ends using short strokes (so you are less likely to rub over the edges and cut through). Then rub the entire length, being careful to stop just short of the edges. You can achieve even better results by using a soap-and-water or mineral-oil lubricant with the steel wool or Scotch-Brite. Oil causes the abrasive pad to scratch the least, but cutting will be slower and the gloss attained higher. You can try one and then the other on the same surface to see which you like best. Most professionals use soap and water. Be careful using any lubricant because if you cut through you won't see the damage until the lubricant dries. Rubbing with an abrasive pad, with or without a lubricant, improves the feel and appearance, but it doesn't remove the flaws; it just rounds them over and disguises them with fine scratches. To achieve the ultimate rubbed finish you have to level the finish first and then rub it. Leveling and Rubbing Leveling a finish is a mechanical exercise employing the same exact procedure as sanding wood, with two differences: You use finer grits of sandpaper and you use a lubricant with the sandpaper to prevent clogging. Here is the procedure. Using a flat sanding block to back your sandpaper, sand the surface until it is perfectly flat. Use a grit sandpaper that cuts through the flaws efficiently without creating larger-than-necessary scratches that then have to be sanded out, usually a grit between #320 and #600 (P400 and P1200). Use wet/dry sandpaper (black in color) and a lubricant of mineral oil, mineral spirits or a mixture of the two. The oilier the lubricant, the slower the cutting and the less likely the sandpaper will clog. (I find that sandpaper clogs quickly with a water or soap-and-water lubricant, but you can use one of these also.) On unfilled, open-pored woods you may need to apply more than three coats so you don't sand through. Because finishes differ in solids content and thus build, and because everyone applies finishes differently, you will need to experiment on scrap wood to learn the number of coats necessary so you don't sand through. Think in terms of four to seven. A finish has no grain so you don't need to sand with the grain. In fact, you can sand in circles, which I find easier, and you can sand cross-grain near the ends (to keep from sanding through the finish at the edges). Each time you advance to a finer grit sandpaper, change directions (circles, with the grain, across the grain) until you reach your finest grit which should go with the grain. By removing the sanding sludge with naphtha or mineral spirits, you will be able to see clearly when you have removed all the scratches from each previous grit sandpaper (a big advantage over sanding wood). You will see your progress better if you use gloss finish rather than satin. After sanding a little, scrape off the sludge from parts of the surface using a plastic spreader. If you see shiny troughs or spots, the surface isn't level. When the surface is an even satin sheen overall, it is level and you can move to a higher grit sandpaper to remove the coarser scratches. Once the surface is level, sand or rub it with finer and finer grit abrasives until you achieve the sheen you want. Begin by sanding up to at least #1000 grit, continuing to back your sandpaper with a flat block or a felt or sponge pad. Then rub with #0000 steel wool, or with pumice and a mineral-oil lubricant using a felt or cloth pad. If you want a higher gloss, sand up to #2000 grit (P2000 or higher) and then rub with rot-tenstone and a mineral-oil lubricant using a felt or cloth pad. Or use any other abrasive rubbing compound. A Final Word I find that woodworkers are often afraid of sanding a finish on a newly made project for fear of sanding through. This is sort of like the fear of sanding veneer the first time. You have to do it to learn that it takes a lot of sanding to actually sand through. So with rubbing a finish, I suggest you first practice on a scrap piece of veneered plywood to gain confidence. Apply a number of coats of finish and sand them after they harden to get a feel for how much sanding it takes to sand through. PW Instead of using steel wool dry, wet the surface with soap and water or mineral oil and then rub. Rubbing wet produces better results, but you run the risk of rubbing through and not seeing it happen. You will make the rub-through much worse. If you want to create the most perfect results when using a film-building finish, you have to level it using fine wet/dry sandpaper, a backing block and a lubricant. You will be able to see your progress leveling a finish better if you use gloss finish. When you remove the rubbing sludge, glossy spots show the places you haven't sanded enough. You can create an even satin sheen on a leveled surface by rubbing it with pumice and a mineral-oil or mineral-spirits lubricant. Use a felt or sponge pad. popularwoodworking.com I 83 |


