Popular Woodworking 2006-08 № 156, страница 87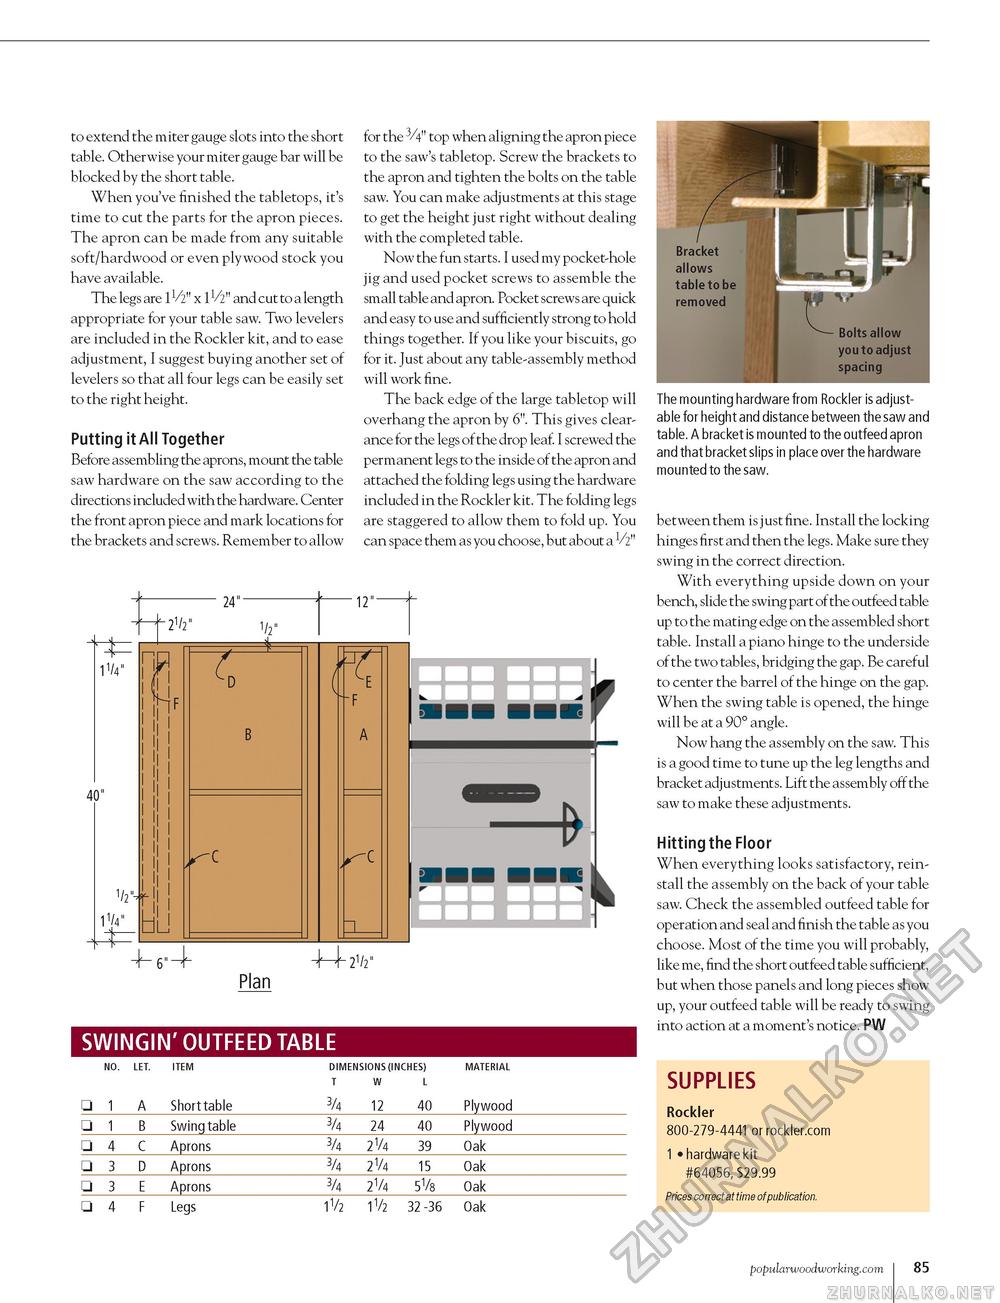
to extend the miter gauge slots into the short table. Otherwise your miter gauge bar will be blocked by the short table. When you've finished the tabletops, it's time to cut the parts for the apron pieces. The apron can be made from any suitable soft/hardwood or even plywood stock you have available. The legs are IV2" x IV2" and cut to a length appropriate for your table saw. Two levelers are included in the Rockler kit, and to ease adjustment, I suggest buying another set of levelers so that all four legs can be easily set to the right height. Putting it All Together Before assembling the aprons, mount the table saw hardware on the saw according to the directions included with the hardware. Center the front apron piece and mark locations for the brackets and screws. Remember to allow for the 3/4" top when aligning the apron piece to the saw's tabletop. Screw the brackets to the apron and tighten the bolts on the table saw. You can make adjustments at this stage to get the height just right without dealing with the completed table. Now the fun starts. I used my pocket-hole jig and used pocket screws to assemble the small table and apron. Pocket screws are quick and easy to use and sufficiently strong to hold things together. If you like your biscuits, go for it. Just about any table-assembly method will work fine. The back edge of the large tabletop will overhang the apron by 6". This gives clearance for the legs of the drop leaf. I screwed the permanent legs to the inside of the apron and attached the folding legs using the hardware included in the Rockler kit. The folding legs are staggered to allow them to fold up. You can space them as you choose, but about a 1/2" 4 Plan SWINGIN' OUTFEED TABLE
The mounting hardware from Rockler is adjustable for height and distance between the saw and table. A bracket is mounted to the outfeed apron and that bracket slips in place over the hardware mounted to the saw. between them is just fine. Install the locking hinges first and then the legs. Make sure they swing in the correct direction. With everything upside down on your bench, slide the swing part of the outfeed table up to the mating edge on the assembled short table. Install a piano hinge to the underside of the two tables, bridging the gap. Be careful to center the barrel of the hinge on the gap. When the swing table is opened, the hinge will be at a 90° angle. Now hang the assembly on the saw. This is a good time to tune up the leg lengths and bracket adjustments. Lift the assembly off the saw to make these adjustments. Hitting the Floor When everything looks satisfactory, reinstall the assembly on the back of your table saw. Check the assembled outfeed table for operation and seal and finish the table as you choose. Most of the time you will probably, like me, find the short outfeed table sufficient, but when those panels and long pieces show up, your outfeed table will be ready to swing into action at a moment's notice. PW SUPPLIES Rockler 800-279-4441 or rockler.com 1 • hardware kit #64056, $29.99 Prices correct at time of publication. popularwoodworking.com I 85 |
||||||||||||||||||||||||||||||||||||||||||||||||||||||||


