Popular Woodworking 2006-10 № 157, страница 64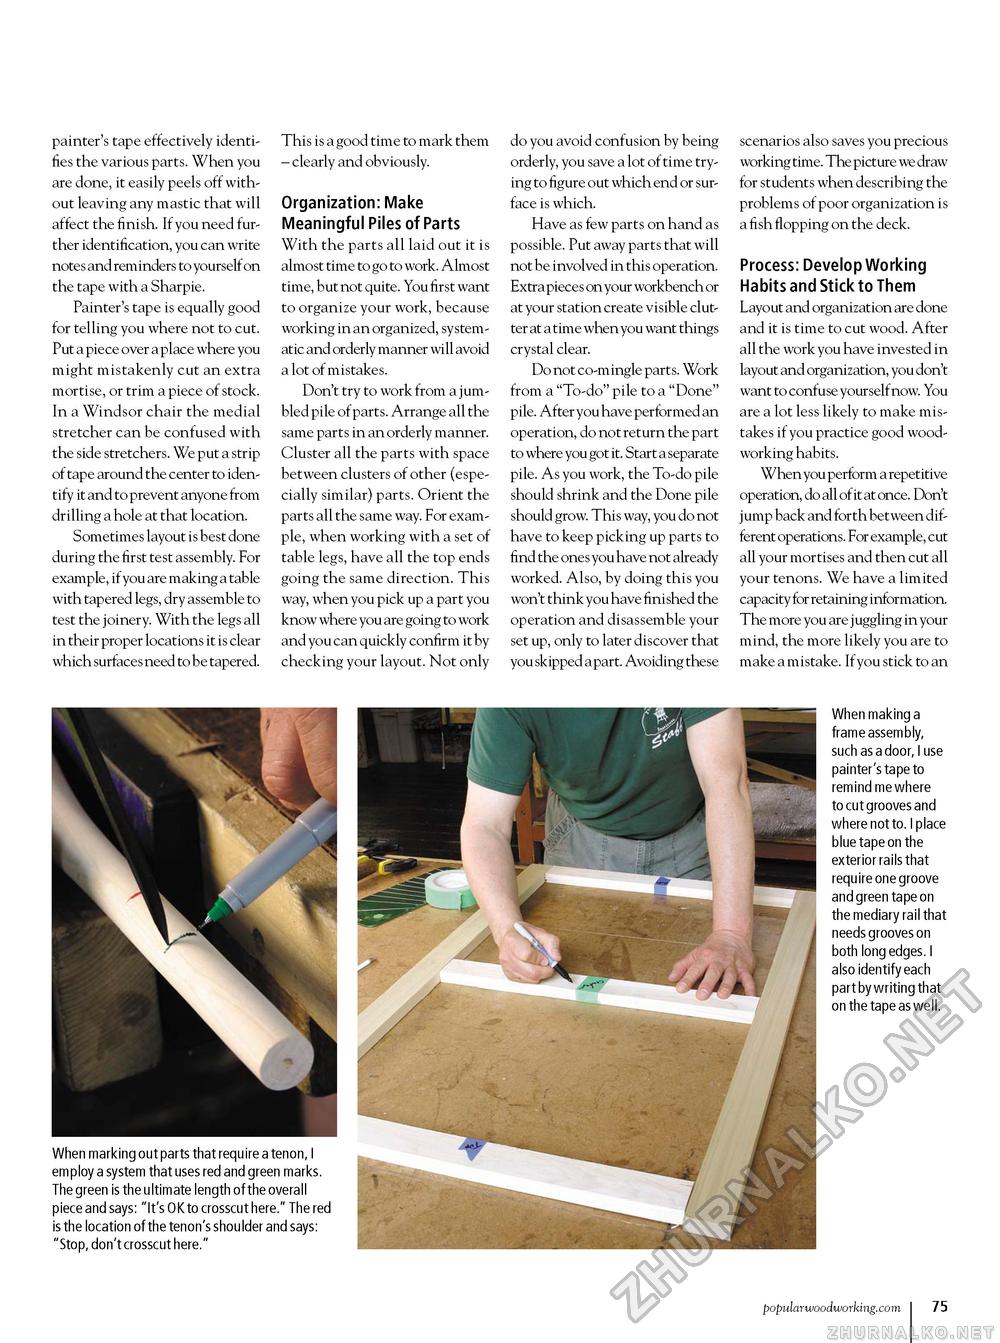
painter's tape effectively identifies the various parts. When you are done, it easily peels off without leaving any mastic that will affect the finish. If you need further identification, you can write notes and reminders to yourself on the tape with a Sharpie. Painter's tape is equally good for telling you where not to cut. Put a piece over a place where you might mistakenly cut an extra mortise, or trim a piece of stock. In a Windsor chair the medial stretcher can be confused with the side stretchers. We put a strip of tape around the center to identify it and to prevent anyone from drilling a hole at that location. Sometimes layout is best done during the first test assembly. For example, if you are making a table with tapered legs, dry assemble to test the joinery. With the legs all in their proper locations it is clear which surfaces need to be tapered. This is a good time to mark them - clearly and obviously. Organization: Make Meaningful Piles of Parts With the parts all laid out it is almost time to go to work. Almost time, but not quite. You first want to organize your work, because working in an organized, systematic and orderly manner will avoid a lot of mistakes. Don't try to work from a jumbled pile of parts. Arrange all the same parts in an orderly manner. Cluster all the parts with space between clusters of other (especially similar) parts. Orient the parts all the same way. For example, when working with a set of table legs, have all the top ends going the same direction. This way, when you pick up a part you know where you are going to work and you can quickly confirm it by checking your layout. Not only do you avoid confusion by being orderly, you save a lot of time trying to figure out which end or surface is which. Have as few parts on hand as possible. Put away parts that will not be involved in this operation. Extra pieces on your workbench or at your station create visible clutter at a time when you want things crystal clear. Do not co-mingle parts. Work from a "To-do" pile to a "Done" pile. After you have performed an operation, do not return the part to where you got it. Start a separate pile. As you work, the To-do pile should shrink and the Done pile should grow. This way, you do not have to keep picking up parts to find the ones you have not already worked. Also, by doing this you won't think you have finished the operation and disassemble your set up, only to later discover that you skipped a part. Avoiding these scenarios also saves you precious working time. The picture we draw for students when describing the problems of poor organization is a fish flopping on the deck. Process: Develop Working Habits and Stick to Them Layout and organization are done and it is time to cut wood. After all the work you have invested in layout and organization, you don't want to confuse yourself now. You are a lot less likely to make mistakes if you practice good woodworking habits. When you perform a repetitive operation, do all of it at once. Don't jump back and forth between different operations. For example, cut all your mortises and then cut all your tenons. We have a limited capacity for retaining information. The more you are j uggling in your mind, the more likely you are to make a mistake. If you stick to an When marking out parts that require a tenon, I employ a system that uses red and green marks. The green is the ultimate length of the overall piece and says: "It's OK to crosscut here." The red is the location of the tenon's shoulder and says: "Stop, don't crosscut here." When making a frame assembly, such as a door, I use painter's tape to remind me where to cut grooves and where not to. I place blue tape on the exterior rails that require one groove and green tape on the mediary rail that needs grooves on both long edges. I also identify each part by writing that on the tape as well. popularwoodworking.com i 75 |


