Popular Woodworking 2006-10 № 157, страница 63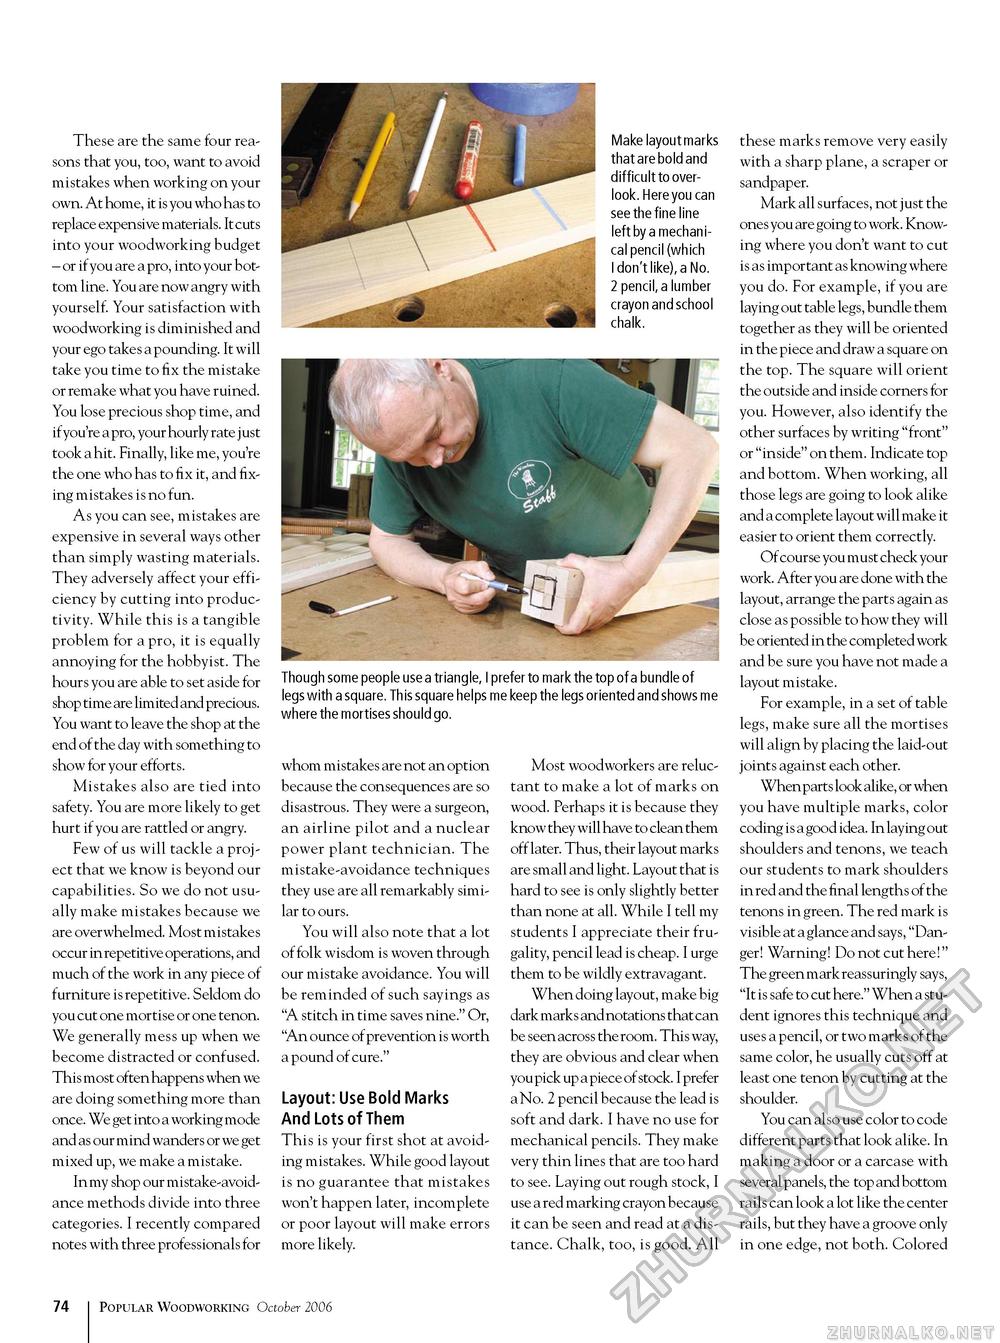
These are the same four reasons that you, too, want to avoid mistakes when working on your own. At home, it is you who has to replace expensive materials. It cuts into your woodworking budget - or if you are a pro, into your bottom line. You are now angry with yourself. Your satisfaction with woodworking is diminished and your ego takes a pounding. It will take you time to fix the mistake or remake what you have ruined. You lose precious shop time, and if you're a pro, your hourly rate just took a hit. Finally, like me, you're the one who has to fix it, and fixing mistakes is no fun. As you can see, mistakes are expensive in several ways other than simply wasting materials. They adversely affect your efficiency by cutting into productivity. While this is a tangible problem for a pro, it is equally annoying for the hobbyist. The hours you are able to set aside for shop time are limited and precious. You want to leave the shop at the end of the day with something to show for your efforts. Mistakes also are tied into safety. You are more likely to get hurt if you are rattled or angry. Few of us will tackle a project that we know is beyond our capabilities. So we do not usually make mistakes because we are overwhelmed. Most mistakes occur in repetitive operations, and much of the work in any piece of furniture is repetitive. Seldom do you cut one mortise or one tenon. We generally mess up when we become distracted or confused. This most often happens when we are doing something more than once. We get into a working mode and as our mind wanders or we get mixed up, we make a mistake. In my shop our mistake-avoidance methods divide into three categories. I recently compared notes with three professionals for Make layout marks that are bold and difficult to overlook. Here you can see the fine line left by a mechanical pencil (which 1 don't like), a No. 2 pencil, a lumber crayon and school chalk. Though some people use a triangle, I prefer to mark the top of a bundle of legs with a square. This square helps me keep the legs oriented and shows me where the mortises should go. whom mistakes are not an option because the consequences are so disastrous. They were a surgeon, an airline pilot and a nuclear power plant technician. The mistake-avoidance techniques they use are all remarkably similar to ours. You will also note that a lot of folk wisdom is woven through our mistake avoidance. You will be reminded of such sayings as "A stitch in time saves nine." Or, "An ounce of prevention is worth a pound of cure." Layout: Use Bold Marks And Lots of Them This is your first shot at avoiding mistakes. While good layout is no guarantee that mistakes won't happen later, incomplete or poor layout will make errors more likely. Most woodworkers are reluctant to make a lot of marks on wood. Perhaps it is because they know they will have to clean them off later. Thus, their layout marks are small and light. Layout that is hard to see is only slightly better than none at all. While I tell my students I appreciate their frugality, pencil lead is cheap. I urge them to be wildly extravagant. When doing layout, make big dark marks and notations that can be seen across the room. This way, they are obvious and clear when you pick up a piece of stock. I prefer a No. 2 pencil because the lead is soft and dark. I have no use for mechanical pencils. They make very thin lines that are too hard to see. Laying out rough stock, I use a red marking crayon because it can be seen and read at a distance. Chalk, too, is good. All these marks remove very easily with a sharp plane, a scraper or sandpaper. Mark all surfaces, not just the ones you are going to work. Knowing where you don't want to cut is as important as knowing where you do. For example, if you are laying out table legs, bundle them together as they will be oriented in the piece and draw a square on the top. The square will orient the outside and inside corners for you. However, also identify the other surfaces by writing "front" or "inside" on them. Indicate top and bottom. When working, all those legs are going to look alike and a complete layout will make it easier to orient them correctly. Of course you must check your work. After you are done with the layout, arrange the parts again as close as possible to how they will be oriented in the completed work and be sure you have not made a layout mistake. For example, in a set of table legs, make sure all the mortises will align by placing the laid-out joints against each other. When parts look alike, or when you have multiple marks, color coding is a good idea. In laying out shoulders and tenons, we teach our students to mark shoulders in red and the final lengths of the tenons in green. The red mark is visible at a glance and says, "Danger! Warning! Do not cut here!" The green mark reassuringly says, "It is safe to cut here." When a student ignores this technique and uses a pencil, or two marks of the same color, he usually cuts off at least one tenon by cutting at the shoulder. You can also use color to code different parts that look alike. In making a door or a carcase with several panels, the top and bottom rails can look a lot like the center rails, but they have a groove only in one edge, not both. Colored 74 Popular Woodworking October 2006 |


