Popular Woodworking 2006-11 № 158, страница 11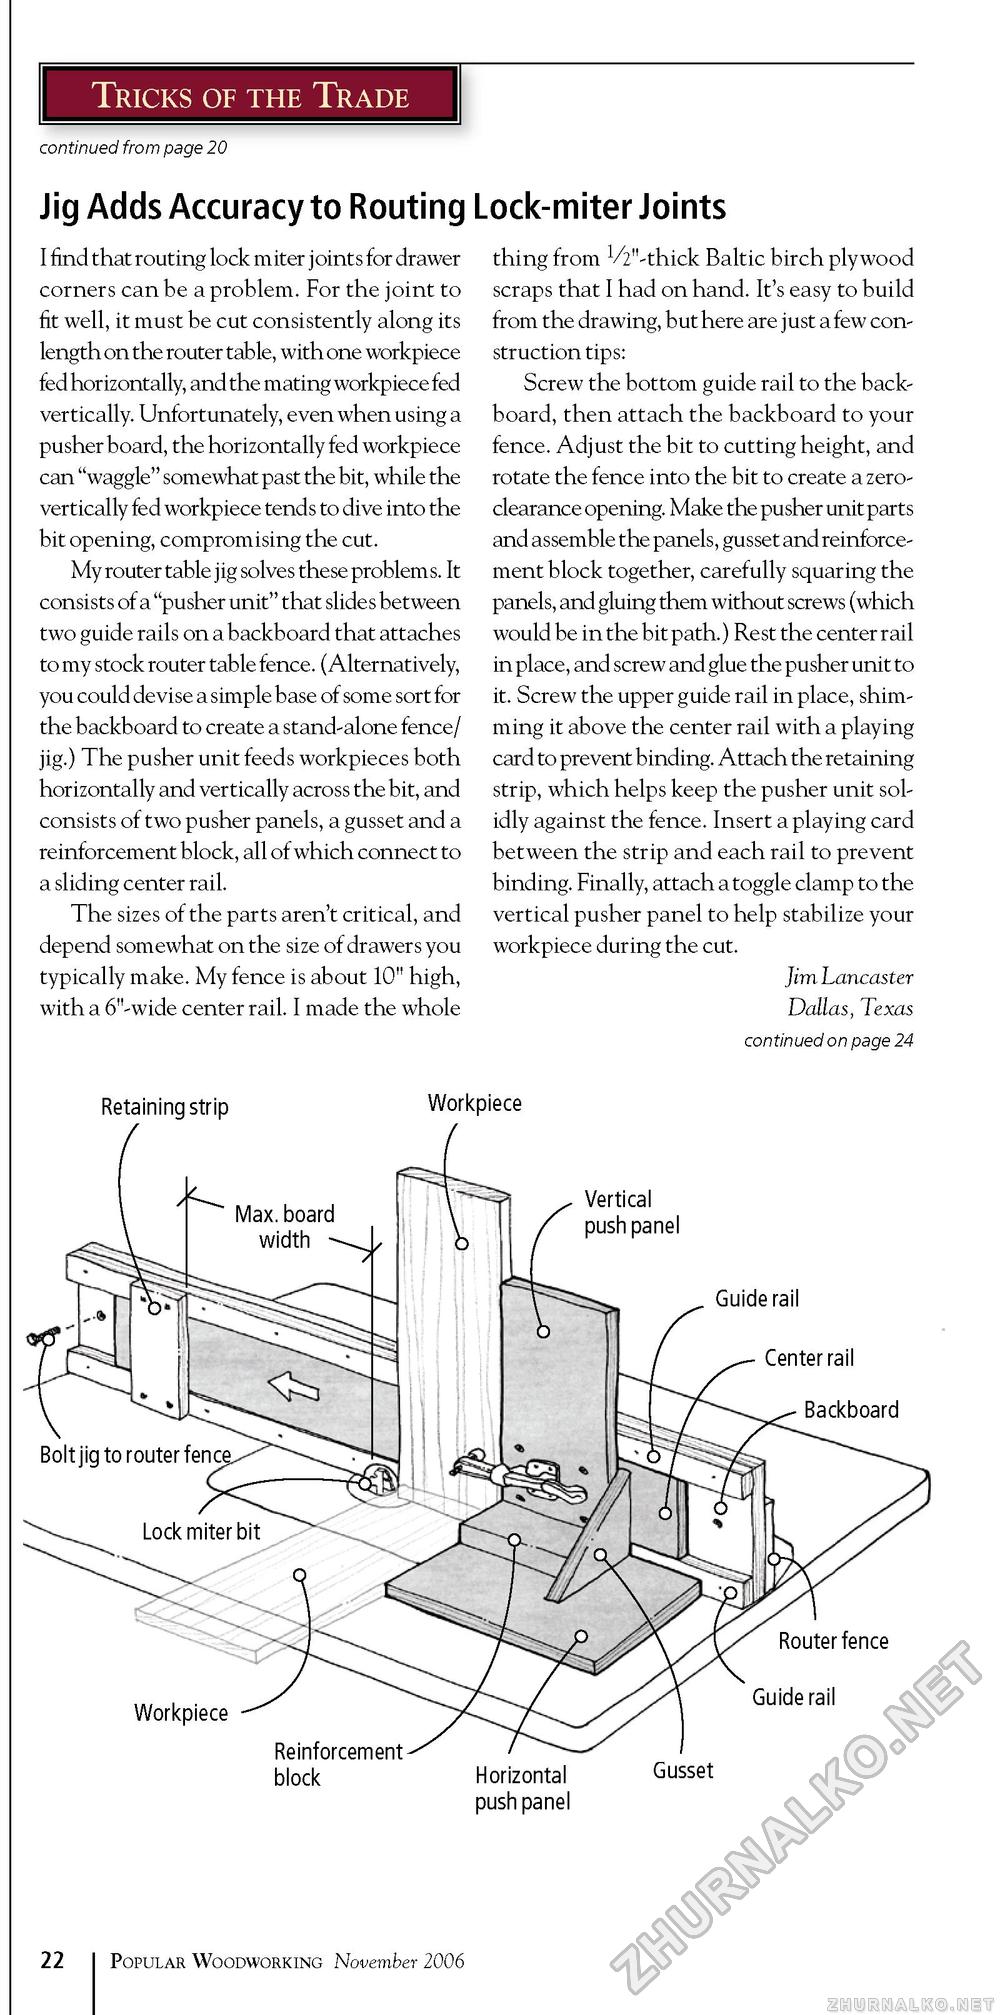
Tricks of the Trade continued from page 20 Jig Adds Accuracy to Routing Lock-miter Joints I find that routing lock miter joints for drawer corners can be a problem. For the joint to fit well, it must be cut consistently along its length on the router table, with one workpiece fed horizontally, and the mating workpiece fed vertically. Unfortunately, even when using a pusher board, the horizontally fed workpiece can "waggle" somewhat past the bit, while the vertically fed workpiece tends to dive into the bit opening, compromising the cut. My router table jig solves these problems. It consists of a "pusher unit" that slides between two guide rails on a backboard that attaches to my stock router table fence. (Alternatively, you could devise a simple base of some sort for the backboard to create a stand-alone fence/ jig.) The pusher unit feeds workpieces both horizontally and vertically across the bit, and consists of two pusher panels, a gusset and a reinforcement block, all of which connect to a sliding center rail. The sizes of the parts aren't critical, and depend somewhat on the size of drawers you typically make. My fence is about 10" high, with a 6"-wide center rail. I made the whole thing from V^-thick Baltic birch plywood scraps that I had on hand. It's easy to build from the drawing, but here are just a few construction tips: Screw the bottom guide rail to the backboard, then attach the backboard to your fence. Adjust the bit to cutting height, and rotate the fence into the bit to create a zero-clearance opening. Make the pusher unit parts and assemble the panels, gusset and reinforcement block together, carefully squaring the panels, and gluing them without screws (which would be in the bit path.) Rest the center rail in place, and screw and glue the pusher unit to it. Screw the upper guide rail in place, shimming it above the center rail with a playing card to prevent binding. Attach the retaining strip, which helps keep the pusher unit solidly against the fence. Insert a playing card between the strip and each rail to prevent binding. Finally, attach a toggle clamp to the vertical pusher panel to help stabilize your workpiece during the cut. Jim Lancaster Dallas, Texas continued on page 24 Retaining strip Workpiece Vertical push panel Guide rail Center rail Backboard Workpiece Router fence Guide rail Reinforcement block Horizontal push panel Gusset 22 Popular Woodworking November 2006 |


