Popular Woodworking 2006-11 № 158, страница 14
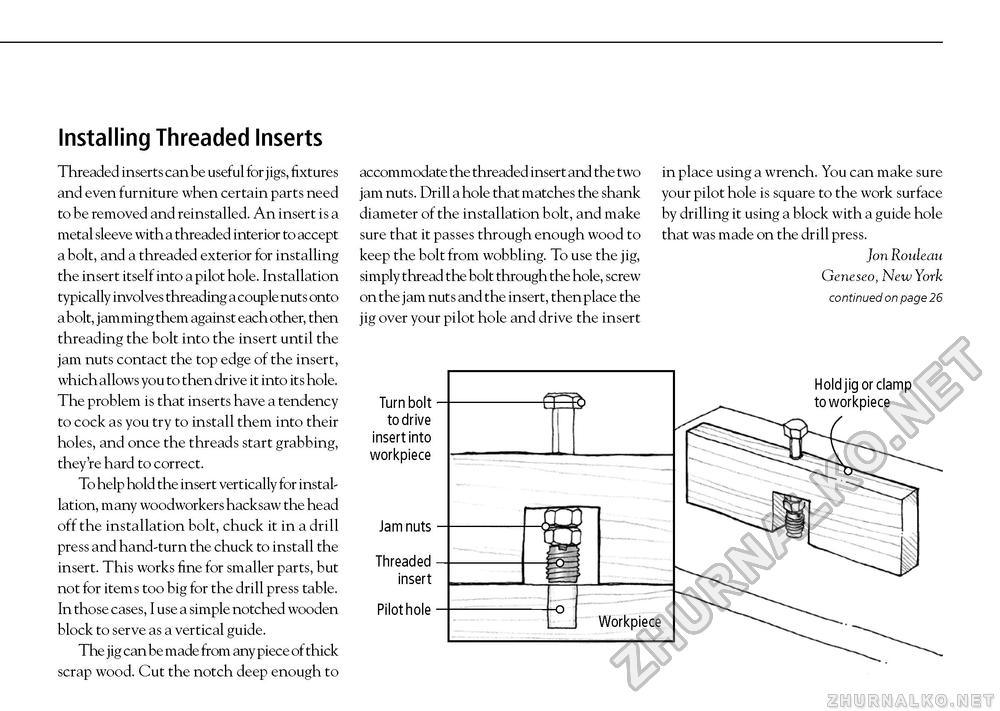
Installing Threaded Inserts Threaded inserts can be useful for jigs, fixtures and even furniture when certain parts need to be removed and reinstalled. An insert is a metal sleeve with a threaded interior to accept a bolt, and a threaded exterior for installing the insert itself into a pilot hole. Installation typically involves threading a couple nuts onto a bolt, jamming them against each other, then threading the bolt into the insert until the jam nuts contact the top edge of the insert, which allows you to then drive it into its hole. The problem is that inserts have a tendency to cock as you try to install them into their holes, and once the threads start grabbing, they're hard to correct. To help hold the insert vertically for installation, many woodworkers hacksaw the head off the installation bolt, chuck it in a drill press and hand-turn the chuck to install the insert. This works fine for smaller parts, but not for items too big for the drill press table. In those cases, I use a simple notched wooden block to serve as a vertical guide. The jig can be made from any piece of thick scrap wood. Cut the notch deep enough to accommodate the threaded insert and the two jam nuts. Drill a hole that matches the shank diameter of the installation bolt, and make sure that it passes through enough wood to keep the bolt from wobbling. To use the jig, simply thread the bolt through the hole, screw on the jam nuts and the insert, then place the jig over your pilot hole and drive the insert in place using a wrench. You can make sure your pilot hole is square to the work surface by drilling it using a block with a guide hole that was made on the drill press. Jon Rouleau Geneseo, New York continued on page 26 |


