Popular Woodworking 2006-11 № 158, страница 39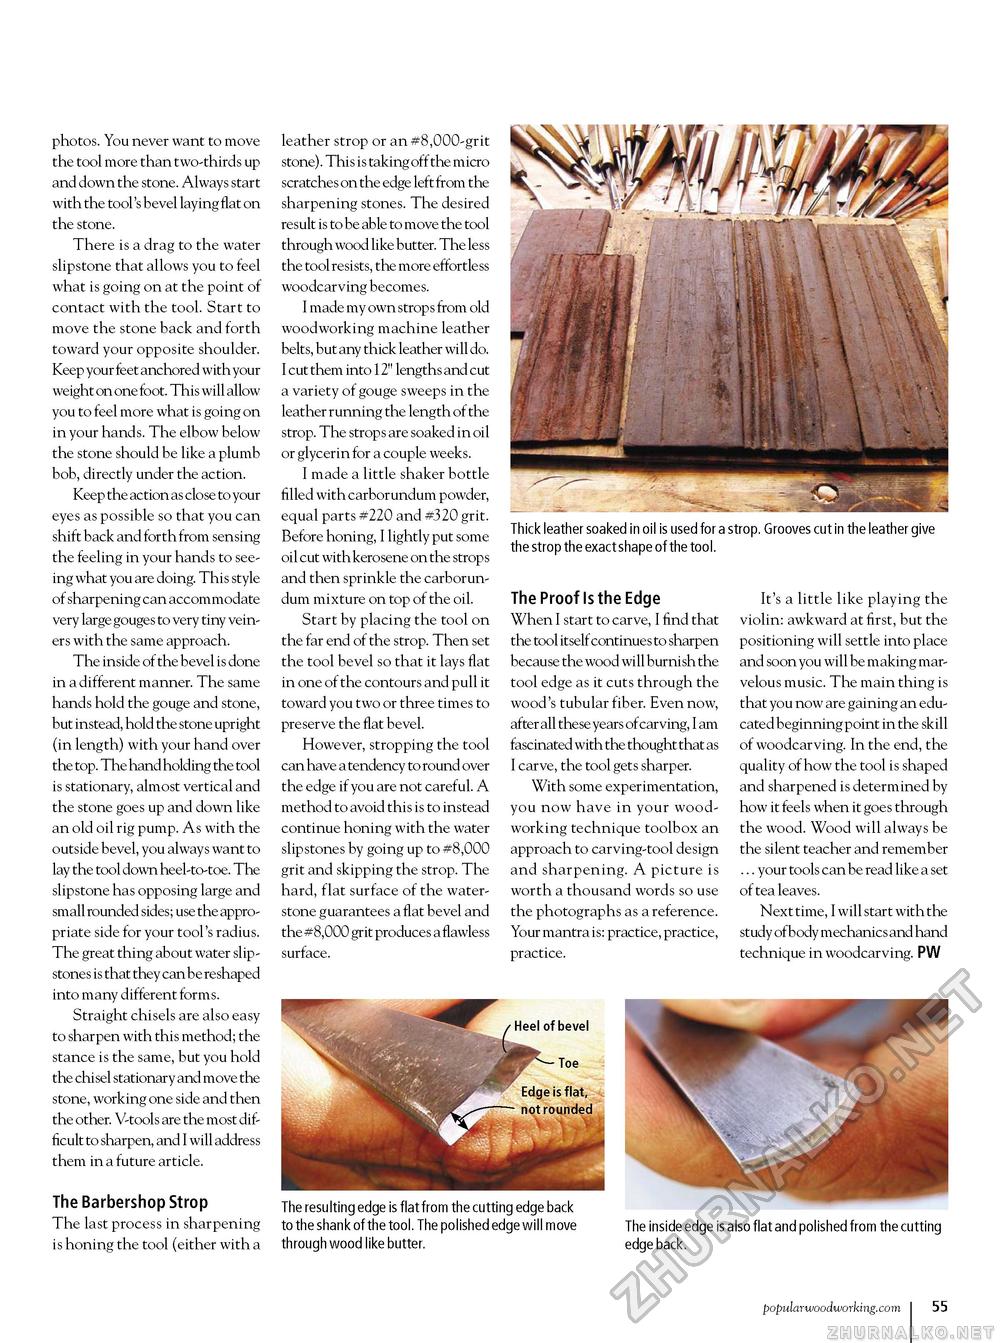
Thick leather soaked in oil is used for a strop. Grooves cut in the leather give the strop the exact shape of the tool. photos. You never want to move the tool more than two-thirds up and down the stone. Always start with the tool's bevel laying flat on the stone. There is a drag to the water slipstone that allows you to feel what is going on at the point of contact with the tool. Start to move the stone back and forth toward your opposite shoulder. Keep your feet anchored with your weight on one foot. This will allow you to feel more what is going on in your hands. The elbow below the stone should be like a plumb bob, directly under the action. Keep the action as close to your eyes as possible so that you can shift back and forth from sensing the feeling in your hands to seeing what you are doing. This style of sharpening can accommodate very large gouges to very tiny vein-ers with the same approach. The inside of the bevel is done in a different manner. The same hands hold the gouge and stone, but instead, hold the stone upright (in length) with your hand over the top. The hand holding the tool is stationary, almost vertical and the stone goes up and down like an old oil rig pump. As with the outside bevel, you always want to lay the tool down heel-to-toe. The slipstone has opposing large and small rounded sides; use the appropriate side for your tool's radius. The great thing about water slip-stones is that they can be reshaped into many different forms. Straight chisels are also easy to sharpen with this method; the stance is the same, but you hold the chisel stationary and move the stone, working one side and then the other. V-tools are the most difficult to sharpen, and I will address them in a future article. The Barbershop Strop The last process in sharpening is honing the tool (either with a leather strop or an #8,000-grit stone). This is taking off the micro scratches on the edge left from the sharpening stones. The desired result is to be able to move the tool through wood like butter. The less the tool resists, the more effortless woodcarving becomes. I made my own strops from old woodworking machine leather belts, but any thick leather will do. I cut them into 12" lengths and cut a variety of gouge sweeps in the leather running the length of the strop. The strops are soaked in oil or glycerin for a couple weeks. I made a little shaker bottle filled with carborundum powder, equal parts #220 and #320 grit. Before honing, I lightly put some oil cut with kero sene on the strop s and then sprinkle the carborundum mixture on top of the oil. Start by placing the tool on the far end of the strop. Then set the tool bevel so that it lays flat in one of the contours and pull it toward you two or three times to preserve the flat bevel. However, stropping the tool can have a tendency to round over the edge if you are not careful. A method to avoid this is to instead continue honing with the water slipstones by going up to #8,000 grit and skipping the strop. The hard, flat surface of the water-stone guarantees a flat bevel and the #8,000 grit produces a flawless surface. The Proof Is the Edge When I start to carve, I find that the tool itself continues to sharpen because the wood will burnish the tool edge as it cuts through the wood's tubular fiber. Even now, after all these years of carving, I am fascinated with the thought that as I carve, the tool gets sharper. With some experimentation, you now have in your woodworking technique toolbox an approach to carving-tool design and sharpening. A picture is worth a thousand words so use the photographs as a reference. Your mantra is: practice, practice, practice. It's a little like playing the violin: awkward at first, but the positioning will settle into place and soon you will be making marvelous music. The main thing is that you now are gaining an educated beginning point in the skill of woodcarving. In the end, the quality of how the tool is shaped and sharpened is determined by how it feels when it goes through the wood. Wood will always be the silent teacher and remember ... your tools can be read like a set of tea leaves. Next time, I will start with the study of body mechanics and hand technique in woodcarving. PW The resulting edge is flat from the cutting edge back to the shank of the tool. The polished edge will move The inside edge is also flat and polished from the cutting through wood like butter. edge back. popularwoodworking.com i 55 |


