Popular Woodworking 2006-11 № 158, страница 49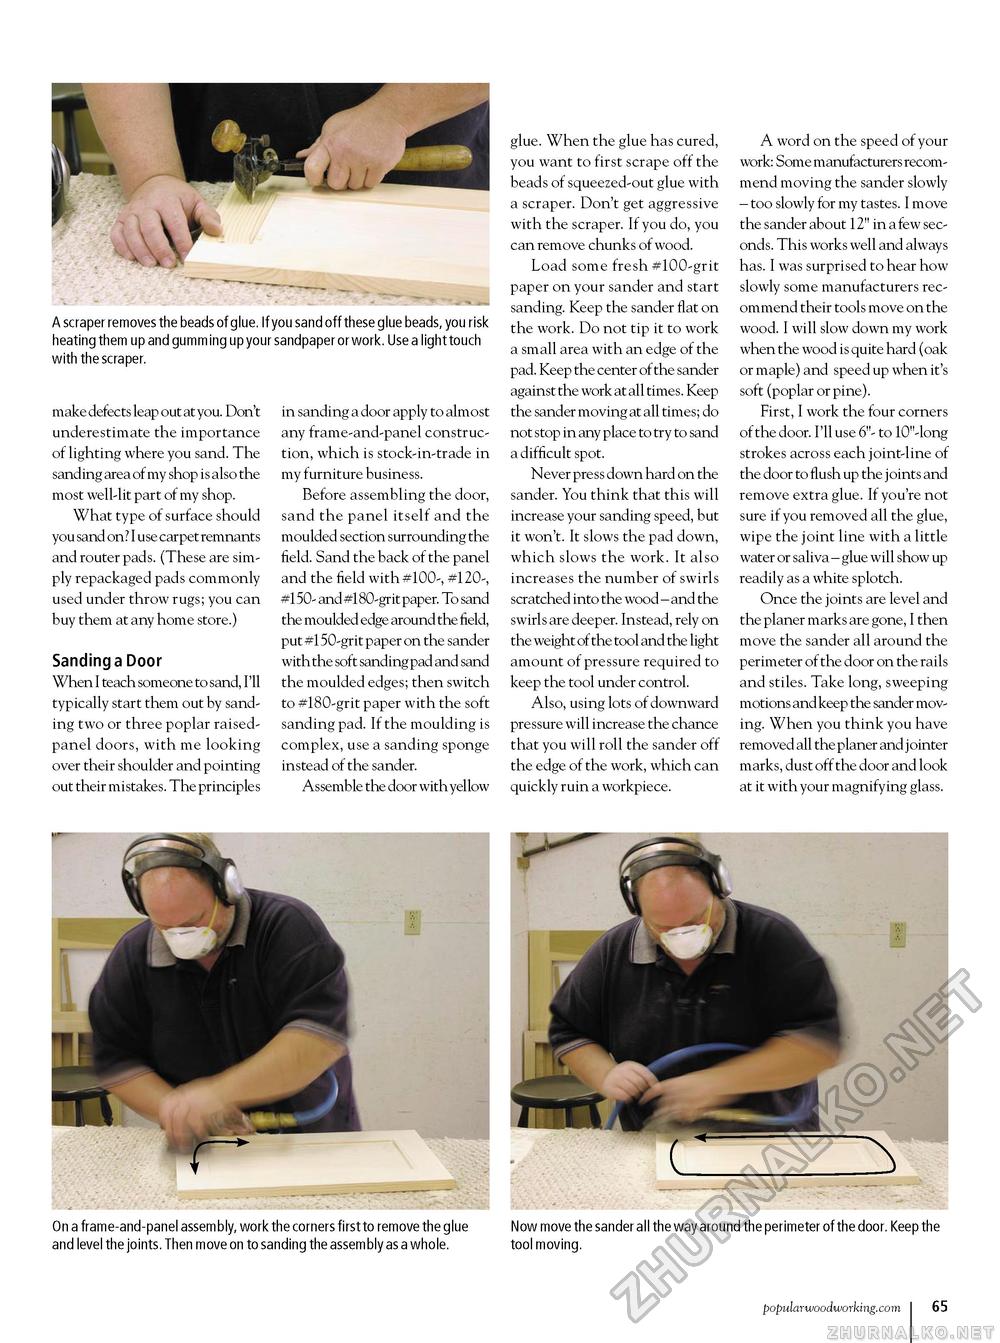
A scraper removes the beads of glue. If you sand off these glue beads, you risk heating them up and gumming up your sandpaper or work. Use a light touch with the scraper. make defects leap out at you. Don't underestimate the importance of lighting where you sand. The sanding area of my shop is also the most well-lit part of my shop. What type of surface should you sand on? I use carpet remnants and router pads. (These are simply repackaged pads commonly used under throw rugs; you can buy them at any home store.) Sanding a Door When I teach someone to sand, I'll typically start them out by sanding two or three poplar raised-panel doors, with me looking over their shoulder and pointing out their mistakes. The principles in sanding a door apply to almost any frame-and-panel construction, which is stock-in-trade in my furniture business. Before assembling the door, sand the panel itself and the moulded section surrounding the field. Sand the back of the panel and the field with #100-, #120-, #150- and #180-grit paper. To sand the moulded edge around the field, put #150-grit paper on the sander with the soft sanding pad and sand the moulded edges; then switch to #180-grit paper with the soft sanding pad. If the moulding is complex, use a sanding sponge instead of the sander. Assemble the door with yellow glue. When the glue has cured, you want to first scrape off the beads of squeezed-out glue with a scraper. Don't get aggressive with the scraper. If you do, you can remove chunks of wood. Load some fresh #100-grit paper on your sander and start sanding. Keep the sander flat on the work. Do not tip it to work a small area with an edge of the pad. Keep the center of the sander against the work at all times. Keep the sander moving at all times; do not stop in any place to try to sand a difficult spot. Never press down hard on the sander. You think that this will increase your sanding speed, but it won't. It slows the pad down, which slows the work. It also increases the number of swirls scratched into the wood - and the swirls are deeper. Instead, rely on the weight of the tool and the light amount of pressure required to keep the tool under control. Also, using lots of downward pressure will increase the chance that you will roll the sander off the edge of the work, which can quickly ruin a workpiece. A word on the speed of your work: Some manufacturers recommend moving the sander slowly - too slowly for my tastes. I move the sander about 12" in a few seconds. This works well and always has. I was surprised to hear how slowly some manufacturers recommend their tools move on the wood. I will slow down my work when the wood is quite hard (oak or maple) and speed up when it's soft (poplar or pine). First, I work the four corners of the door. I'll use 6"- to 10"-long strokes across each joint-line of the door to flush up the joints and remove extra glue. If you're not sure if you removed all the glue, wipe the joint line with a little water or saliva - glue will show up readily as a white splotch. Once the joints are level and the planer marks are gone, I then move the sander all around the perimeter of the door on the rails and stiles. Take long, sweeping motions and keep the sander moving. When you think you have removed all the planer and j ointer marks, dust off the door and look at it with your magnifying glass. On a frame-and-panel assembly, work the corners first to remove the glue and level the joints. Then move on to sanding the assembly as a whole. Now move the sander all the way around the perimeter of the door. Keep the tool moving. popularwoodworking.com i 65 |


