Popular Woodworking 2006-11 № 158, страница 50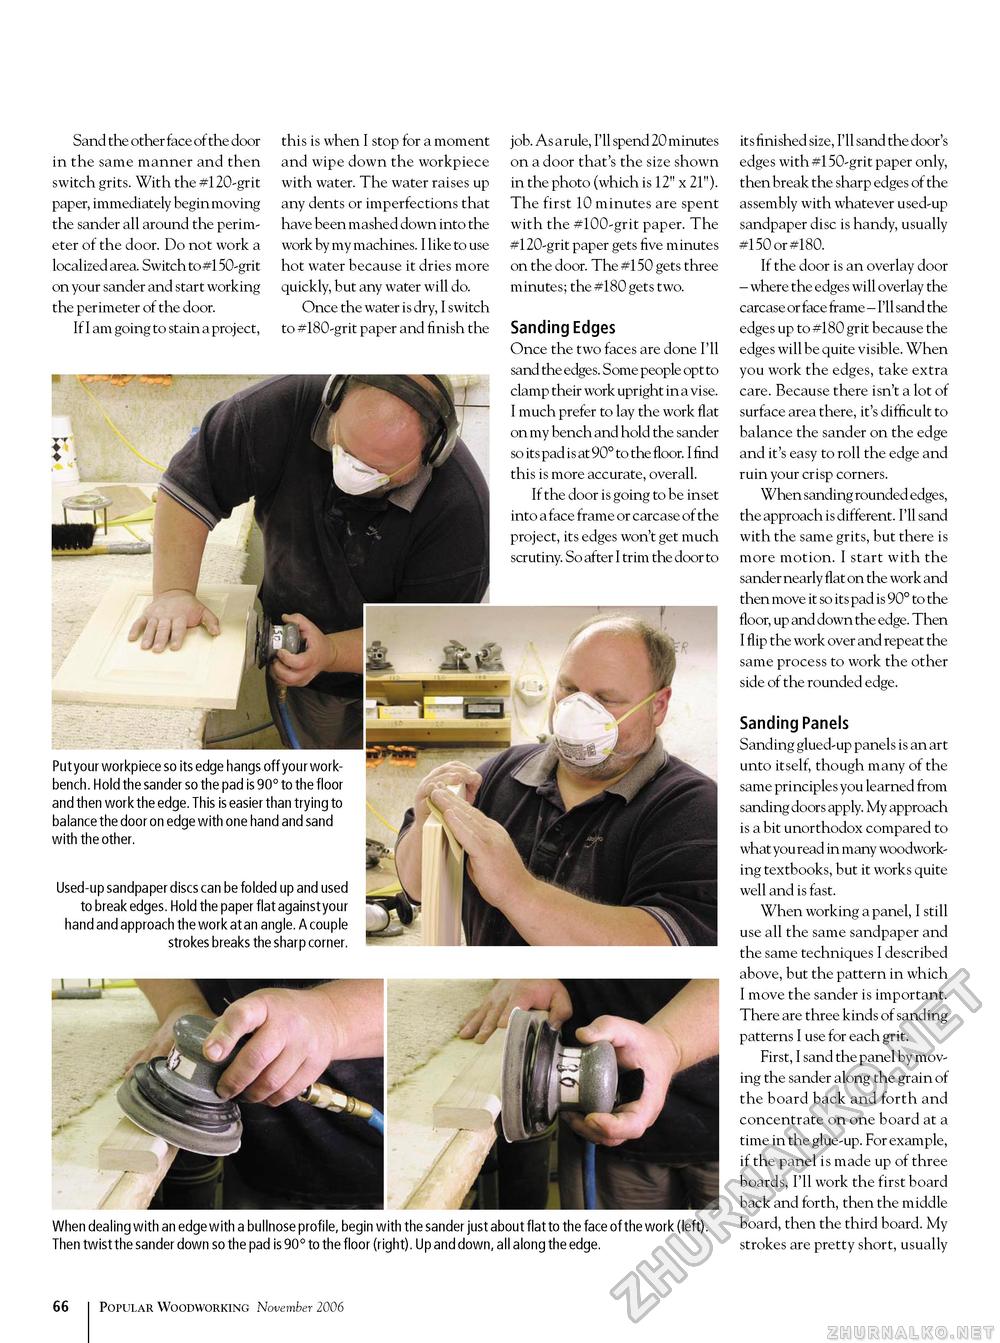
Sand the other face of the door in the same manner and then switch grits. With the #120-grit paper, immediately begin moving the sander all around the perimeter of the door. Do not work a localized area. Switch to #150-grit on your sander and start working the perimeter of the door. If I am going to stain a proj ect, this is when I stop for a moment and wipe down the workpiece with water. The water raises up any dents or imperfections that have been mashed down into the work by my machines. I like to use hot water because it dries more quickly, but any water will do. Once the water is dry, I switch to #180-grit paper and finish the job. As a rule, I'll spend 20 minutes on a door that's the size shown in the photo (which is 12" x 21"). The first 10 minutes are spent with the #100-grit paper. The #120-grit paper gets five minutes on the door. The #150 gets three minutes; the #180 gets two. Sanding Edges Once the two faces are done I'll sand the edges. Some people opt to clamp their work upright in a vise. I much prefer to lay the work flat on my bench and hold the sander so its pad is at 90° to the floor. I find this is more accurate, overall. If the door is going to be inset into a face frame or carcase of the project, its edges won't get much scrutiny. So after I trim the door to Put your workpiece so its edge hangs off your workbench. Hold the sander so the pad is 90° to the floor and then work the edge. This is easier than trying to balance the door on edge with one hand and sand with the other. Used-up sandpaper discs can be folded up and used to break edges. Hold the paper flat against your hand and approach the work at an angle. A couple strokes breaks the sharp corner. When dealing with an edge with a bullnose profile, begin with the sander just about flat to the face of the work (left). Then twist the sander down so the pad is 90° to the floor (right). Up and down, all along the edge. its finished size, I'll sand the door's edges with #150-grit paper only, then break the sharp edges of the assembly with whatever used-up sandpaper disc is handy, usually #150 or #180. If the door is an overlay door - where the edges will overlay the carcase or face frame - I'll sand the edges up to #180 grit because the edges will be quite visible. When you work the edges, take extra care. Because there isn't a lot of surface area there, it's difficult to balance the sander on the edge and it's easy to roll the edge and ruin your crisp corners. When sanding rounded edges, the approach is different. I'll sand with the same grits, but there is more motion. I start with the sander nearly flat on the work and then move it so its pad is 90° to the floor, up and down the edge. Then I flip the work over and repeat the same process to work the other side of the rounded edge. Sanding Panels Sanding glued-up panels is an art unto itself, though many of the same principles you learned from sanding doors apply. My approach is a bit unorthodox compared to what you read in many woodworking textbooks, but it works quite well and is fast. When working a panel, I still use all the same sandpaper and the same techniques I described above, but the pattern in which I move the sander is important. There are three kinds of sanding patterns I use for each grit. First, I sand the panel by moving the sander along the grain of the board back and forth and concentrate on one board at a time in the glue-up. For example, if the panel is made up of three boards, I'll work the first board back and forth, then the middle board, then the third board. My strokes are pretty short, usually 66 Popular Woodworking November 2006 |


