Popular Woodworking 2006-11 № 158, страница 48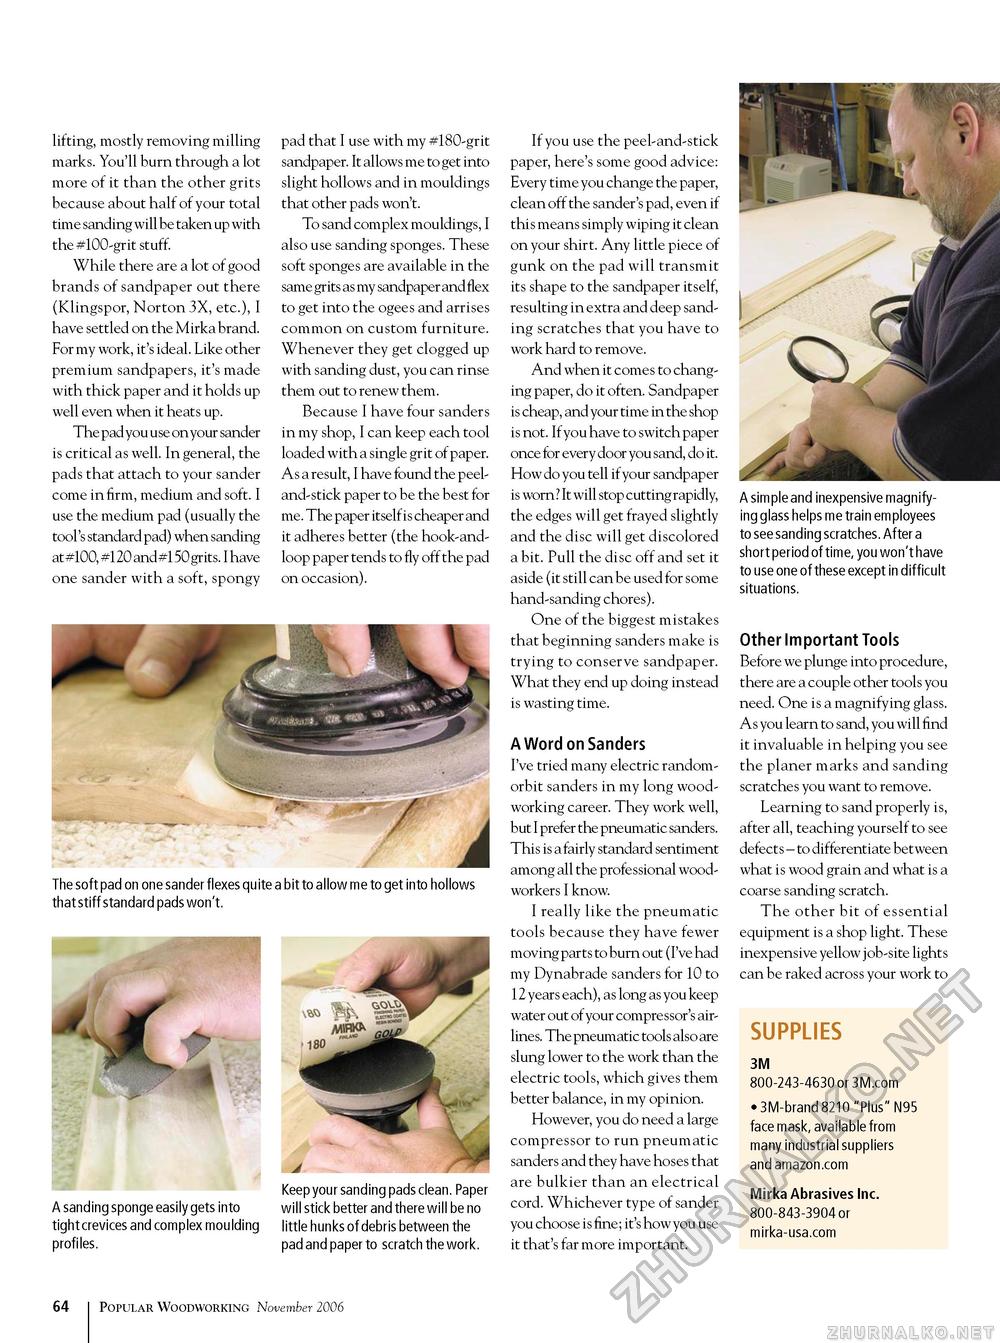
lifting, mostly removing milling marks. You'll burn through a lot more of it than the other grits because about half of your total time sanding will be taken up with the #100-grit stuff. While there are a lot of good brands of sandpaper out there (Klingspor, Norton 3X, etc.), I have settled on the Mirka brand. For my work, it's ideal. Like other premium sandpapers, it's made with thick paper and it holds up well even when it heats up. The pad you use on your sander is critical as well. In general, the pads that attach to your sander come in firm, medium and soft. I use the medium pad (usually the tool's standard pad) when sanding at #100, #120 and #150 grits. I have one sander with a soft, spongy pad that I use with my #180-grit sandpaper. It allows me to get into slight hollows and in mouldings that other pads won't. To sand complex mouldings, I also use sanding sponges. These soft sponges are available in the same grits as my sandpaper and flex to get into the ogees and arrises common on custom furniture. Whenever they get clogged up with sanding dust, you can rinse them out to renew them. Because I have four sanders in my shop, I can keep each tool loaded with a single grit of paper. As a result, I have found the peel-and-stick paper to be the best for me. The paper itself is cheaper and it adheres better (the hook-and-loop paper tends to fly off the pad on occasion). The soft pad on one sander flexes quite a bit to allow me to get into hollows that stiff standard pads won't. A sanding sponge easily gets into tight crevices and complex moulding profiles. Keep your sanding pads clean. Paper will stick better and there will be no little hunks of debris between the pad and paper to scratch the work. If you use the peel-and-stick paper, here's some good advice: Every time you change the paper, clean off the sander's pad, even if this means simply wiping it clean on your shirt. Any little piece of gunk on the pad will transmit its shape to the sandpaper itself, resulting in extra and deep sanding scratches that you have to work hard to remove. And when it comes to changing paper, do it often. Sandpaper is cheap, and your time in the shop is not. If you have to switch paper once for every door you sand, do it. How do you tell if your sandpaper is worn ? It will stop cutting rapidly, the edges will get frayed slightly and the disc will get discolored a bit. Pull the disc off and set it aside (it still can be used for some hand-sanding chores). One of the biggest mistakes that beginning sanders make is trying to conserve sandpaper. What they end up doing instead is wasting time. A Word on Sanders I've tried many electric random-orbit sanders in my long woodworking career. They work well, but I prefer the pneumatic sanders. This is a fairly standard sentiment among all the professional woodworkers I know. I really like the pneumatic tools because they have fewer moving parts to burn out (I've had my Dynabrade sanders for 10 to 12 years each), as long as you keep water out of your compressor's airlines. The pneumatic tools also are slung lower to the work than the electric tools, which gives them better balance, in my opinion. However, you do need a large compressor to run pneumatic sanders and they have hoses that are bulkier than an electrical cord. Whichever type of sander you choose is fine; it's how you use it that's far more important. A simple and inexpensive magnifying glass helps me train employees to see sanding scratches. After a short period of time, you won't have to use one of these except in difficult situations. Other Important Tools Before we plunge into procedure, there are a couple other tools you need. One is a magnifying glass. As you learn to sand, you will find it invaluable in helping you see the planer marks and sanding scratches you want to remove. Learning to sand properly is, after all, teaching yourself to see defects - to differentiate between what is wood grain and what is a coarse sanding scratch. The other bit of essential equipment is a shop light. These inexpensive yellow job-site lights can be raked across your work to SUPPLIES 3M 800-243-4630 or 3M.com • 3M-brand 8210 "Plus" N95 face mask, available from many industrial suppliers and amazon.com Mirka Abrasives Inc. 800-843-3904 or mirka-usa.com 64 Popular Woodworking November 2006 |


