Popular Woodworking 2007-04 № 161, страница 29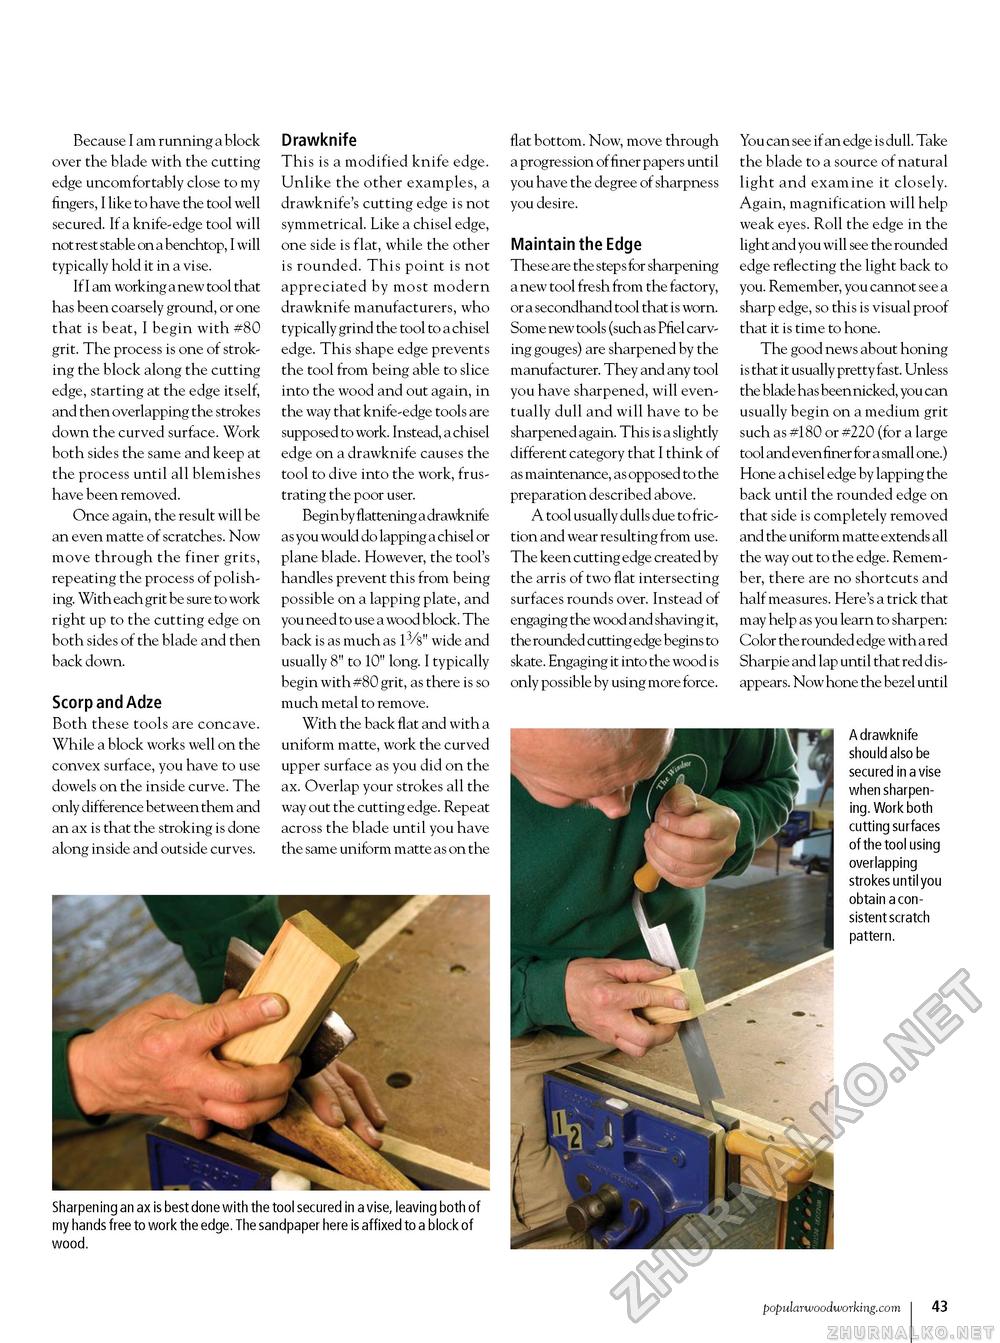
Because I am running a block over the blade with the cutting edge uncomfortably close to my fingers, I like to have the tool well secured. If a knife-edge tool will not rest stable on a benchtop, I will typically hold it in a vise. If I am working a new tool that has been coarsely ground, or one that is beat, I begin with #80 grit. The process is one of stroking the block along the cutting edge, starting at the edge itself, and then overlapping the strokes down the curved surface. Work both sides the same and keep at the process until all blemishes have been removed. Once again, the result will be an even matte of scratches. Now move through the finer grits, repeating the process of polishing. With each grit be sure to work right up to the cutting edge on both sides of the blade and then back down. Scorp and Adze Both these tools are concave. While a block works well on the convex surface, you have to use dowels on the inside curve. The only difference between them and an ax is that the stroking is done along inside and outside curves. drawknife This is a modified knife edge. Unlike the other examples, a drawknife's cutting edge is not symmetrical. Like a chisel edge, one side is flat, while the other is rounded. This point is not appreciated by most modern drawknife manufacturers, who typically grind the tool to a chisel edge. This shape edge prevents the tool from being able to slice into the wood and out again, in the way that knife-edge tools are supposed to work. Instead, a chisel edge on a drawknife causes the tool to dive into the work, frustrating the poor user. Begin by flattening a drawknife as you would do lapping a chisel or plane blade. However, the tool's handles prevent this from being possible on a lapping plate, and you need to use a wood block. The back is as much as 13/8" wide and usually 8" to 10" long. I typically begin with #80 grit, as there is so much metal to remove. With the back flat and with a uniform matte, work the curved upper surface as you did on the ax. Overlap your strokes all the way out the cutting edge. Repeat across the blade until you have the same uniform matte as on the flat bottom. Now, move through a progression of finer papers until you have the degree of sharpness you desire. Maintain the Edge These are the steps for sharpening a new tool fre sh from the factory, or a secondhand tool that is worn. Some new tools (such as Pfiel carving gouges) are sharpened by the manufacturer. They and any tool you have sharpened, will eventually dull and will have to be sharpened again. This is a slightly different category that I think of as maintenance, as opposed to the preparation described above. A tool usually dulls due to friction and wear resulting from use. The keen cutting edge created by the arris of two flat intersecting surfaces rounds over. Instead of engaging the wood and shaving it, the rounded cutting edge begins to skate. Engaging it into the wood is only possible by using more force. Sharpening an ax is best done with the tool secured in a vise, leaving both of my hands free to work the edge. The sandpaper here is affixed to a block of wood. You can see if an edge is dull. Take the blade to a source of natural light and examine it closely. Again, magnification will help weak eyes. Roll the edge in the light and you will see the rounded edge reflecting the light back to you. Remember, you cannot see a sharp edge, so this is visual proof that it is time to hone. The good news about honing is that it usually pretty fast. Unless the blade has been nicked, you can usually begin on a medium grit such as #180 or #220 (for a large tool and even finer for a small one.) Hone a chisel edge by lapping the back until the rounded edge on that side is completely removed and the uniform matte extends all the way out to the edge. Remember, there are no shortcuts and half measures. Here's a trick that may help as you learn to sharpen: Color the rounded edge with a red Sharpie and lap until that red disappears. Now hone the bezel until A drawknife should also be secured in a vise when sharpening. Work both cutting surfaces of the tool using overlapping strokes until you obtain a consistent scratch pattern. popularwoodworking.com I 43 |


