Popular Woodworking 2007-04 № 161, страница 26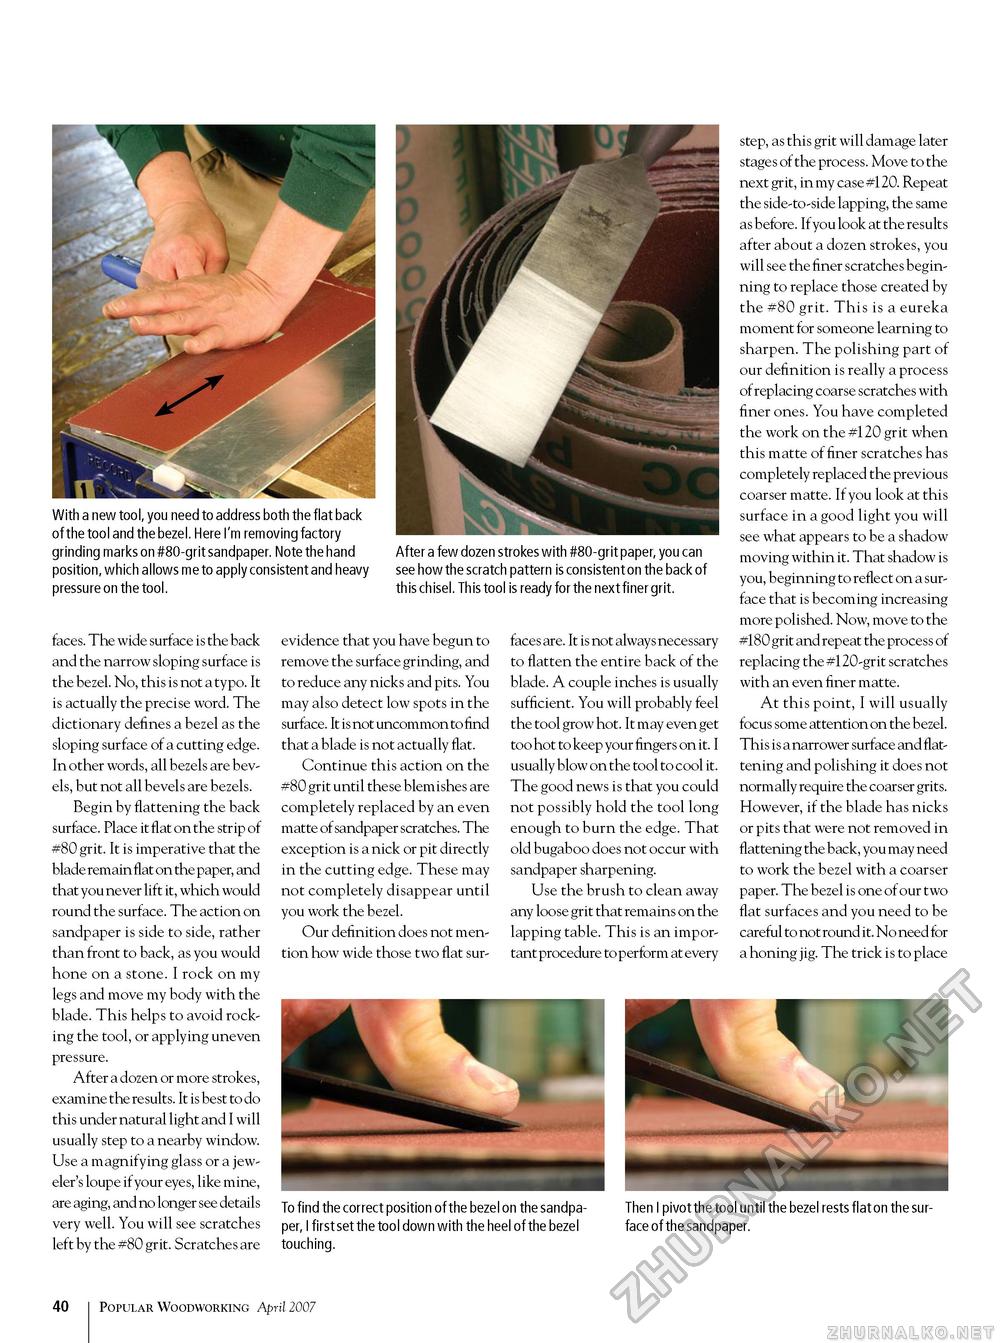
With a new tool, you need to address both the flat back of the tool and the bezel. Here I'm removing factory grinding marks on #80-grit sandpaper. Note the hand position, which allows me to apply consistent and heavy pressure on the tool. After a few dozen strokes with #80-grit paper, you can see how the scratch pattern is consistent on the back of this chisel. This tool is ready for the next finer grit. faces. The wide surface is the back and the narrow sloping surface is the bezel. No, this is not a typo. It is actually the precise word. The dictionary defines a bezel as the sloping surface of a cutting edge. In other words, all bezels are bevels, but not all bevels are bezels. Begin by flattening the back surface. Place it flat on the strip of #80 grit. It is imperative that the blade remain flat on the paper, and that you never lift it, which would round the surface. The action on sandpaper is side to side, rather than front to back, as you would hone on a stone. I rock on my legs and move my body with the blade. This helps to avoid rocking the tool, or applying uneven pressure. After a dozen or more strokes, examine the results. It is best to do this under natural light and I will usually step to a nearby window. Use a magnifying glass or a jeweler's loupe if your eyes, like mine, are aging, and no longer see details very well. You will see scratches left by the #80 grit. Scratches are evidence that you have begun to remove the surface grinding, and to reduce any nicks and pits. You may also detect low spots in the surface. It is not uncommon to find that a blade is not actually flat. Continue this action on the #80 grit until these blemishes are completely replaced by an even matte of sandpaper scratches. The exception is a nick or pit directly in the cutting edge. These may not completely disappear until you work the bezel. Our definition does not mention how wide those two flat sur- faces are. It is not always necessary to flatten the entire back of the blade. A couple inches is usually sufficient. You will probably feel the tool grow hot. It may even get too hot to keep your fingers on it. I usually blow on the tool to cool it. The good news is that you could not possibly hold the tool long enough to burn the edge. That old bugaboo does not occur with sandpaper sharpening. Use the brush to clean away any loose grit that remains on the lapping table. This is an important procedure to perform at every step, as this grit will damage later stages of the process. Move to the next grit, in my case #120. Repeat the side-to-side lapping, the same as before. If you look at the results after about a dozen strokes, you will see the finer scratches beginning to replace those created by the #80 grit. This is a eureka moment for someone learning to sharpen. The polishing part of our definition is really a process of replacing coarse scratches with finer ones. You have completed the work on the #120 grit when this matte of finer scratches has completely replaced the previous coarser matte. If you look at this surface in a good light you will see what appears to be a shadow moving within it. That shadow is you, beginning to reflect on a surface that is becoming increasing more polished. Now, move to the #180 grit and repeat the process of replacing the #120-grit scratches with an even finer matte. At this point, I will usually focus some attention on the bezel. This is a narrower surface and flattening and polishing it does not normally require the coarser grits. However, if the blade has nicks or pits that were not removed in flattening the back, you may need to work the bezel with a coarser paper. The bezel is one of our two flat surfaces and you need to be careful to not round it. No need for a honing jig. The trick is to place To find the correct position of the bezel on the sandpaper, I first set the tool down with the heel of the bezel touching. Then I pivot the tool until the bezel rests flat on the surface of the sandpaper. 40 Popular Woodworking April 2007 |


