Popular Woodworking 2007-04 № 161, страница 52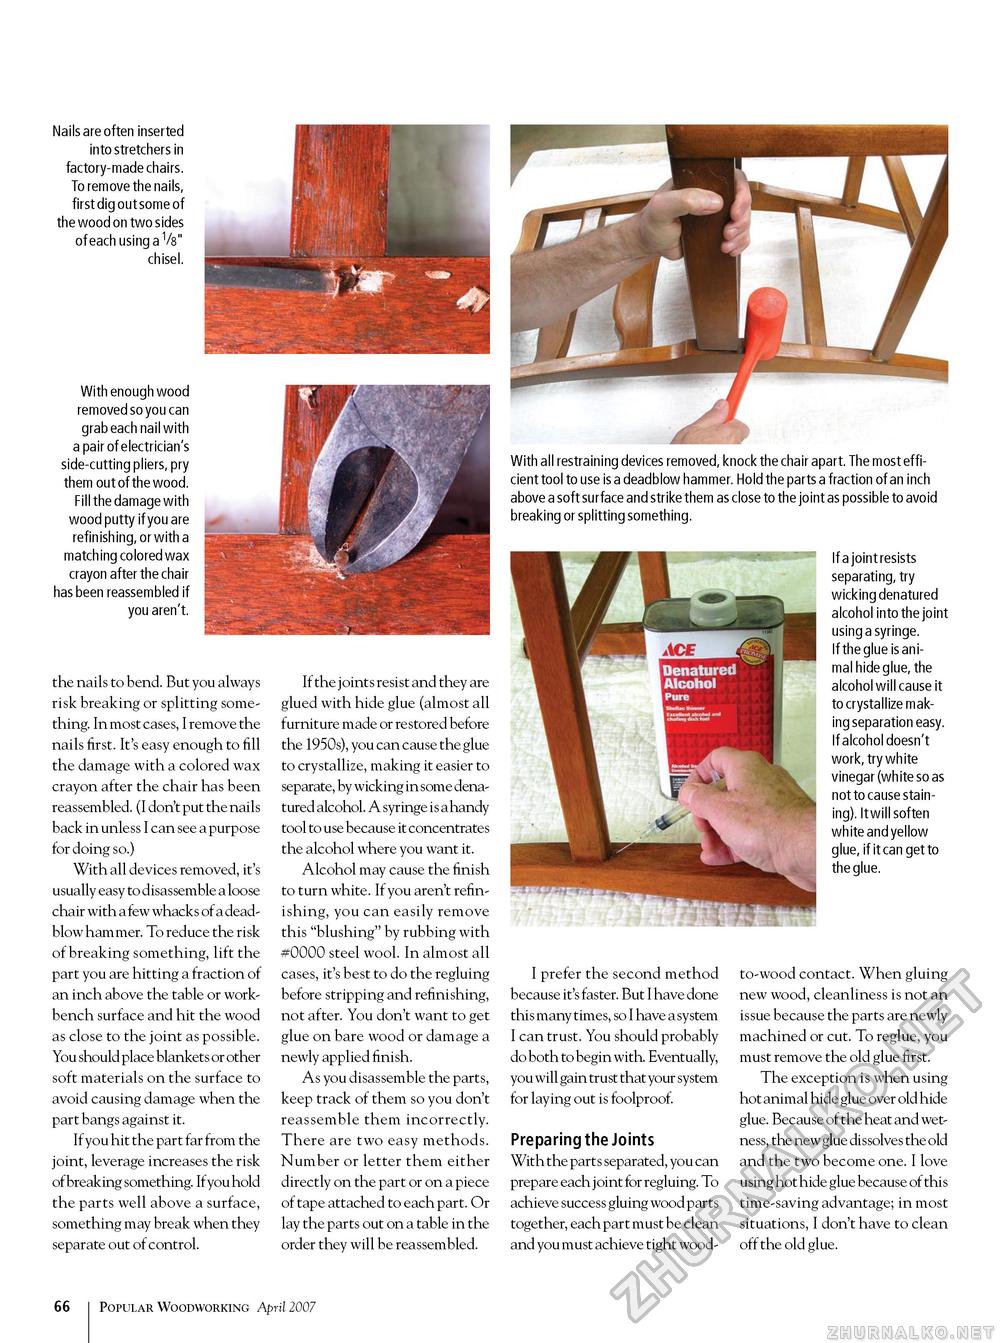
Nails are often inserted into stretchers in factory-made chairs. To remove the nails, first dig out some of the wood on two sides of each using a V8" chisel. With enough wood removed so you can grab each nail with a pair of electrician's side-cutting pliers, pry them out of the wood. Fill the damage with wood putty if you are refinishing, or with a matching colored wax crayon after the chair has been reassembled if you aren't. the nails to bend. But you always risk breaking or splitting something. In most cases, I remove the nails first. It's easy enough to fill the damage with a colored wax crayon after the chair has been reassembled. (I don't put the nails back in unless I can see a purpose for doing so.) With all devices removed, it's usually easy to disassemble a loose chair with a few whacks of a dead-blow hammer. To reduce the risk of breaking something, lift the part you are hitting a fraction of an inch above the table or workbench surface and hit the wood as close to the joint as possible. You should place blankets or other soft materials on the surface to avoid causing damage when the part bangs against it. If you hit the part far from the joint, leverage increases the risk ofbreaking something. Ifyou hold the parts well above a surface, something may break when they separate out of control. If the joints resist and they are glued with hide glue (almost all furniture made or restored before the 1950s), you can cause the glue to crystallize, making it easier to separate, by wicking in some denatured alcohol. A syringe is a handy tool to use because it concentrates the alcohol where you want it. Alcohol may cause the finish to turn white. If you aren't refin-ishing, you can easily remove this "blushing" by rubbing with #0000 steel wool. In almost all cases, it's best to do the regluing before stripping and refinishing, not after. You don't want to get glue on bare wood or damage a newly applied finish. As you disassemble the parts, keep track of them so you don't reassemble them incorrectly. There are two easy methods. Number or letter them either directly on the part or on a piece of tape attached to each part. Or lay the parts out on a table in the order they will be reassembled. With all restraining devices removed, knock the chair apart. The most efficient tool to use is a deadblow hammer. Hold the parts a fraction of an inch above a soft surface and strike them as close to the joint as possible to avoid breaking or splitting something. If a joint resists separating, try wicking denatured alcohol into the joint using a syringe. If the glue is animal hide glue, the alcohol will cause it to crystallize making separation easy. If alcohol doesn't work, try white vinegar (white so as not to cause staining). It will soften white and yellow glue, if it can get to the glue. I prefer the second method because it's faster. But I have done this many times, so I have a system I can trust. You should probably do both to begin with. Eventually, you will gain trust that your system for laying out is foolproof. Preparing the Joints With the parts separated, you can prepare each joint for regluing. To achieve success gluing wood parts together, each part must be clean and you must achieve tight wood- to-wood contact. When gluing new wood, cleanliness is not an issue because the parts are newly machined or cut. To reglue, you must remove the old glue first. The exception is when using hot animal hide glue over old hide glue. Because of the heat and wetness, the new glue dissolves the old and the two become one. I love using hot hide glue because of this time-saving advantage; in most situations, I don't have to clean off the old glue. 66 Popular Woodworking April 2007 |


