Popular Woodworking 2007-04 № 161, страница 51
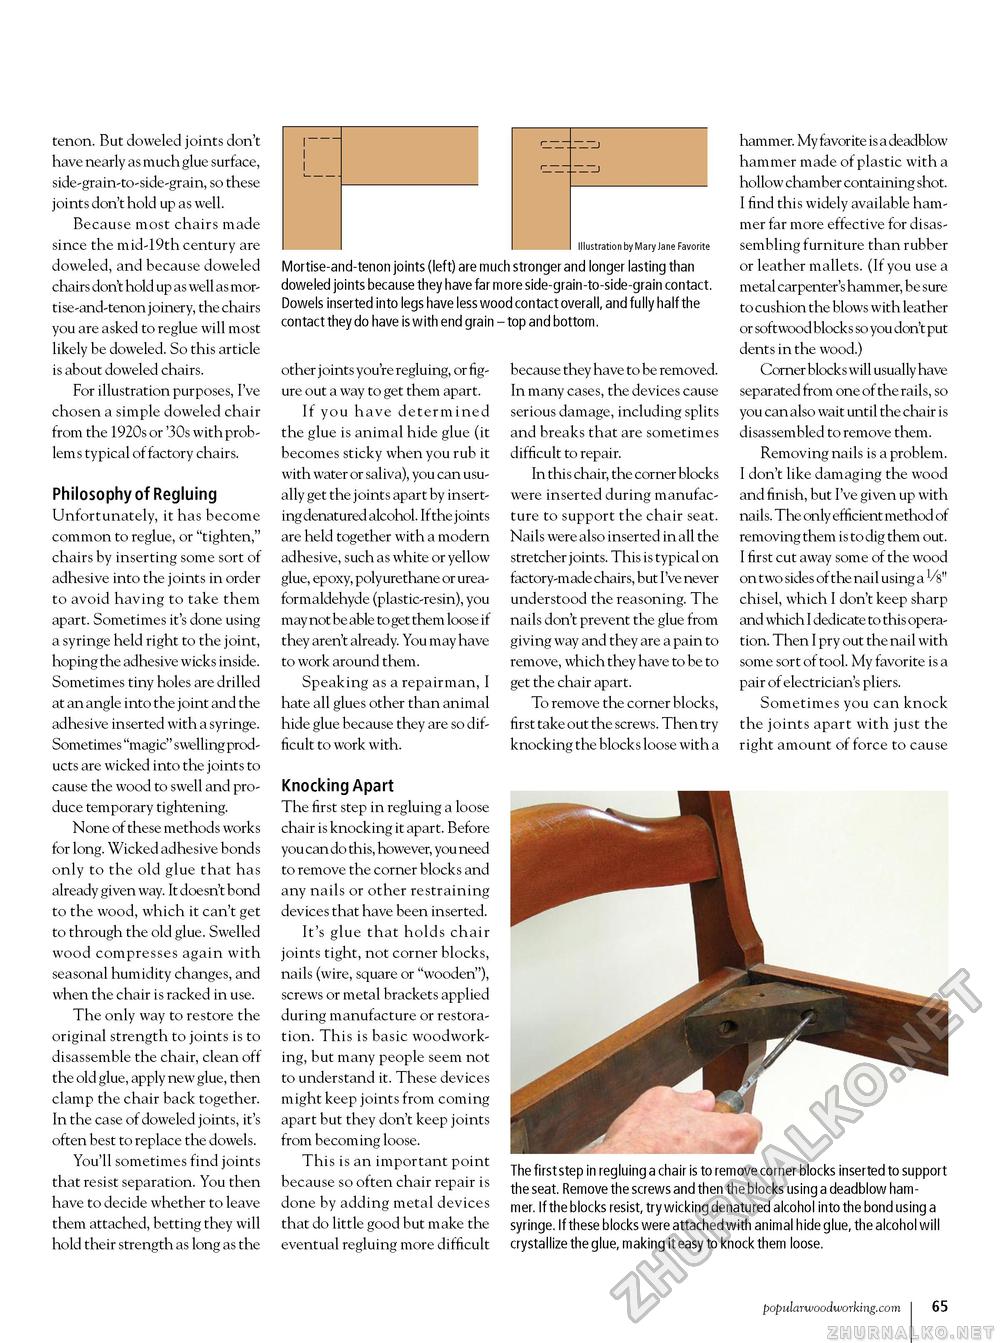
Mortise-and-tenon joints (left) are much stronger and longer lasting than doweled joints because they have far more side-grain-to-side-grain contact. Dowels inserted into legs have less wood contact overall, and fully half the contact they do have is with end grain - top and bottom. tenon. But doweled joints don't have nearly as much glue surface, side-grain-to-side-grain, so these joints don't hold up as well. Because most chairs made since the mid-19th century are doweled, and because doweled chairs don't hold up as well as mor-tise-and-tenon joinery, the chairs you are asked to reglue will most likely be doweled. So this article is about doweled chairs. For illustration purposes, I've chosen a simple doweled chair from the 1920s or '30s with problems typical of factory chairs. Philosophy of Regluing Unfortunately, it has become common to reglue, or "tighten," chairs by inserting some sort of adhesive into the joints in order to avoid having to take them apart. Sometimes it's done using a syringe held right to the joint, hoping the adhesive wicks inside. Sometimes tiny holes are drilled at an angle into the joint and the adhesive inserted with a syringe. Sometimes ""magic" swelling products are wicked into the joints to cause the wood to swell and produce temporary tightening. None of these methods works for long. Wicked adhesive bonds only to the old glue that has already given way. It doesn't bond to the wood, which it can't get to through the old glue. Swelled wood compresses again with seasonal humidity changes, and when the chair is racked in use. The only way to restore the original strength to joints is to disassemble the chair, clean off the old glue, apply new glue, then clamp the chair back together. In the case of doweled joints, it's often best to replace the dowels. You'll sometimes find joints that resist separation. You then have to decide whether to leave them attached, betting they will hold their strength as long as the other joints you're regluing, or figure out a way to get them apart. If you have determined the glue is animal hide glue (it becomes sticky when you rub it with water or saliva), you can usually get the j oints apart by inserting denatured alcohol. If the j oints are held together with a modern adhesive, such as white or yellow glue, epoxy, polyurethane or urea-formaldehyde (plastic-resin), you may not be able to get them loose if they aren't already. You may have to work around them. Speaking as a repairman, I hate all glues other than animal hide glue because they are so difficult to work with. Knocking Apart The first step in regluing a loose chair is knocking it apart. Before you can do this, however, you need to remove the corner blocks and any nails or other restraining devices that have been inserted. It's glue that holds chair joints tight, not corner blocks, nails (wire, square or "wooden"), screws or metal brackets applied during manufacture or restoration. This is basic woodworking, but many people seem not to understand it. These devices might keep joints from coming apart but they don't keep joints from becoming loose. This is an important point because so often chair repair is done by adding metal devices that do little good but make the eventual regluing more difficult because they have to be removed. In many cases, the devices cause serious damage, including splits and breaks that are sometimes difficult to repair. In this chair, the corner blocks were inserted during manufacture to support the chair seat. Nails were also inserted in all the stretcher joints. This is typical on factory-made chairs, but I've never understood the reasoning. The nails don't prevent the glue from giving way and they are a pain to remove, which they have to be to get the chair apart. To remove the corner blocks, first take out the screws. Then try knocking the blocks loose with a hammer. My favorite is a deadblow hammer made of plastic with a hollow chamber containing shot. I find this widely available hammer far more effective for disassembling furniture than rubber or leather mallets. (If you use a metal carpenter's hammer, be sure to cushion the blows with leather or softwood blocks so you don't put dents in the wood.) Corner blocks will usually have separated from one of the rails, so you can also wait until the chair is disassembled to remove them. Removing nails is a problem. I don't like damaging the wood and finish, but I've given up with nails. The only efficient method of removing them is to dig them out. I first cut away some of the wood on two sides of the nail using a Vs" chisel, which I don't keep sharp and which I dedicate to this operation. Then I pry out the nail with some sort of tool. My favorite is a pair of electrician's pliers. Sometimes you can knock the joints apart with just the right amount of force to cause The first step in regluing a chair is to remove corner blocks inserted to support the seat. Remove the screws and then the blocks using a deadblow hammer. If the blocks resist, try wicking denatured alcohol into the bond using a syringe. If these blocks were attached with animal hide glue, the alcohol will crystallize the glue, making it easy to knock them loose. popularwoodworking.com I 65 |


