Popular Woodworking 2007-04 № 161, страница 54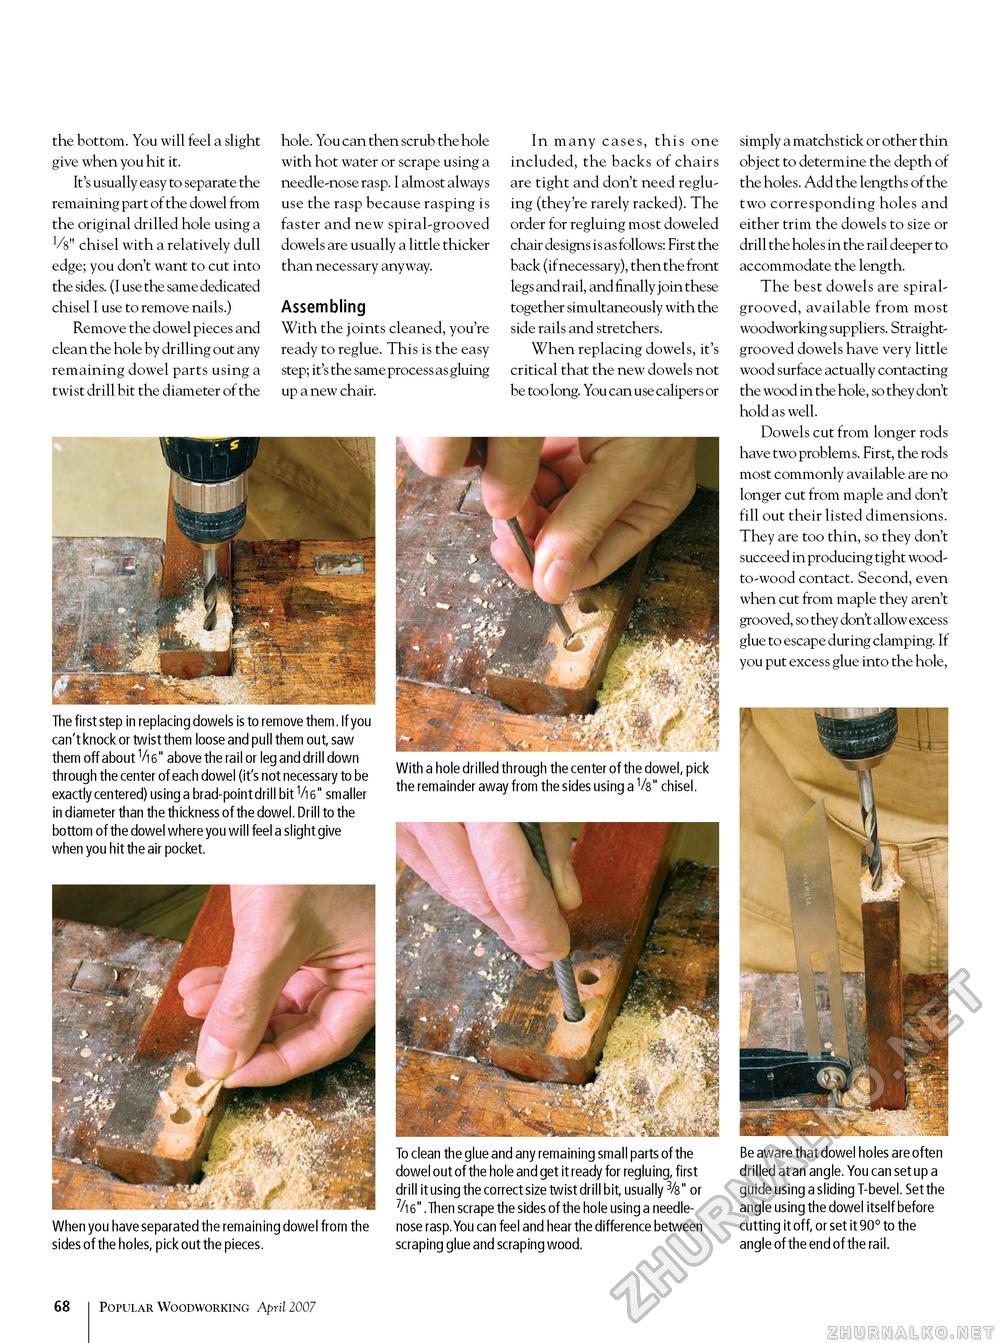
the bottom. You will feel a slight give when you hit it. It's usually easy to separate the remaining part of the dowel from the original drilled hole using a V8" chisel with a relatively dull edge; you don't want to cut into the sides. (I use the same dedicated chisel I use to remove nails.) Remove the dowel pieces and clean the hole by drilling out any remaining dowel parts using a twist drill bit the diameter of the hole. You can then scrub the hole with hot water or scrape using a needle-nose rasp. I almost always use the rasp because rasping is faster and new spiral-grooved dowels are usually a little thicker than necessary anyway. Assembling With the joints cleaned, you're ready to reglue. This is the easy step; it's the same process as gluing up a new chair. In many cases, this one included, the backs of chairs are tight and don't need reglu-ing (they're rarely racked). The order for regluing most doweled chair designs is as follows: First the back (if necessary), then the front legs and rail, and finally join these together simultaneously with the side rails and stretchers. When replacing dowels, it's critical that the new dowels not be too long. You can use calipers or The first step in replacing dowels is to remove them. If you can't knock or twist them loose and pull them out, saw them off about Vi6" above the rail or leg and drill down through the center of each dowel (it's not necessary to be exactly centered) using a brad-point drill bit Vi6" smaller in diameter than the thickness of the dowel. Drill to the bottom of the dowel where you will feel a slight give when you hit the air pocket. With a hole drilled through the center of the dowel, pick the remainder away from the sides using a V8" chisel. When you have separated the remaining dowel from the sides of the holes, pick out the pieces. To clean the glue and any remaining small parts of the dowel out of the hole and get it ready for regluing, first drill it using the correct size twist drill bit, usually 3/8" or 7/i6". Then scrape the sides of the hole using a needle-nose rasp. You can feel and hear the difference between scraping glue and scraping wood. simply a matchstick or other thin object to determine the depth of the holes. Add the lengths of the two corresponding holes and either trim the dowels to size or drill the hole s in the rail deeper to accommodate the length. The best dowels are spiral-grooved, available from most woodworking suppliers. Straight-grooved dowels have very little wood surface actually contacting the wood in the hole, so they don't hold as well. Dowels cut from longer rods have two problems. First, the rods most commonly available are no longer cut from maple and don't fill out their listed dimensions. They are too thin, so they don't succeed in producing tight wood-to-wood contact. Second, even when cut from maple they aren't grooved, so they don't allow excess glue to escape during clamping. If you put excess glue into the hole, Be aware that dowel holes are often drilled at an angle. You can set up a guide using a sliding T-bevel. Set the angle using the dowel itself before cutting it off, or set it 90° to the angle of the end of the rail. 68 Popular Woodworking April 2007 |


