Popular Woodworking 2007-06 № 162, страница 10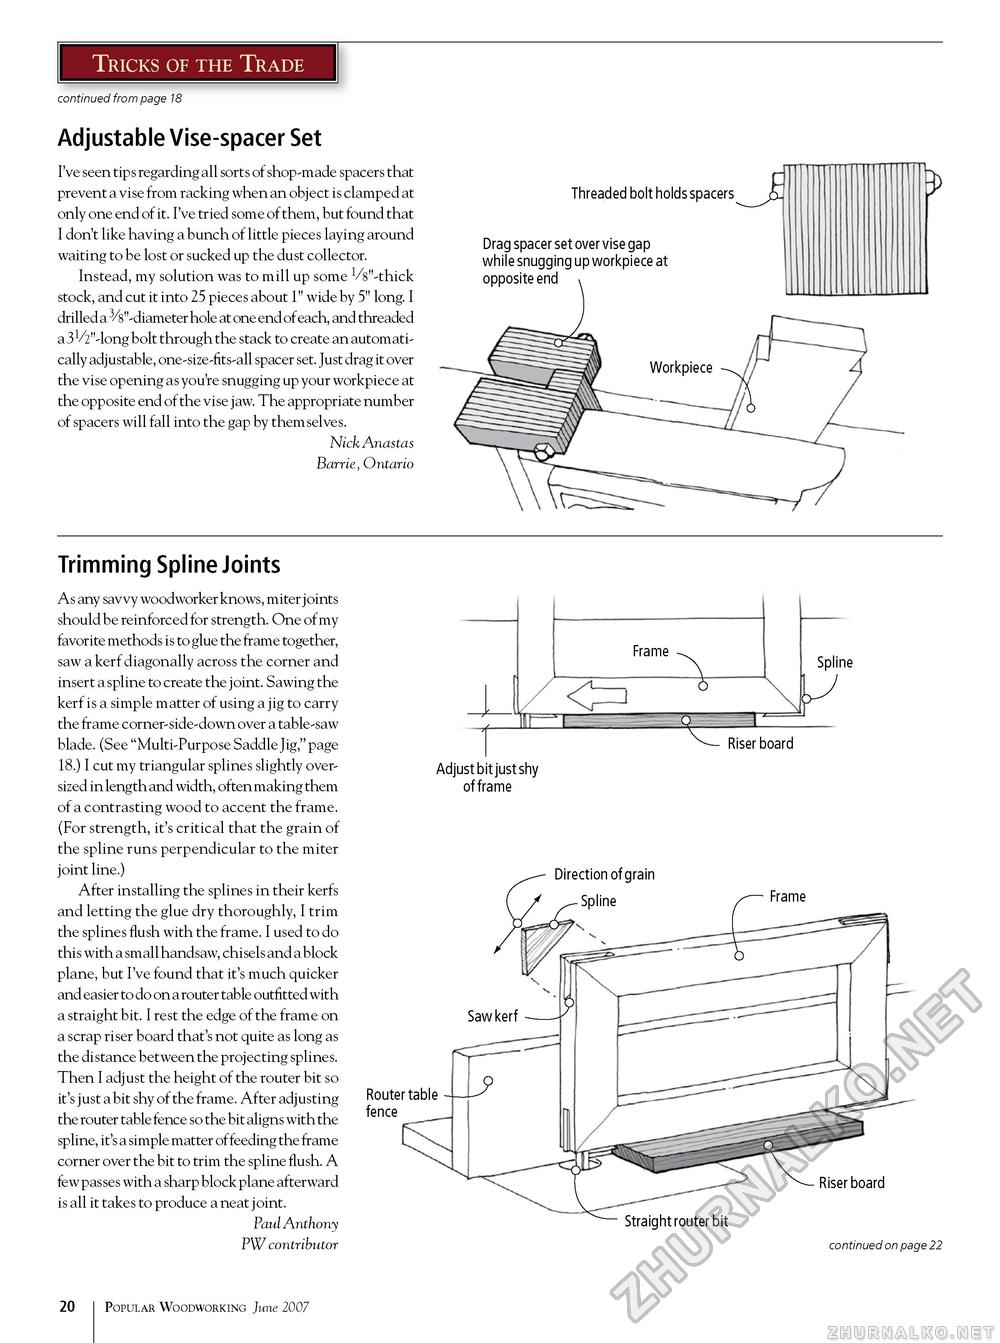
Tricks of the Trade continued from page 18 Adjustable Vise-spacer Set I've seen tips regarding all sorts of shop-made spacers that prevent a vise from racking when an object is clamped at only one end of it. I've tried some of them, but found that I don't like having a bunch of little pieces laying around waiting to be lost or sucked up the dust collector. Instead, my solution was to mill up some ^"-thick stock, and cut it into 25 pieces about 1" wide by 5" long. I drilled a 3/8"-diameter hole at one end of each, and threaded a 31/2"-long bolt through the stack to create an automatically adjustable, one-size-fits-all spacer set. Just drag it over the vise opening as you're snugging up your workpiece at the opposite end of the vise jaw. The appropriate number of spacers will fall into the gap by themselves. Nick Anastas Barrie, Ontario Threaded bolt holds spacers -J Drag spacer set over vise gap while snugging up workpiece at opposite end Trimming Spline Joints As any savvy woodworker knows, miter joints should be reinforced for strength. One of my favorite methods is to glue the frame together, saw a kerf diagonally across the corner and insert a spline to create the joint. Sawing the kerf is a simple matter of using a jig to carry the frame corner-side-down over a table-saw blade. (See "Multi-Purpose Saddle Jig," page 18.) I cut my triangular splines slightly oversized in length and width, often making them of a contrasting wood to accent the frame. (For strength, it's critical that the grain of the spline runs perpendicular to the miter joint line.) After installing the splines in their kerfs and letting the glue dry thoroughly, I trim the splines flush with the frame. I used to do this with a small handsaw, chisels and a block plane, but I've found that it's much quicker and easier to do on a router table outfitted with a straight bit. I rest the edge of the frame on a scrap riser board that's not quite as long as the distance between the projecting splines. Then I adjust the height of the router bit so it's just a bit shy of the frame. After adjusting the router table fence so the bit aligns with the spline, it's a simple matter of feeding the frame corner over the bit to trim the spline flush. A few passes with a sharp block plane afterward is all it takes to produce a neat joint. Paul Anthony PW contributor Frame EI 9 Spline Riser board Adjust bit just shy of frame Direction of grain Spline Frame Router table fence Straight router bit Riser board continued on page 22 10 Popular Woodworking June 2007 |


