Popular Woodworking 2007-11 № 165, страница 75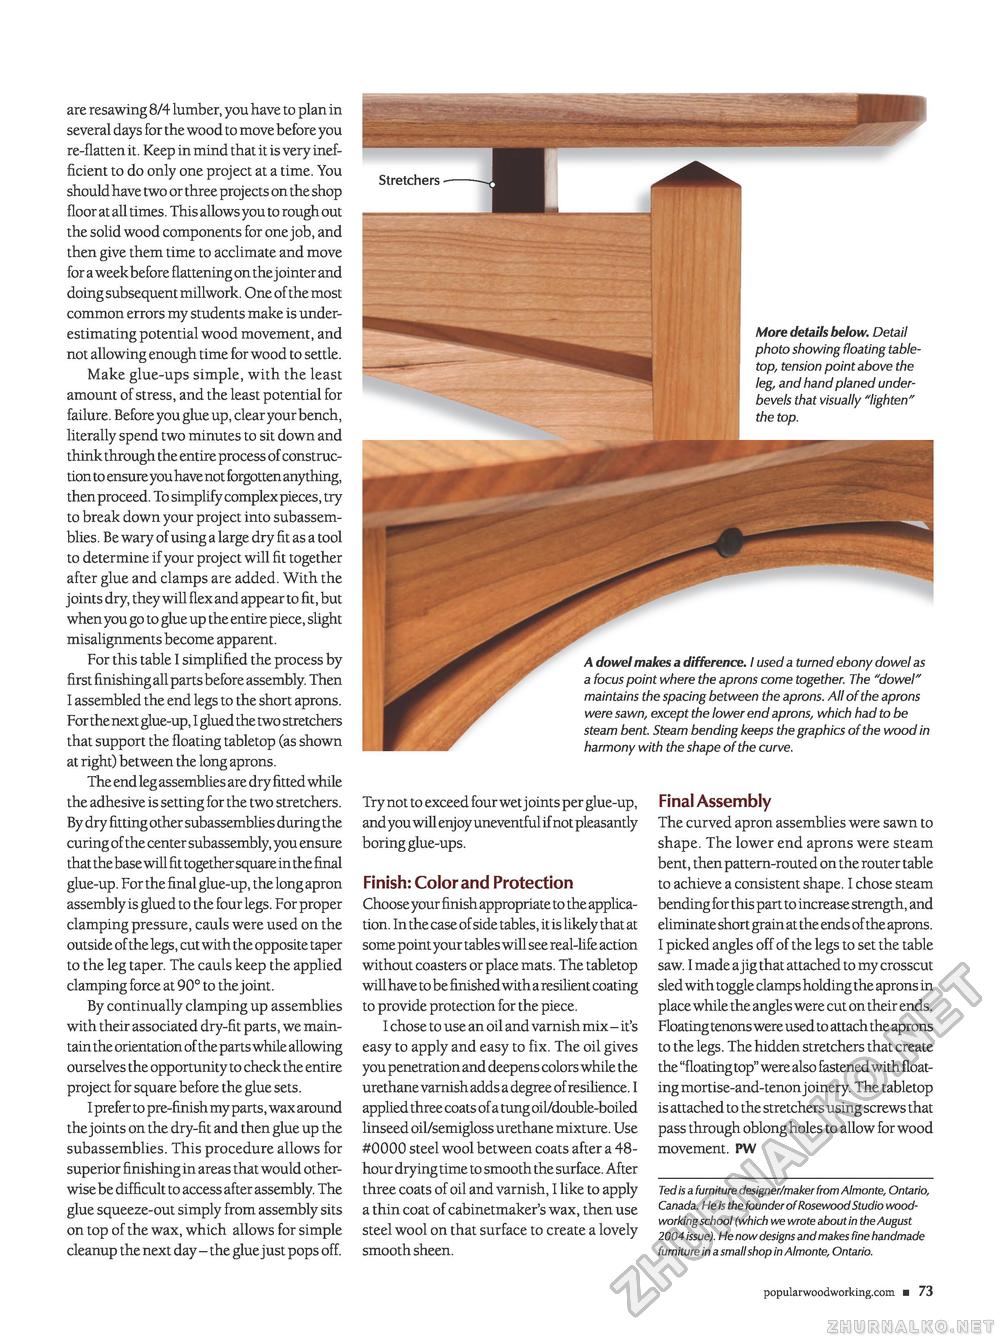
are resawing 8/4 lumber, you have to plan in several days for the wood to move before you re-flatten it. Keep in mind that it is very inefficient to do only one project at a time. You should have two or three projects on the shop floor at all times. This allows you to rough out the solid wood components for one job, and then give them time to acclimate and move for a week before flattening on the j ointer and doing subsequent millwork. One of the most common errors my students make is underestimating potential wood movement, and not allowing enough time for wood to settle. Make glue-ups simple, with the least amount of stress, and the least potential for failure. Before you glue up, clear your bench, literally spend two minutes to sit down and think through the entire process of construction to ensure you have not forgotten anything, then proceed. To simplify complexpieces, try to break down your project into subassemblies. Be wary of using a large dry fit as a tool to determine if your project will fit together after glue and clamps are added. With the j oints dry, they will flex and appear to fit, but when you go to glue up the entire piece, slight misalignments become apparent. For this table I simplified the process by first finishing all parts before assembly. Then I assembled the end legs to the short aprons. For the next glue-up, I glued the two stretchers that support the floating tabletop (as shown at right) between the long aprons. The end leg assemblies are dry fitted while the adhesive is setting for the two stretchers. By dry fitting other subassemblies during the curing of the center subassembly, you ensure that the base will fit together square in the final glue-up. For the final glue-up, the long apron assembly is glued to the four legs. For proper clamping pressure, cauls were used on the outside of the legs, cut with the opposite taper to the leg taper. The cauls keep the applied clamping force at 90° to the joint. By continually clamping up assemblies with their associated dry-fit parts, we maintain the orientation of the parts while allowing ourselves the opportunity to check the entire project for square before the glue sets. I prefer to pre-finish my parts, wax around the joints on the dry-fit and then glue up the subassemblies. This procedure allows for superior finishing in areas that would otherwise be difficult to access after assembly. The glue squeeze-out simply from assembly sits on top of the wax, which allows for simple cleanup the next day - the glue just pops off. Try not to exceed four wet j oints per glue-up, and you will enjoy uneventful if not pleasantly boring glue-ups. Finish: Color and Protection Choose your finish appropriate to the application. In the case of side tables, it is likely that at some point your tables will see real-life action without coasters or place mats. The tabletop will have to be finished with a resilient coating to provide protection for the piece. I chose to use an oil and varnish mix - it's easy to apply and easy to fix. The oil gives you penetration and deepens colors while the urethane varnish adds a degree of resilience. I applied three coats of a tung oil/double-boiled linseed oil/semigloss urethane mixture. Use #0000 steel wool between coats after a 48hour drying time to smooth the surface. After three coats of oil and varnish, I like to apply a thin coat of cabinetmaker's wax, then use steel wool on that surface to create a lovely smooth sheen. Final Assembly The curved apron assemblies were sawn to shape. The lower end aprons were steam bent, then pattern-routed on the router table to achieve a consistent shape. I chose steam bending for this part to increase strength, and eliminate short grain at the ends of the aprons. I picked angles off of the legs to set the table saw. I made a jig that attached to my crosscut sled with toggle clamps holding the aprons in place while the angles were cut on their ends. Floating tenons were used to attach the aprons to the legs. The hidden stretchers that create the "floating top" were also fastened with floating mortise-and-tenon joinery. The tabletop is attached to the stretchers using screws that pass through oblong holes to allow for wood movement. PW Ted is a furniture designer/maker from Almonte, Ontario, Canada. He is the founder of Rosewood Studio woodworking school (which we wrote about in the August 2004 issue). He now designs and makes fine handmade furniture in a small shop in Almonte, Ontario. popularwoodworking.com ■ 73 |


