Popular Woodworking 2007-11 № 165, страница 79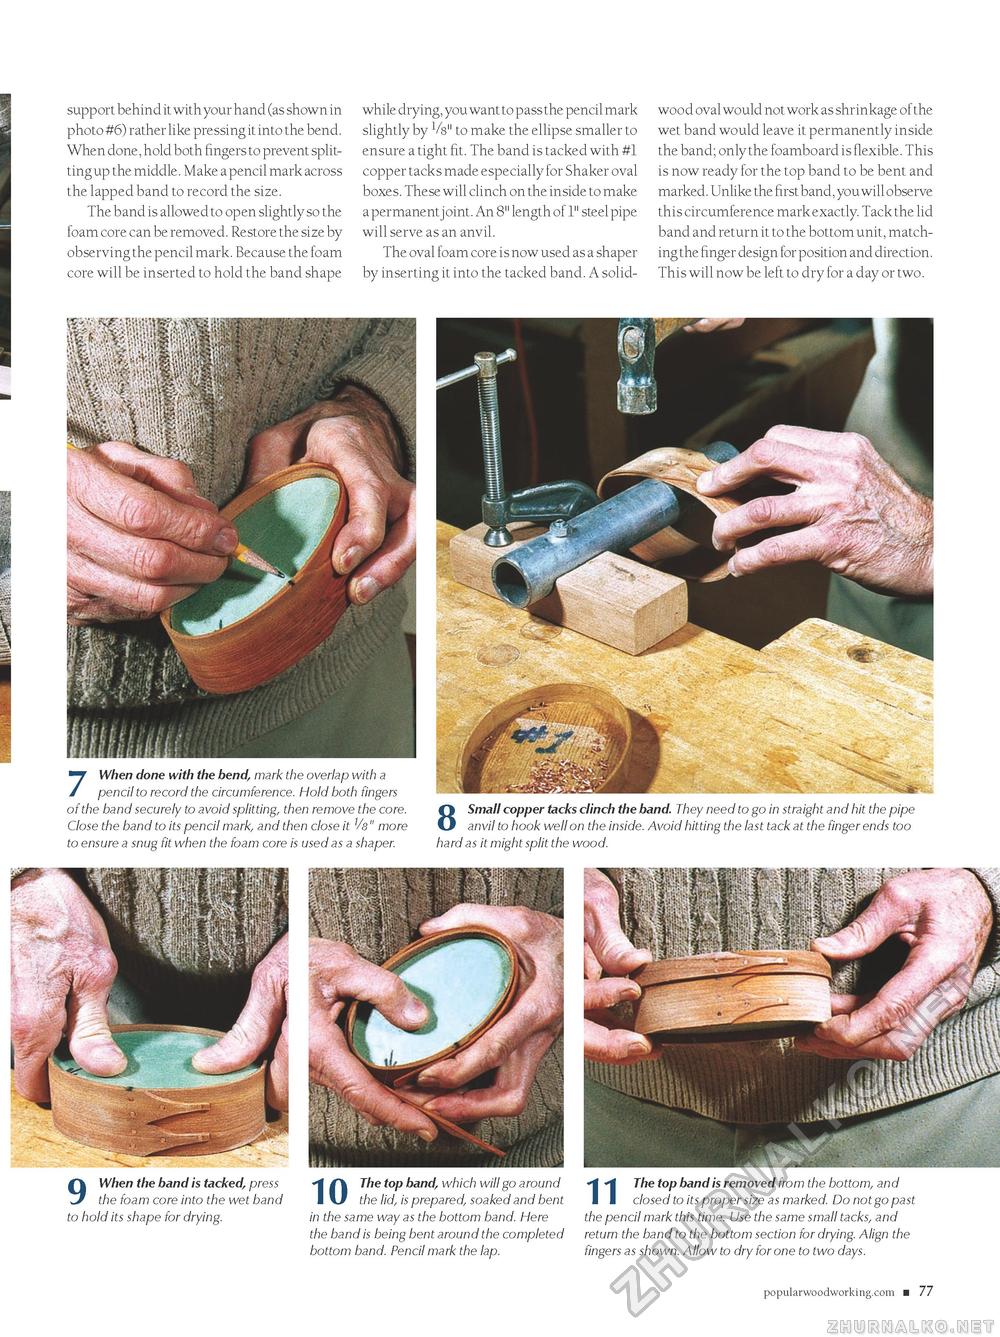
support behind it with your hand (as shown in photo #6) rather like pressing it into the bend. When done, hold both fingers to prevent splitting up the middle. Make a pencil mark across the lapped band to record the size. The band is allowe d to op en slightly so the foam core can be removed. Restore the size by observing the pencil mark. Because the foam core will be inserted to hold the band shape while drying, you want to pass the pencil mark slightly by Vs" to make the ellipse smaller to ensure a tight fit. The band is tacked with #1 copper tacks made especially for Shaker oval boxes. These will clinch on the inside to make a permanentjoint. An 8" length of 1" steel pipe will serve as an anvil. The oval foam core is now used as a shaper by inserting it into the tacked band. A solid- wood oval would not work as shrinkage of the wet band would leave it permanently inside the band; only the foamboard is flexible. This is now ready for the top band to be bent and marked. Unlike the first band, you will observe this circumference mark exactly. Tack the lid band and return it to the bottom unit, matching the finger design for position and direction. This will now be left to dry for a day or two. 7 When done with the bend, mark the overlap with a pencil to record the circumference. Hold both fingers of the band securely to avoid splitting, then remove the core Close the band to its pencil mark, and then close it Vs" more to ensure a snug fit when the foam core is used as a shaper. 8 Small copper tacks clinch the band. They need to go in straight and hit the pipe anvil to hook well on the inside. Avoid hitting the last tack at the finger ends too hard as it might split the wood. 9 When the band is tacked, press the foam core into the wet band to hold its shape for drying. "t /"k The top band, which will go around the lid, is prepared, soaked and bent in the same way as the bottom band. Here the band is being bent around the completed bottom band. Pencil mark the lap. "t "t The top band is removed from the bottom, and I I closed to its proper size as marked. Do not go past the pencil mark this time. Use the same small tacks, and return the band to the bottom section for drying. Align the fingers as shown. Allow to dry for one to two days. popularwoodworking.com ■ 77 |


