Popular Woodworking 2007-12 № 166, страница 53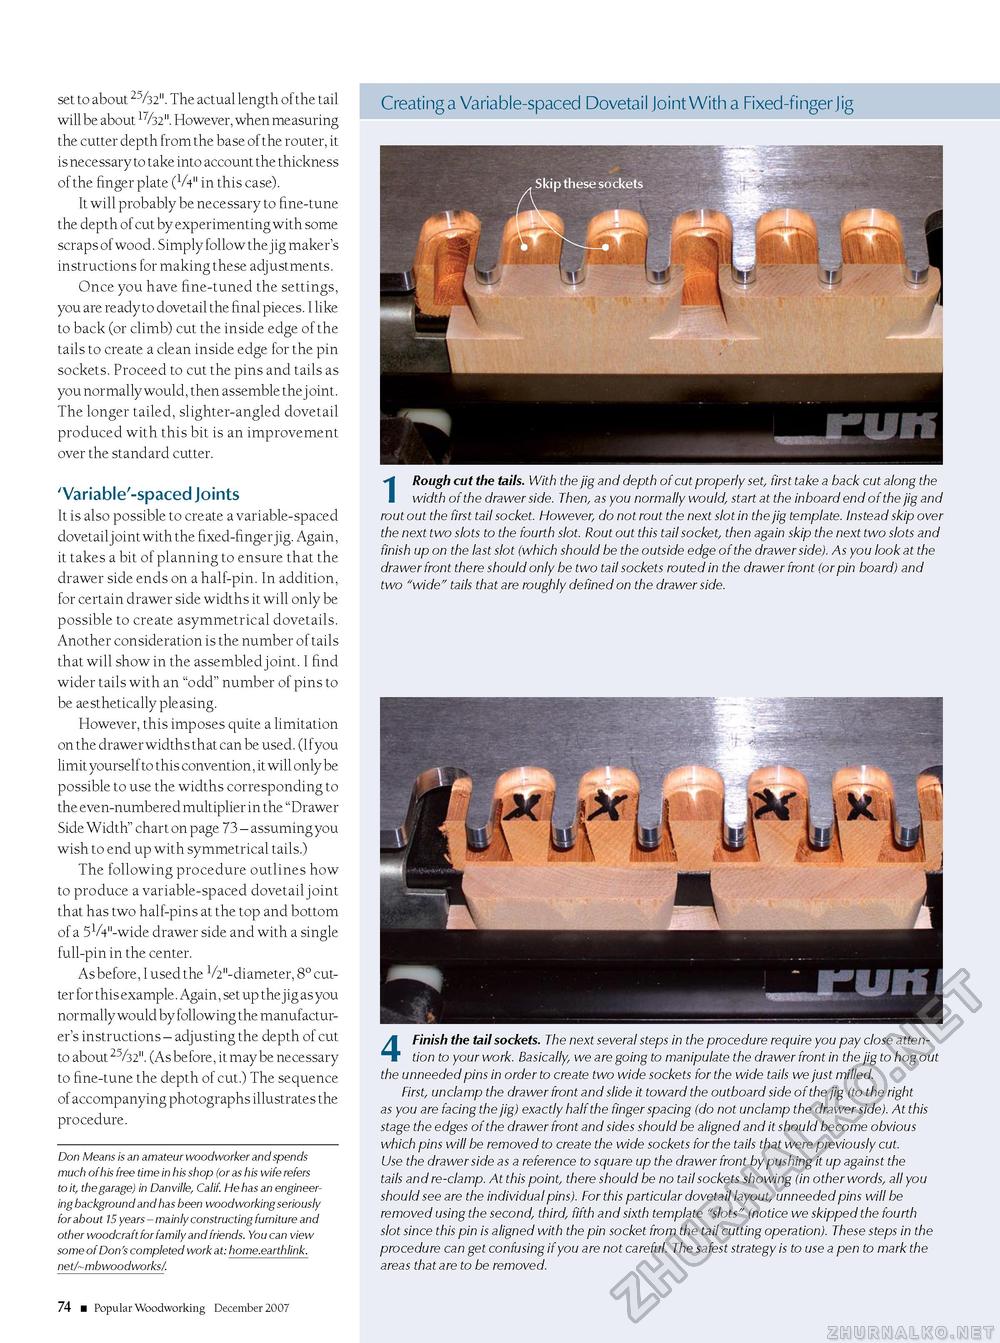
set to about 25/32". The actual length of the tail will be about 17/32". However, when measuring the cutter depth from the base of the router, it is necessary to take into account the thickness of the finger plate (V4" in this case). It will probably be necessary to fine-tune the depth of cut by experimenting with some scraps of wood. Simply follow the jig maker's instructions for making these adj ustments. Once you have fine-tuned the settings, you are ready to dovetail the final pieces. I like to back (or climb) cut the inside edge of the tails to create a clean inside edge for the pin sockets. Proceed to cut the pins and tails as you normally would, then assemble the j oint. The longer tailed, slighter-angled dovetail produced with this bit is an improvement over the standard cutter. 'Variable'-spaced Joints It is also possible to create a variable-spaced dovetail joint with the fixed-finger jig. Again, it takes a bit of planning to ensure that the drawer side ends on a half-pin. In addition, for certain drawer side widths it will only be possible to create asymmetrical dovetails. Another consideration is the number of tails that will show in the assembled joint. I find wider tails with an "odd" number of pins to be aesthetically pleasing. However, this imposes quite a limitation on the drawer widths that can be used. (Ifyou limit yourself to this convention, it will only be possible to use the widths corresponding to the even-numbered multiplier in the "Drawer Side Width" chart on page 73 - assuming you wish to end up with symmetrical tails.) The following procedure outlines how to produce a variable-spaced dovetail joint that has two half-pins at the top and bottom of a 5VVl-wide drawer side and with a single full-pin in the center. As before, I used the 1/2"-diameter, 8° cutter for this example. Again, set up the jig as you normally would by following the manufacturer's instructions - adjusting the depth of cut to about 25/32". (As before, it may be necessary to fine-tune the depth of cut.) The sequence of accompanying photographs illustrates the procedure. Don Means is an amateur woodworker and spends much of his free time in his shop (or as his wife refers to it, the garage) in Danville, Calif. He has an engineering background and has been woodworking seriously for about 15 years - mainly constructing furniture and other woodcraft for family and friends. You can view some of Don's completed work at: home.earthlink. net/~mbwoodworks/. Creating a Variable-spaced Dovetail Joint With a Fixed-finger Jig 1 Rough cut the tails. With the jig and depth of cut properly set, first take a back cut along the width of the drawer side. Then, as you normally would, start at the inboard end of the jig and rout out the first tail socket. However, do not rout the next slot in the jig template. Instead skip over the next two slots to the fourth slot. Rout out this tail socket, then again skip the next two slots and finish up on the last slot (which should be the outside edge of the drawer side). As you look at the drawer front there should only be two tail sockets routed in the drawer front (or pin board) and two "wide" tails that are roughly defined on the drawer side. 4 Finish the tail sockets. The next several steps in the procedure require you pay close attention to your work. Basically, we are going to manipulate the drawer front in the jig to hog out the unneeded pins in order to create two wide sockets for the wide tails we just milled. First, unclamp the drawer front and slide it toward the outboard side of the jig (to the right as you are facing the jig) exactly half the finger spacing (do not unclamp the drawer side). At this stage the edges of the drawer front and sides should be aligned and it should become obvious which pins will be removed to create the wide sockets for the tails that were previously cut. Use the drawer side as a reference to square up the drawer front by pushing it up against the tails and re-clamp. At this point, there should be no tail sockets showing (in other words, all you should see are the individual pins). For this particular dovetail layout, unneeded pins will be removed using the second, third, fifth and sixth template "slots" (notice we skipped the fourth slot since this pin is aligned with the pin socket from the tail cutting operation). These steps in the procedure can get confusing if you are not careful. The safest strategy is to use a pen to mark the areas that are to be removed. 74 ■ Popular Woodworking December 2007 |


