Popular Woodworking 2008-04 № 168, страница 40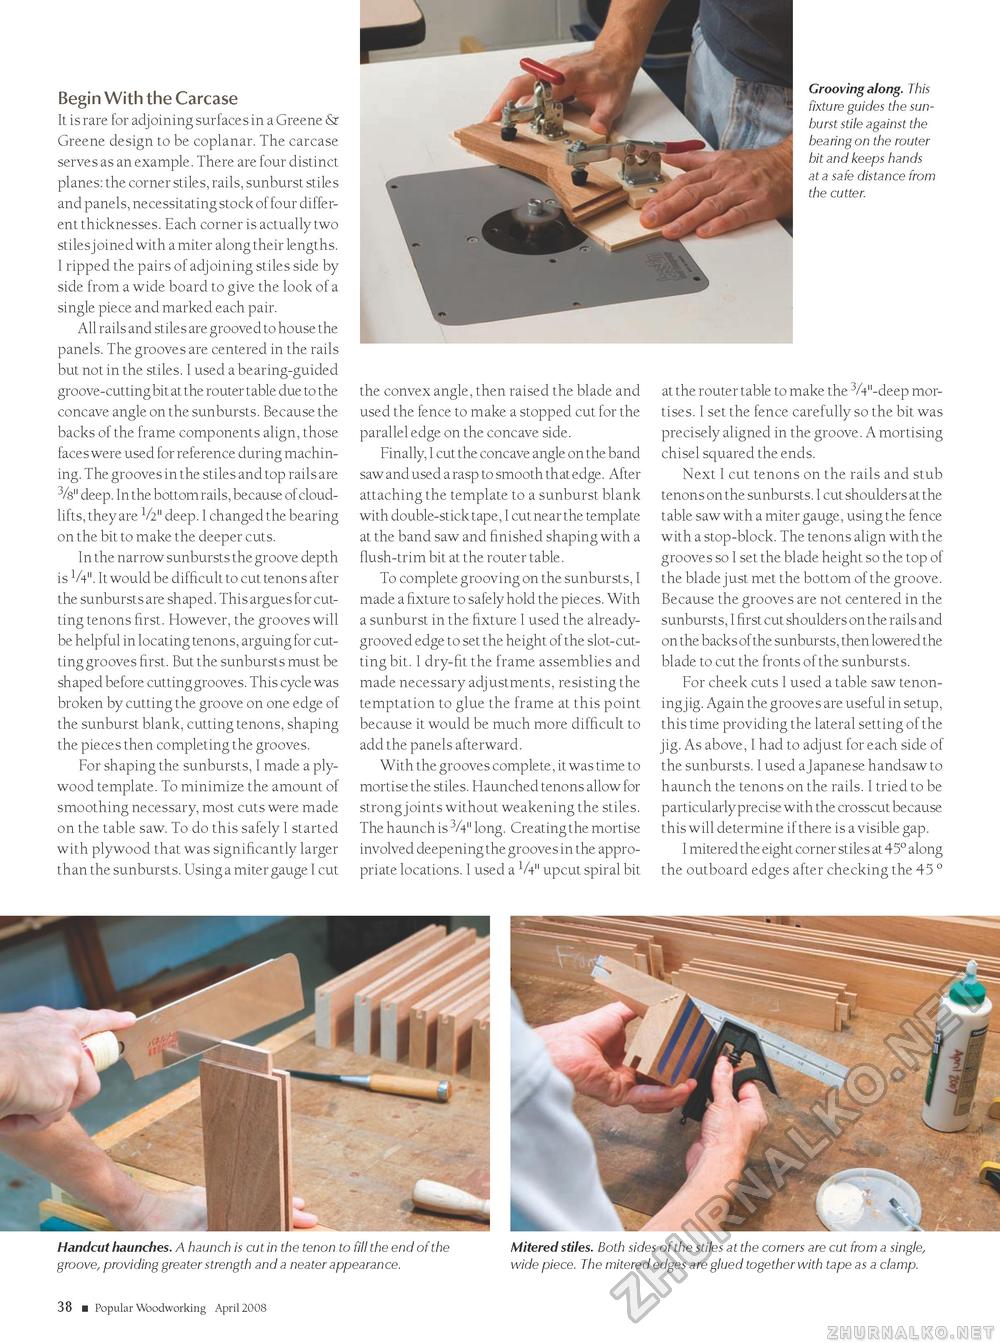
Grooving along. This fixture guides the sunburst stile against the bearing on the router bit and keeps hands at a safe distance from the cutter. Begin With the Carcase It is rare for adjoining surfaces in a Greene & Greene design to be coplanar. The carcase serves as an example. There are four distinct planes: the corner stiles, rails, sunburst stiles and panels, necessitating stock of four different thicknesses. Each corner is actually two stiles joined with a miter along their lengths. I ripped the pairs of adjoining stiles side by side from a wide board to give the look of a single piece and marked each pair. All rails and stiles are grooved to house the panels. The grooves are centered in the rails but not in the stiles. I used a bearing-guided groove-cutting bit at the router table due to the concave angle on the sunbursts. Because the backs of the frame components align, those faces were used for reference during machining. The grooves in the stiles and top rails are 3/8" deep. In the bottom rails, because of cloudlifts, they are V2" deep. I changed the bearing on the bit to make the deeper cuts. In the narrow sunbursts the groove depth is V4". It would be difficult to cut tenons after the sunbursts are shaped. This argues for cutting tenons first. However, the grooves will be helpful in locating tenons, arguing for cutting grooves first. But the sunbursts must be shaped before cutting grooves. This cycle was broken by cutting the groove on one edge of the sunburst blank, cutting tenons, shaping the pieces then completing the grooves. For shaping the sunbursts, I made a plywood template. To minimize the amount of smoothing necessary, most cuts were made on the table saw. To do this safely I started with plywood that was significantly larger than the sunbursts. Using a miter gauge I cut the convex angle, then raised the blade and used the fence to make a stopped cut for the parallel edge on the concave side. Finally, I cut the concave angle on the band saw and used a rasp to smooth that edge. After attaching the template to a sunburst blank with double-stick tape, I cut near the template at the band saw and finished shaping with a flush-trim bit at the router table. To complete grooving on the sunbursts, I made a fixture to safely hold the pieces. With a sunburst in the fixture I used the already-grooved edge to set the height of the slot-cutting bit. I dry-fit the frame assemblies and made necessary adjustments, resisting the temptation to glue the frame at this point because it would be much more difficult to add the panels afterward. With the grooves complete, it was time to mortise the stiles. Haunched tenons allow for strong joints without weakening the stiles. The haunch is 3/4" long. Creating the mortise involved deepening the grooves in the appropriate locations. I used a 1/4" upcut spiral bit at the router table to make the 3/4"-deep mortises. I set the fence carefully so the bit was precisely aligned in the groove. A mortising chisel squared the ends. Next I cut tenons on the rails and stub tenons on the sunbursts. I cut shoulders at the table saw with a miter gauge, using the fence with a stop-block. The tenons align with the grooves so I set the blade height so the top of the blade just met the bottom of the groove. Because the grooves are not centered in the sunbursts, I first cut shoulders on the rails and on the backs of the sunbursts, then lowered the blade to cut the fronts of the sunbursts. For cheek cuts I used a table saw tenoning jig. Again the grooves are useful in setup, this time providing the lateral setting of the jig. As above, I had to adjust for each side of the sunbursts. I used a Japanese handsaw to haunch the tenons on the rails. I tried to be particularly precise with the crosscut because this will determine if there is a visible gap. I mitered the eight corner stiles at 45° along the outboard edges after checking the 45 ° Handcut haunches. A haunch is cut in the tenon to fill the end of the groove, providing greater strength and a neater appearance. Mitered stiles. Both sides of the stiles at the corners are cut from a single, wide piece. The mitered edges are glued together with tape as a clamp. 38 ■ Popular Woodworking April 2008 MX |


