Popular Woodworking 2008-04 № 168, страница 43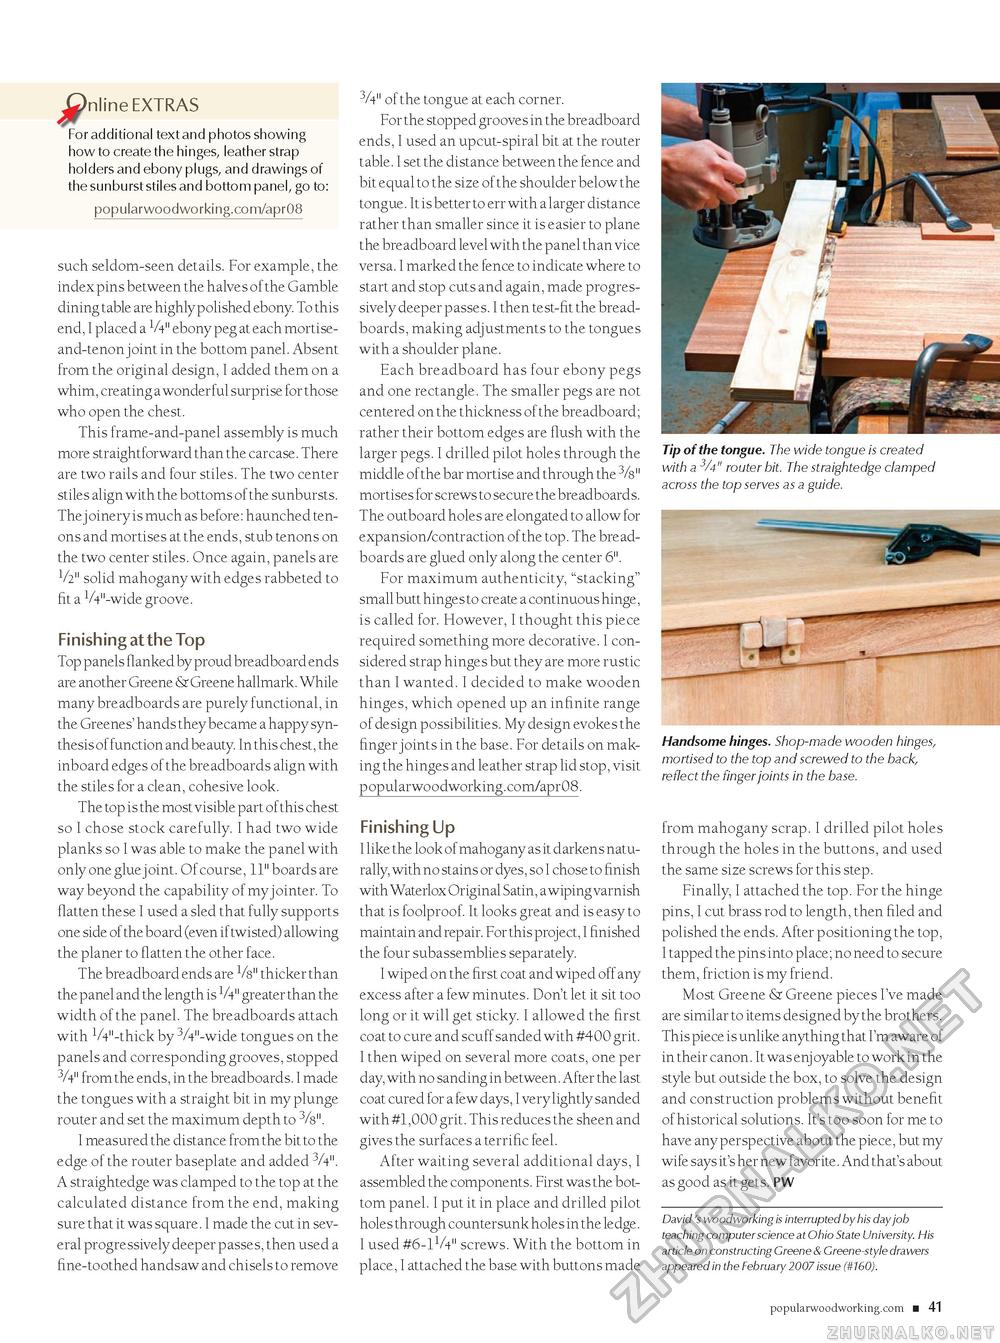
^Online EXTRAS For additional text and photos showing how to create the hinges, leather strap holders and ebony plugs, and drawings of the sunburst stiles and bottom panel, go to: popularwoodworking.com/apr08 such seldom-seen details. For example, the index pins between the halves of the Gamble dining table are highly polished ebony. To this end, I placed a V4" ebony peg at each mortise-and-tenon joint in the bottom panel. Absent from the original design, I added them on a whim, creating a wonderful surprise for those who open the chest. This frame-and-panel assembly is much more straightforward than the carcase. There are two rails and four stiles. The two center stiles align with the bottoms of the sunbursts. The joinery is much as before: haunched tenons and mortises at the ends, stub tenons on the two center stiles. Once again, panels are V2" solid mahogany with edges rabbeted to fit a VV'-wide groove. Finishing at the Top Top panels flanked by proud breadboard ends are another Greene & Greene hallmark. While many breadboards are purely functional, in the Greenes' hands they became a happy synthesis of function and beauty. In this chest, the inboard edges of the breadboards align with the stiles for a clean, cohesive look. The top is the most visible part of this chest so I chose stock carefully. I had two wide planks so I was able to make the panel with only one glue joint. Of course, 11" boards are way beyond the capability of my jointer. To flatten these I used a sled that fully supports one side of the board (even if twisted) allowing the planer to flatten the other face. The breadboard ends are V8" thicker than the panel and the length is V4" greater than the width of the panel. The breadboards attach with VV-thick by 3A"-wide tongues on the panels and corresponding grooves, stopped 3A" from the ends, in the breadboards. I made the tongues with a straight bit in my plunge router and set the maximum depth to 3/8". I measured the distance from the bit to the edge of the router baseplate and added 3A". A straightedge was clamped to the top at the calculated distance from the end, making sure that it was square. I made the cut in several progressively deeper passes, then used a fine-toothed handsaw and chisels to remove 3A" of the tongue at each corner. For the stopped grooves in the breadboard ends, I used an upcut-spiral bit at the router table. I set the distance between the fence and bit equal to the size of the shoulder below the tongue. It is better to err with a larger distance rather than smaller since it is easier to plane the breadboard level with the panel than vice versa. I marked the fence to indicate where to start and stop cuts and again, made progressively deeper passes. I then test-fit the breadboards, making adjustments to the tongues with a shoulder plane. Each breadboard has four ebony pegs and one rectangle. The smaller pegs are not centered on the thickness of the breadboard; rather their bottom edges are flush with the larger pegs. I drilled pilot holes through the middle of the bar mortise and through the 3/8" mortises for screws to secure the breadboards. The outboard holes are elongated to allow for expansion/contraction of the top. The breadboards are glued only along the center 6". For maximum authenticity, "stacking" small butt hinges to create a continuous hinge, is called for. However, I thought this piece required something more decorative. I considered strap hinges but they are more rustic than I wanted. I decided to make wooden hinges, which opened up an infinite range of design possibilities. My design evokes the finger joints in the base. For details on making the hinges and leather strap lid stop, visit popularwoodworking.com/apr08. Tip of the tongue. The wide tongue is created with a router bit. The straightedge clamped across the top serves as a guide. Handsome hinges. Shop-made wooden hinges, mortised to the top and screwed to the back, reflect the finger joints in the base. Finishing Up I like the look of mahogany as it darkens naturally, with no stains or dyes, so I chose to finish with Waterlox Original Satin, a wiping varnish that is foolproof. It looks great and is easy to maintain and repair. For this project, I finished the four subassemblies separately. I wiped on the first coat and wiped off any excess after a few minutes. Don't let it sit too long or it will get sticky. I allowed the first coat to cure and scuff sanded with #400 grit. I then wiped on several more coats, one per day, with no sanding in between. After the last coat cured for a few days, I very lightly sanded with #1,000 grit. This reduces the sheen and gives the surfaces a terrific feel. After waiting several additional days, I assembled the components. First was the bottom panel. I put it in place and drilled pilot holes through countersunk holes in the ledge. I used #6-11/4" screws. With the bottom in place, I attached the base with buttons made from mahogany scrap. I drilled pilot holes through the holes in the buttons, and used the same size screws for this step. Finally, I attached the top. For the hinge pins, I cut brass rod to length, then filed and polished the ends. After positioning the top, I tapped the pins into place; no need to secure them, friction is my friend. Most Greene & Greene pieces I've made are similar to items designed by the brothers. This piece is unlike anything that I'm aware of in their canon. It was enj oyable to work in the style but outside the box, to solve the design and construction problems without benefit of historical solutions. It's too soon for me to have any perspective about the piece, but my wife says it's her new favorite. And that's about as good as it gets. PW David's woodworking is interrupted by his day job teaching computer science at Ohio State University. His article on constructing Greene & Greene-style drawers appeared in the February 2007 issue (#160). popularwoodworking.com ■ 41 |


