Popular Woodworking 2008-06 № 169, страница 17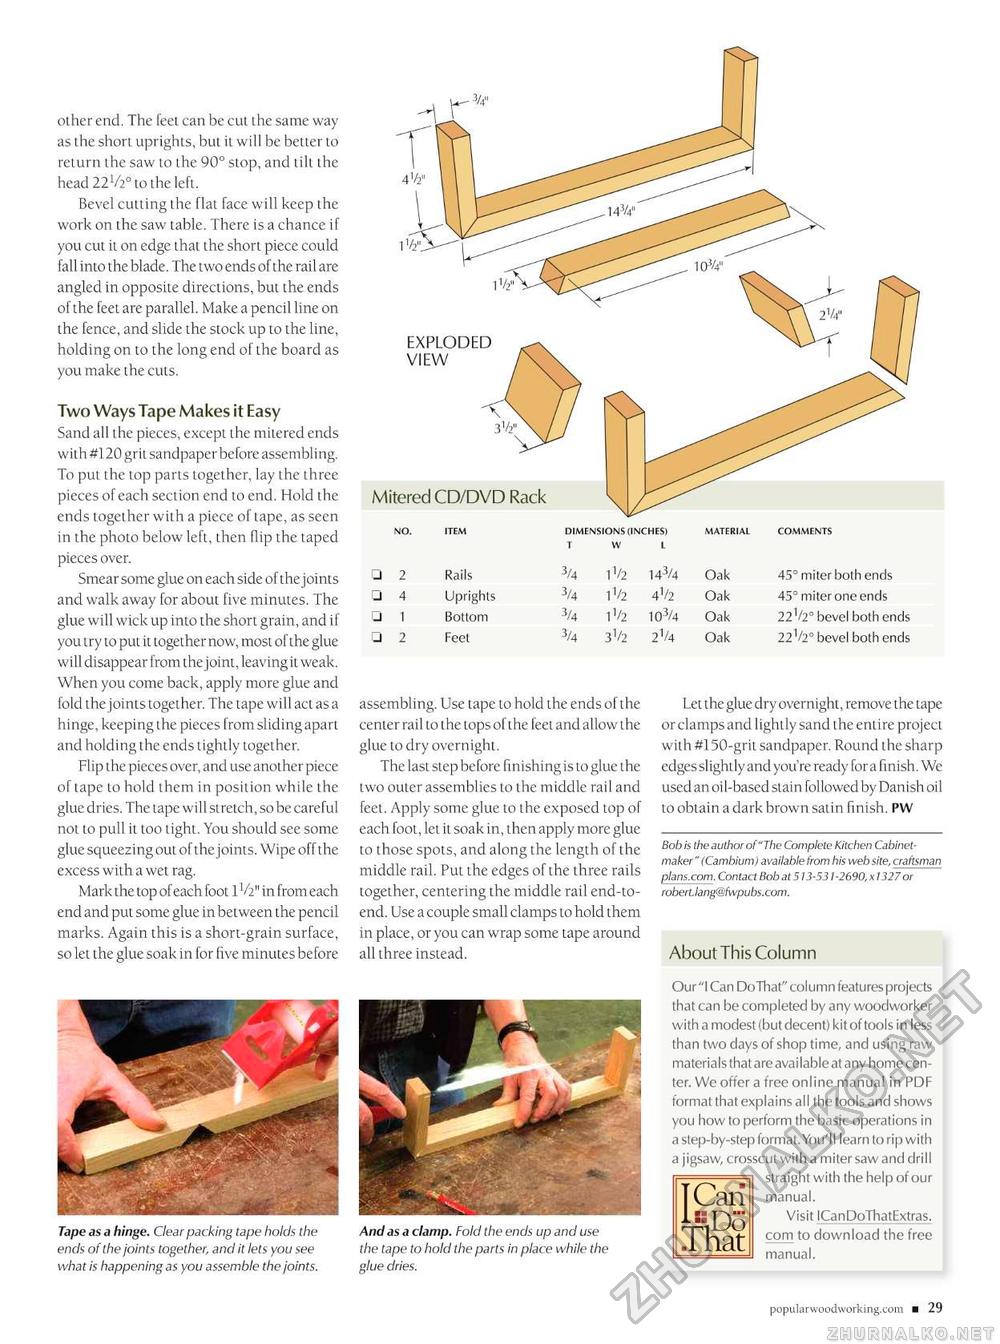
oiher end. The feet can be cut the same way as the short uprights, but it will be better to return the saw to the 90° stop, and till the head 22 V20 to the left. Bevel cutting the flat face will keep the work on the saw table. There is a chance if you cut it on edge that the short piece could fall into the blade. The two ends of the rail are angled in opposite directions, but the ends of the feet are parallel. Make a pencil line on the fence, and slide the stock up to the line, holding on to the long end of the board as you make the cuts. Two Ways Tape Makes it Easy Sand all the pieces, except the mitered ends with #120 grit sandpaper before assembling. To put the lop parts together, lay the ihree pieces of each section end to end. Hold the ends together with a piece of tape, as seen in the photo below left, then flip the taped pieces over. Smear some glue on each side of the joints and walk away for about five minutes. The glue will wick up into the short grain, and if you try to put it together now, most of the glue will disappear from the joint, leaving it weak. When you come back, apply more glue and fold thejoints together. The tape will act as a hinge, keeping the pieces from sliding apart and holding the ends tightly together. Flip the pieces over, and use another piece of tape to hold them in position while the glue dries. The tape will stretch, so be careful not to pull it too tight. You should see some glue squeezing out of thejoints. Wipe off the excess with a wet rag. Mark the top of each foot 1V2" in from each end and put some glue in between the pencil marks. Again this is a short-grain surface, so let the glue soak in for five minutes before Tape as a hinge. Clear packing tape holds the ends of the joints together, and it lets you see what is happening as you assemble the joints. assembling. Use tape to hold the ends of the center rail to the tops of the feet and allow the glue to dry overnight. The last step before finishing is to glue the two outer assemblies to the middle rail and feet. Apply some glue to the exposed top of each foot, let it soak in, then apply more glue to those spots, and along the length of the middle rail. Put the edges of the three rails together, centering the middle rail end-to-end. Use a couple small clamps to hold them in place, or you can wrap some tape around all three instead. And as a clamp. Fold the ends up and use the tape to hold the parts in place while the glue dries. Let the glue dry overnight, remove the tape or clamps and lightly sand the entire project with #150-grit sandpaper. Round the sharp edges slightly and you're ready fora finish. We used an oil-based stain followed by Danish oil to obtain a dark brown satin finish. PW Bob is the author of "The Complete Kitchen Cabinetmaker" (Cambium) available from his web site, craftsman plans.com. Contact Bob at 513-531-2690, x 1327 or roben.lang@fwpubs.com. About This Column Our "I Can DoThat" column features projects that can be completed by any woodworker with a modest (but decent) kit of tools in less than two days of shop time, and using raw materials that are avai lable at any home center. We offer a free online manual in PDF format that explains all the tools and shows you how to perform the basic operations in a step-by-step format. You'll learn to rip with a jigsaw, crosscut with a miter saw and drill straight with the help of our manual. Visit ICanDoThatExtras. com to download the free manual. I Can That 29 |


