Popular Woodworking 2008-06 № 169, страница 16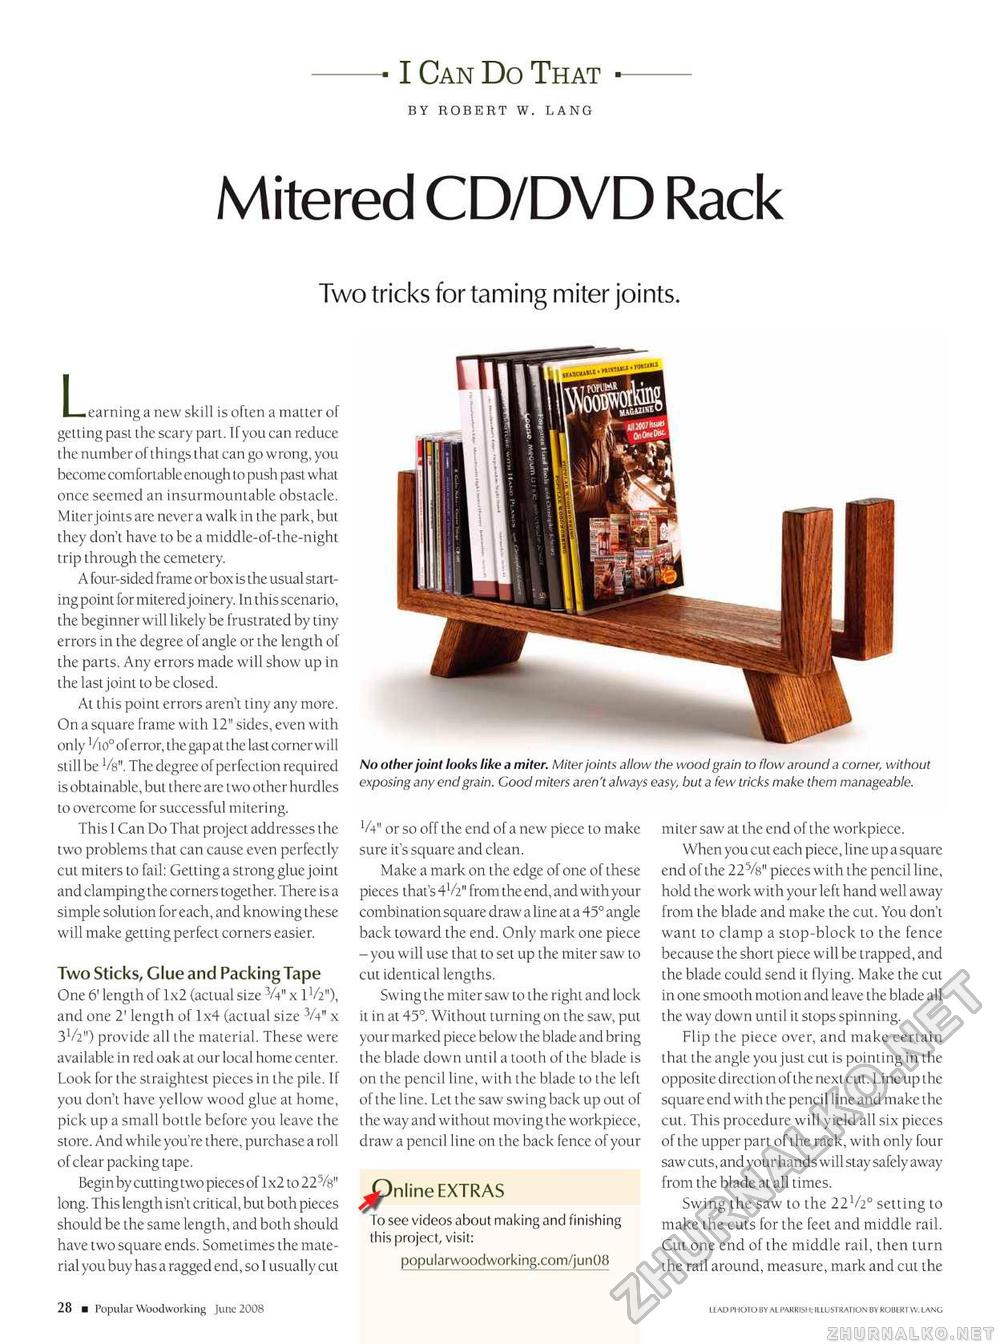
I Can Do That BY ROBERT W. LANG Mitered CD/DVD Rack Two tricks for taming miter joints. L earning a new skill is often a matter of getting past the scary part. If you can reduce the number of things that can go wrong, you become com fortable enough to push past what once seemed an insurmountable obstacle. Miter joints are never a walk in the park, but they don't have to be a middle-of-the-night trip through the cemetery. A four-sided frame or box is the usual starting point for mitered joinery. In this scenario, the beginner will likely be frustrated by tiny errors in the degree of angle or the length of the parts. Any errors made will show up in the last joint to be closed. At this point errors aren't tiny any more. On a square frame with 12" sides, even with only Vio° oferror, the gap at the last corner will stillbe Vs". The degree of perfection required is obtainable, but there are two other hurdles to overcome for successful mitering. This I Can Do That project addresses the two problems that can cause even perfectly cut miters to fail: Getting a strong glue joint and clamping the corners together. There is a simple solution for each, and knowing these will make getting perfect corners easier. Two Sticks, Clue and Packing Tape One 6' length of 1x2 (actual size W1 x IV2"), and one 2' length of 1x4 (actual size V4" x 3V2") provide all the material. These were available in red oak at our local home center. Look for the straightesi pieces in the pile. If you don't have yellow wood glue at home, pick up a small bottle before you leave the store. And while you're there, purchase a roll of clear packing tape. Begin by cutting two pieces of 1x2 to 225/s" long. This length isn't critical, but both pieces should be the same length, and both should have two square ends. Sometimes the material you buy has a ragged end, so I usually cut No other joint looks like a miter. Miter joints allow the wood grain to flow around a corner, without exposing any end grain. Good miters aren't always easy, but a few tricks make them manageable. V4" or so off the end of a new piece to make sure it's square and clean. Make a mark on the edge of one of these pieces that's 4 V2" from the end, and with your combination square draw a line at a 45° angle back toward the end. Only mark one piece - you will use that to set up the miter saw to cut identical lengths. Swing the miter saw to the right and lock it in at 45°. Without turning on the saw, put your marked piece below the blade and bring the blade down until a tooth of the blade is on the pencil line, with the blade to the left of the line. Let the saw swing back up out of the way and without moving the workpiece, draw a pencil line on the back fence of your ^nline EXTRAS To see videos about making and finishing this project, visit: popularwoodworking.com/jun08 miter saw at the end of the workpiece. When you cut each piece, line up a square end of the 225/8" pieces with the pencil line, hold the work with your left hand well away from the blade and make the cut. You don't want to clamp a stop-block to the fence because the short piece will be trapped, and the blade could send it flying. Make the cut in one smooth motion and leave the blade all the way down until it stops spinning. Flip the piece over, and make certain that the angle you just cut is pointing in the opposite direction ofthe next cut. Line up the square end with the pencil line and make the cut. This procedure will yield all six pieces of the upper part of the rack, with only four saw cuts, and your hands will stay safely away from the blade at all times. Swing the saw to the 22V20 setting to make the cuts for the feet and middle rail. Cut one end ofthe middle rail, then turn the rail around, measure, mark and cut the 12 ■ Popular Woodworking June 2008 |


