Popular Woodworking 2008-08 № 170, страница 51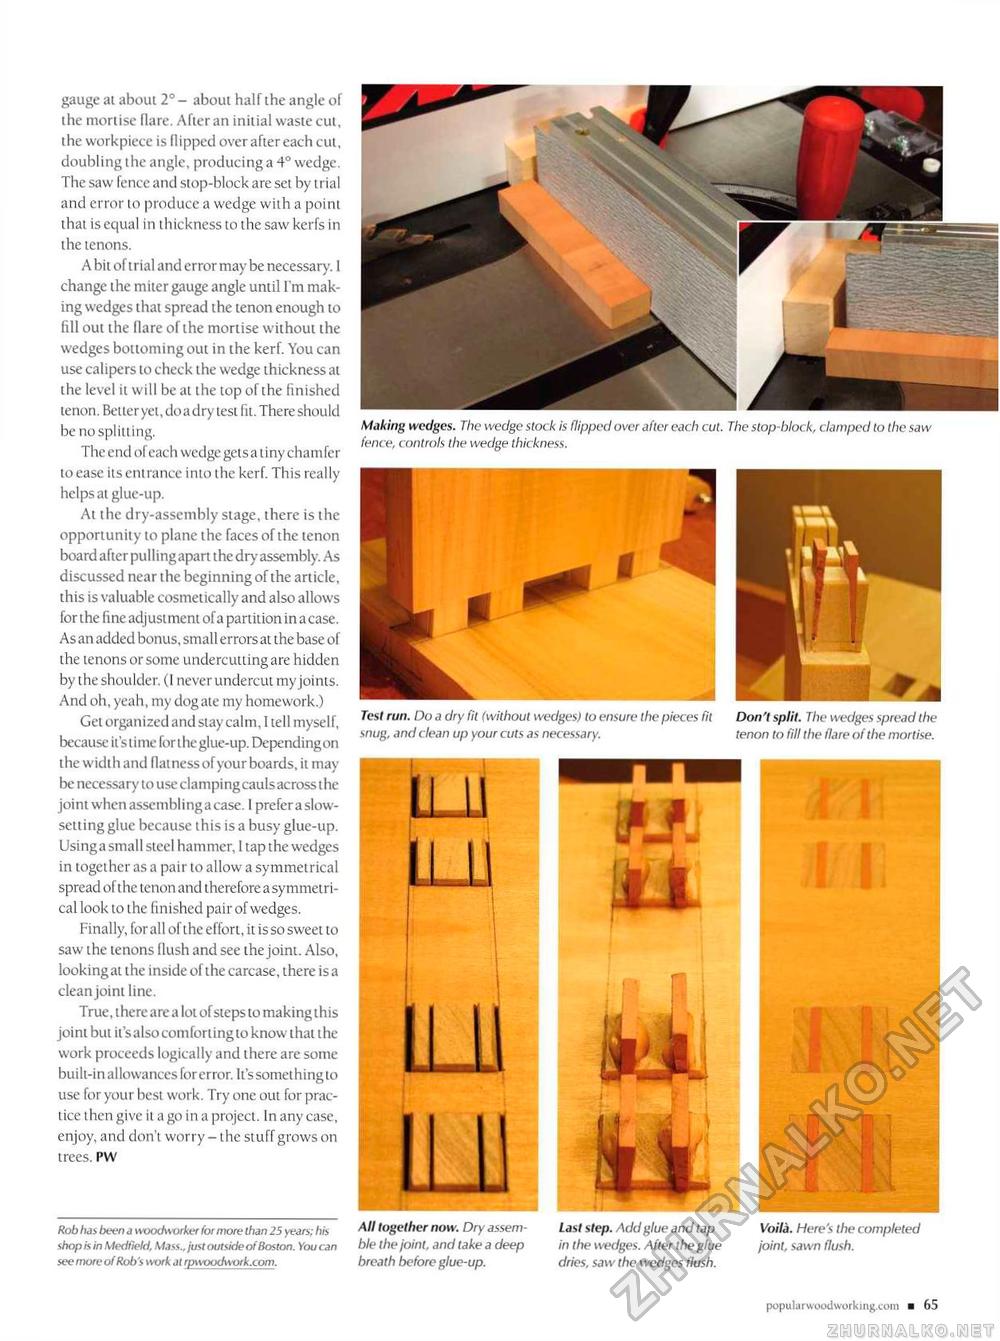
gauge at about 2°- about half the angle of the mortise flare. After an initial waste cut, the workpiece is flipped over after each cut, doubling the angle, producinga 4° wedge. The saw fence and stop-block are set by trial and error to produce a wedge with a point that is equal in thickness to the saw kerfs in the tenons. A bit of trial and error may be necessary. 1 change the miter gauge angle until I'm making wedges that spread the tenon enough to fill out the flare of the mortise without the wedges bottoming out in the kerf. You can use calipers to check the wedge thickness at the level it will be at the top of the finished tenon. Better yet, do a dry lest fit. There should be no splitting. The end ofeach wedge gets a tiny chamfer to ease its entrance into the kerf. This really helps at glue-up. At the dry-assembly stage, there is the opportunity to plane the faces of the tenon board after pulling apart the dry assembly. As discussed near the beginning of the article, this is valuable cosmetically and also allows for the fine adjustment of a partition in a case. As an added bonus, small errors at the base of the tenons or some undercutting are hidden by the shoulder. (I never undercut myjoints. And oh, yeah, my dogate my homework.) Get organized and stay calm, I tell myself, because it'siime for the glue-up. Depending on the width and flatness of your boards, it may be necessary to use clamping cauls across the joint when assembling a case. I prefer a slow-setting glue because this is a busy glue-up. Using a small steel hammer, I tap the wedges in together as a pair to allow a symmetrical spread of the tenon and therefore a symmetrical look to the finished pair of wedges. Finally, for all of the effort, it is so sweet to saw the tenons flush and see the joint. Also, looking at the inside of the carcase, there is a clean joint line. True, there are a lot of steps to making this joint but it'salso comforting to know that the work proceeds logically and there are some built-in allowances for error. It's something to use for your best work. Try one out for practice then give it a go in a project. In any case, enjoy, and don't worry - the stuff grows on trees. PW Making wedges. The wedge stock is flipped over after each cut. The stop-block, clamped to (he si fence, controls the wedge thickness. Test run. Do a dry fit (without wedges) to ensure the pieces fit Don't split. The wedges spread the snug, and clean up your cuts as necessary. tenon to fill the flare of the mortise. Rob lias been a woodworker for more than 25 years; liis shop is in Med field, Mass., just outside of Boston. You can see more of Rob's work at rpwoodwork.com. All together now. Dry assemble the joint, and take a deep breath before glue-up. Last step. Add glue and tap in the wedges. After the glue dries, saw the wedges flush. Voila. Here's the completed joint, sawn flush. popularwoodworking.co |


