Popular Woodworking 2008-10 № 171, страница 40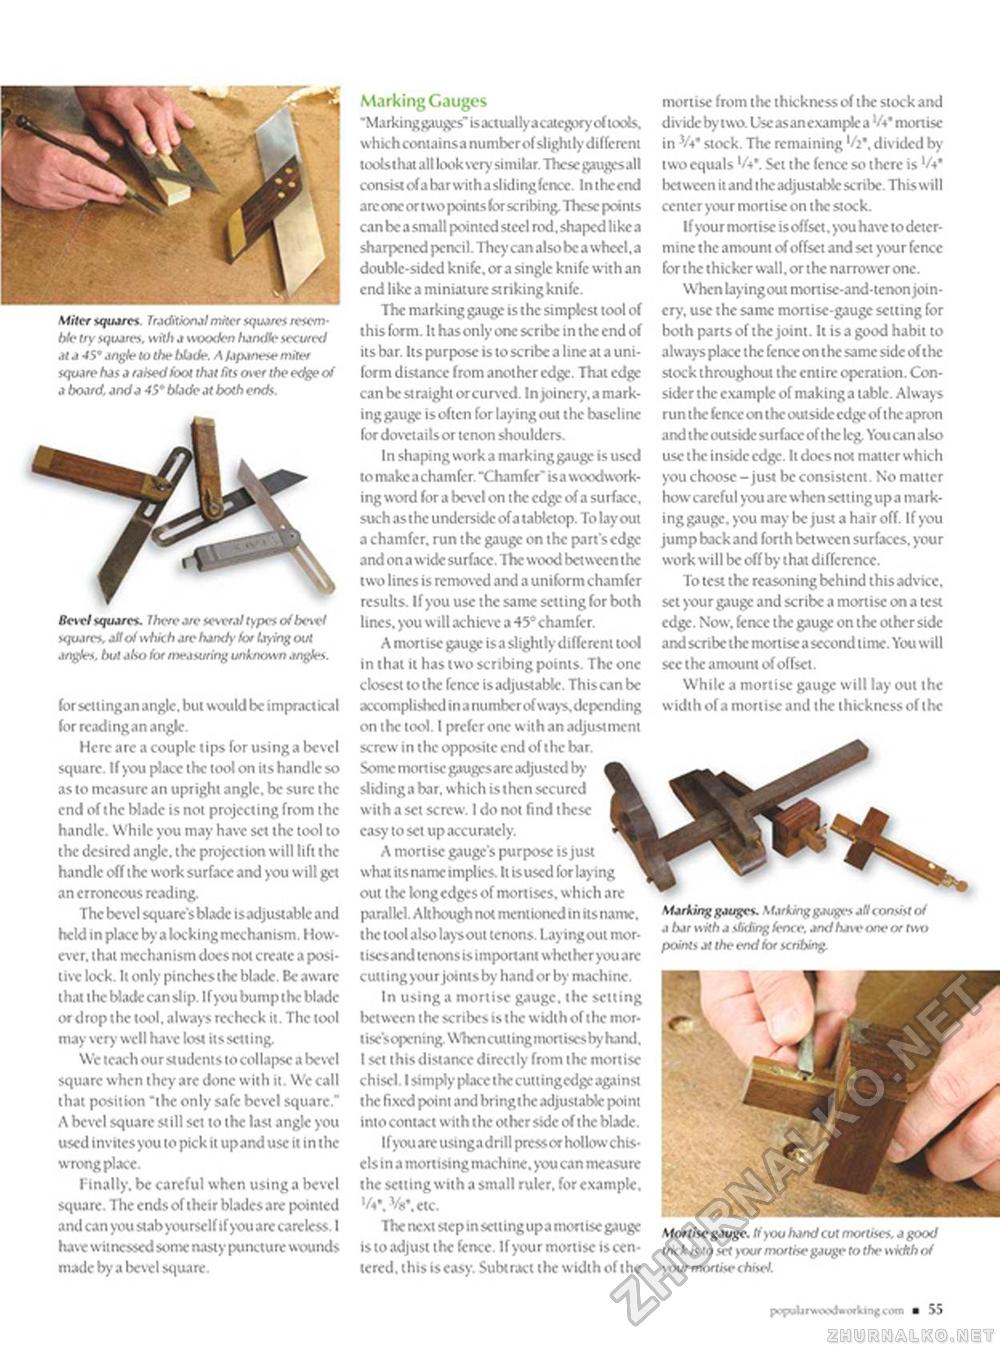
Miter squjres Traditional miter squares resem-Me try squares, with a wooden handle secured at a 45' angle to the blade. A lapanese miter square has a raised foot that Iits over the edge of a board, and a 45* blade at both ends. 7k Bevel square*. There are several types ofbesvl squares, all of \shkhare hand>• (or laying out angles, but also for measuring unknosvn angles. for sell ingan angle, bill would be impractical (or rcadingan angle. Here arc a couple tips for using a bevel square. If you place the tool on its handle so as to measure an upright angle, be sure the end of the blade is not projecting from the handle. While you may have set the tool to the desired angle, the projection will lift the handle off the work surface and you will get an erroneous reading. The bevel square's blade isadjustable and held in place byalockingmcchanism. However. thai mechanism docs not create a positive lock. It only pinches the blade. Be aware that the blade can slip. I f you bump the blade or drop the tool, always recheck it. The tool may very well haw lost its setting We teach ou r students to col lapse a bevel square when they arc done with it. We call that position "the only safe bevel square." A bevel square still set to the last angle you used invitesyou to pick it upand use it in the wrong place. Finally, be careful when using a bevel square. The ends of their blades are pointed and can you stab yourself if you are careless. I have witnessed son* nasty puncture wounds made by a bevel square. Marking Gauges "Markinggaugcs" isactually acatcgory of tools, whichcontainsanumberof slightly different loolsthat all look very similar. These giugesall consistofaharwithaslidingfence. Inthccnd arccnc or two points k>r scribing These points can be a small pointed steel rod, shaped like a sharpened pencil. They can also be a wheel, a double-sided knife, or a single knife with an end like a miniature striking knife. The marking gauge is the simplest tool of this form. It has only one scribe in the end of its bar. Its purpose is to scribe a line at a uniform distance from another edge. That edge can be straight or curved. In joinery, a tnark-inggaugc is often for laying out the haseline for dovetails or tenon shoulders. In shaping work a marking gauge is used to makca chamfcr. "Chamfer" is a woodworking word for a bevel on the edge of a surface, such as the underside of a tablctop. To layout a chamfer, run the gauge on the part's edge and on a wide surface. The wood between the two lines is removed and a uniform chamfer results. If you use the same setting for both lines, you will achieve a 45°chamfcr. A mortise gauge isaslighlly different tool in that it has two scribing points. The one closest to the fence isadjustable. Thiscan be accomplished inanumbcrofways. depending cm the tool. I prefer one with an adjustment screw in the opposite end of the bar. Some mortisegaugesare adjusted by-sliding a bar. which is then secured with a set screw. I do not find these easy to set up accurately. A mortise gauge's purpose is just what its name implies. It is used for laying out the longcdgcs of mortises, which are paralkl. Although not mentioned in its name, the tool alsolaysoul tenons. Laying out mor-t isesand lenons is important whether you are cutting your joints by hand or by machine. In using a mortise gauge, the setting between the scribes is the width of the mor-tisc'sopening When cutting mortises by hand. I set ihisdistance directly from ihc mortise chisel. I simply place the cuttingcdgr against the fixed point and bringtheadjustable point into contact with the other side of the blade. Ifyouareusingadrill press or hollow chisels in a mortising machine, you can measure the setting with a small ruler, for example. V«\V.etc. The next step in selling upa mort ise gauge is to adjust the fence. If your mortise is centered. this is easy. Subtract the widthof the mortise from the thickness of the stock and divkkbytwo-Useasancxamplca'A* mortise in V+* stock. The remaining '/i\ divided by two equals 'A*. Set the fence so there is 'A* between it and i he adjustable scribe. This will center your mort ise on the stock. If your mortise isoffsct. you have todetcr-mine the amount of offset and set your fence for the thicker wall, or the narrower one. When laying out mortise-and-tenon joinery. use the same mortise-gauge setting for both parts of the joint. It is a good habit to always place the fence on the same side of the stock throughout the entire operation. Consider the example of makinga table. Always run the fence on the outside edge of the apron and the outside surface of the leg You can also uscthc inside edge. It does not matter which you choose - just be consistent. No matter how careful you arc when setting upa mark-inggaugc. you may be just a hair off. If you jump back and forth between surfaces, your work will be off by that difference. To test the reasoning behind this advice, set your gauge and scribe a mortise on a test edge. Now. fence the gauge on the other side and scribe the mortise a second time. You will see the amount of offset. While a mortise gauge will lay out the width of a mortise and the thickness of ihe Vt^ Marling gauges. Markingg.tuges aNconsist of a bar with a sliding fence, and haw one or two points at the end for scribing. m Mortise gauge, tf you hand cut mortises, a good trick h to set your mortise gauge to the \s idth of your mortise chisel. pcpulirwmiaiHtingiiKn ■ 55 |


