Popular Woodworking 2008-11 № 172, страница 17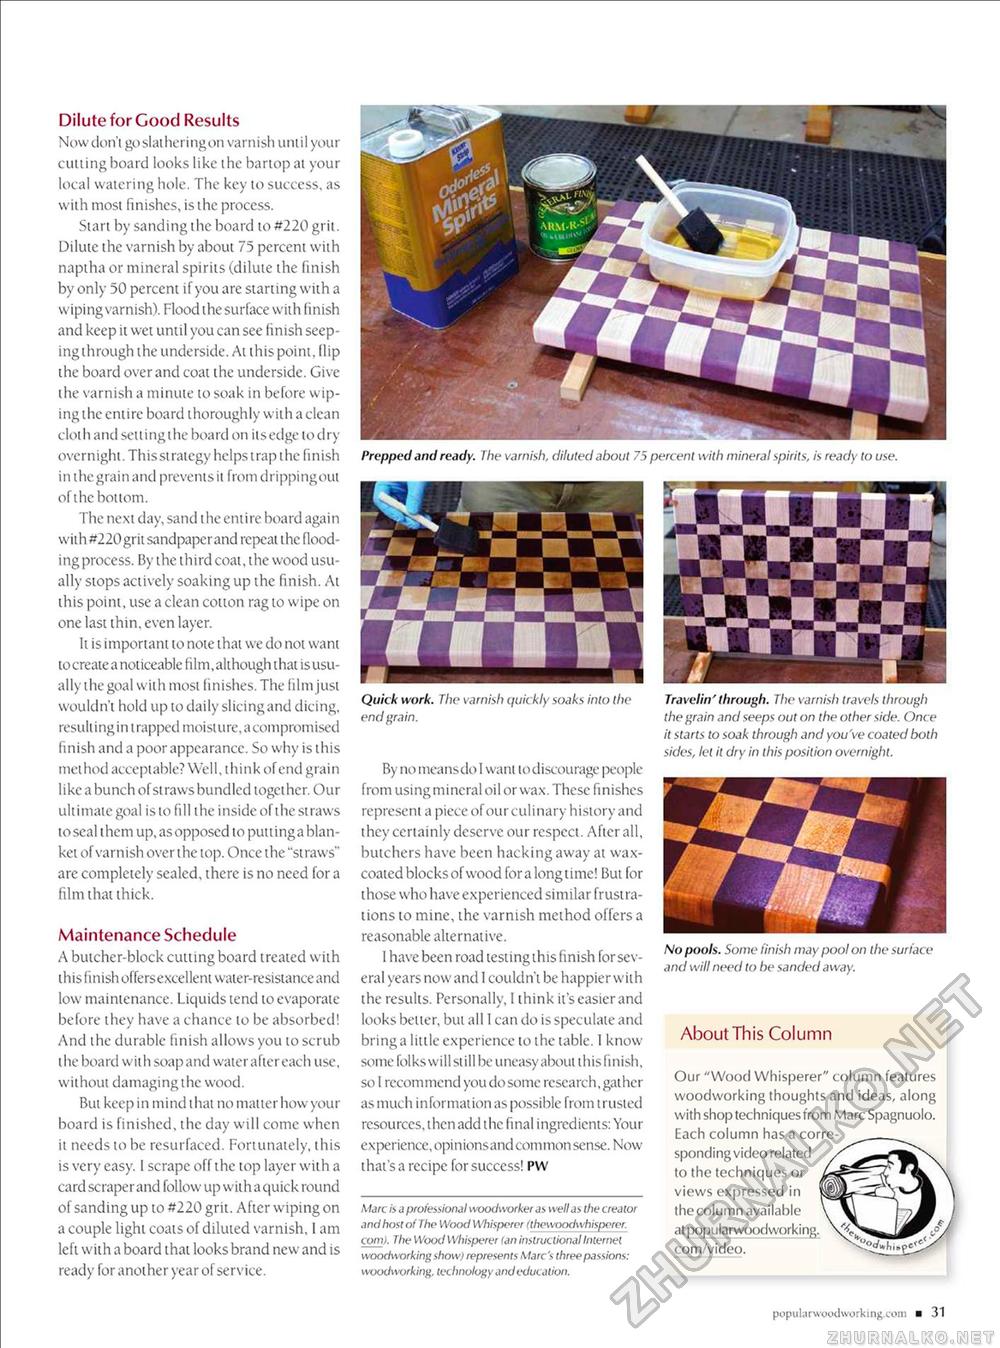
Prepped and ready. Ihe varnish, diluted about 75 percent with mineral spirits, is ready to use. Dilute for Good Results Now don't go slathering on varnish until your cutting board looks like the bartop at your local watering hole. The key to success, as with most finishes, is the process. Start by sanding the board to #220 grit. Dilute the varnish by about 75 percent with naptha or mineral spirits (dilute the finish by only 50 percent if you are starting with a wiping varnish). Flood the surface with finish and keep it wet until you can see finish seep-ing through the underside. At this point, flip the board over and coat the underside. Give the varnish a minute to soak in before wiping the entire board thoroughly with a clean cloth and setting the board on itsedge to dry-overnight. This strategy helps trap the finish in the grain and prevents it from dripping out of the bottom. The next day, sand the entire board again with #220 grit sandpaper and repeat the flooding process. By the third coat, the wood usually stops actively soaking up the finish. At this point, use a clean cotton rag to wipe on one last thin, even layer. It is important to note that we do not want to create a noticeable film, although that isusu-ally the goal with most finishes. The film just wouldn't hold up to daily slicing and dicing, resulting in trapped moisture, a compromised finish and a poor appearance. So why is this method acceptable? Well, think of end grain like a bunch of si raws bundled togci her. Our ultimate goal is to fill ihe inside of the straws to seal them up, as opposed to putting a blanket of varnish over the top. Once ihe "straws" are completely sealed, there is no need for a film that thick. Maintenance Schedule A butcher-block cutting board treated vviih this finish offersexcelleni water-resistance and low maintenance. Liquids tend to evaporate before they have a chance to be absorbed! And the durable finish allows you to scrub the board with soapand water after each use, without damagingthe wood. But keep in mind that no matter how your board is finished, the day will come when it needs to be resurfaced. Fortunately, this is very easy. I scrape off the top layer with a card scraper and follow up with a quick round of sanding up to #220 grit. After wiping on a couple light coats of diluted varnish, 1 am left with a board lhai looks brand new and is ready for another year of service. Quick work. The varnish quickly soaks into the end grain. By nomeansdol wanl lo discourage people from usingmineral oil or wax. These finishes represent a piece of our culinary history and ihey certainly deserve our respect. Aficr all, butchers have been hacking away at wax-coated blocks of wood for a long time! But for those who have experienced similar frustrations to mine, the varnish method offers a reasonable alternative. I have been road testing this finish for several years now and 1 couldn't be happier with the results. Personally, I think it's easier and looks better, but all 1 can do is speculate and bring a little experience to the table. I know some folks will still be uneasy about this finish, so I recommend you do some research, gather as much information as possible from t rusted resources, then add the final ingredients: Your experience, opinionsand common sense. Now that's a recipe for success! pw Marc is a professional woodworker as well as the creator and host of I hp Wood Whisperer (thewoodwhispcrcr. com). The Wood Whisperer Ian instructional Internet woodworking show/represents Marc's three passions: woodworking, technology and education. Traveliri' through. The varnish travels through the grain and seeps out on the other side. Once it starts to soak through and you've coated both sides, let it dry in this position overnight. No pools. Some finish may pool on the surface and will need to be sanded away. About This Column Our "Wood Whisperer" column features woodworking thoughts and ideas, along with shop techniques from Marc Spagnuolo. Each column has a corresponding video related to the techniques or views expressed in the column available at popularwoodworking. com/video. popularwooclworking.com ■ 31 |


