Popular Woodworking 2008-11 № 172, страница 14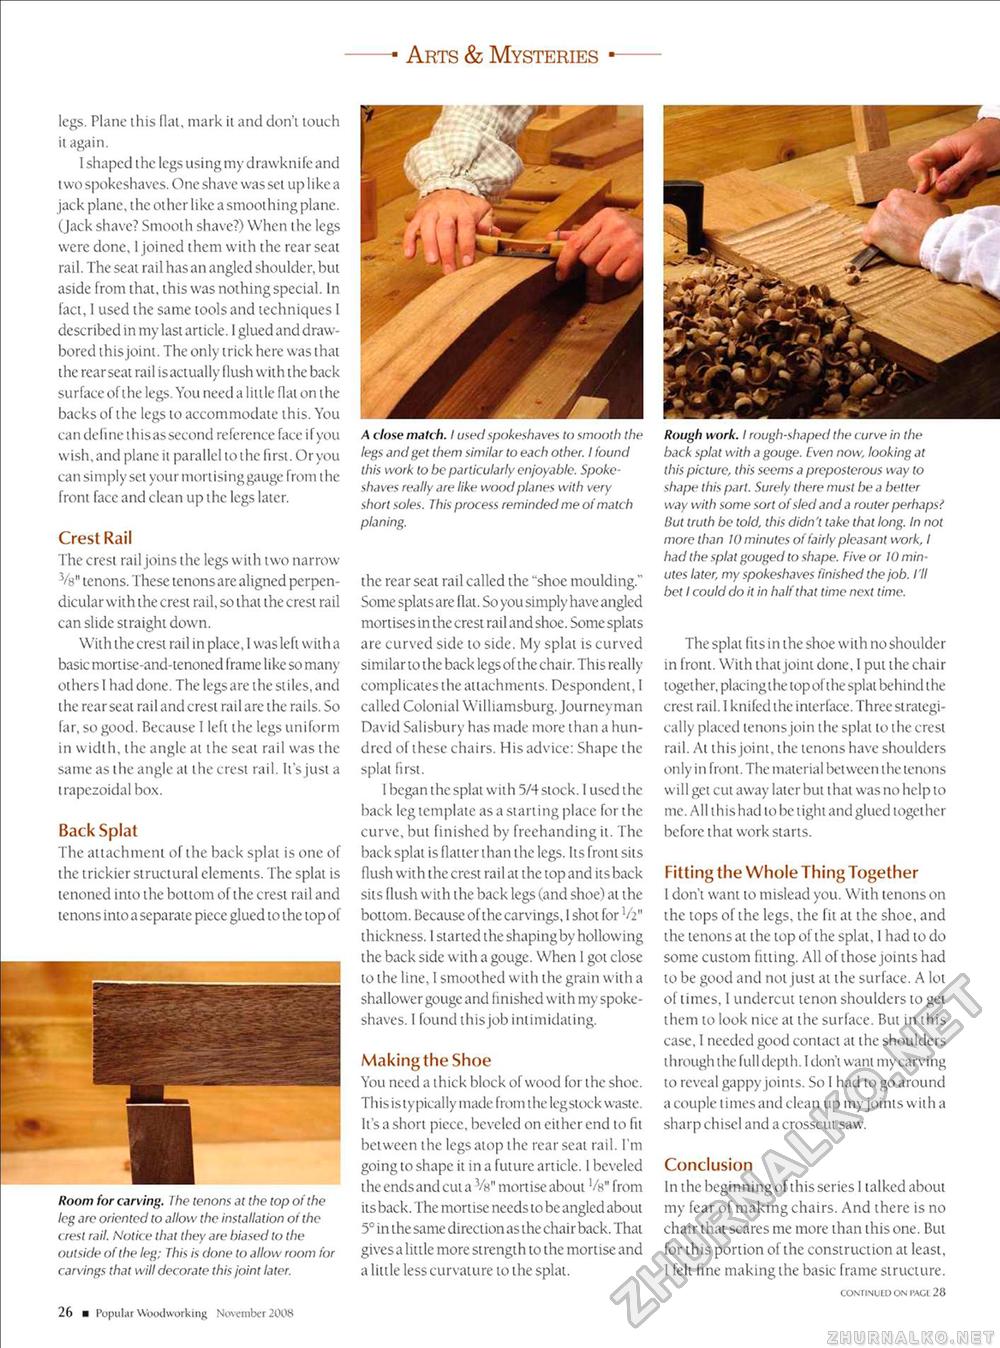
Arts & Mysteries legs. Plane this flat, mark it and don't touch it again. 1 shaped the legsusingmy drawknifeand two spokeshaves. One shave was set up like a jack plane, the other like a smoothing plane. (Jack shave? Smooth shave?) When the legs were done, 1 joined them with the rear seat rail. The seat rail has an angled shoulder, but aside from that, this was nothing special. In fact, 1 used the same tools and techniques I described in my last article. 1 glued and draw-bored this joint. The only trick here was that the rearseat rail isactually (lush with the back surface of the legs. You need a little flat on the backs of the legs to accommodate this. You can define thisassecond reference face ifyou wish, and plane it parallel to the first. Or you can simply set your mortising gauge from the front face and clean up the legs later. Crest Rail The crest rail joins the legs with two narrow Vs" tenons. These tenons are aligned perpendicular with the crest rail, so that the crest rail can slide straight down. With the crest rail in place, I was left with a basic mortise-and-ienoned frame like so many others 1 had done. The legsare the stiles, and the rearseat rail and crest rail are the rails. So far, so good. Because 1 left the legs uniform in width, the angle at the seat rail was the same as the angle at the crest rail. It's just a trapezoidal box. Back Splat The attachment of the back splat is one of the trickier structural elements. The splat is tenoned into the bottom of the crest rail and tenons into a separate piece glued to the top of Room for carving. The tenons at the top of the leg are oriented to allow the installation of the crest rail. Notice that they are biased to the outside of the leg; This is done to allow room for carvings that will decorate this joint later. A close match. I used spokeshaves to smooth the legs and get them similar to each other. I found this work to be particularly enjoyable. Spokeshaves really are like wood planes with very short soles. This process reminded me of match planing. the rear seat rail called the "shoe moulding." Some splatsare flat. So you simply have angled mortises in the crest rail and shoe. Some splats are curved side to side. My splat is curved similar to the back legsol the chair. This really complicates the attachments. Despondent, I called Colonial Williamsburg. Journeyman David Salisbury has made more than a hundred of these chairs. His advice: Shape the splat first. I began thesplat with 5/4stock. I used the back leg template as a starting place forthe curve, but finished by freehanding it. The back splat is flatter than the legs. Its front sits Hush with the crest rail at the top and its back sits Hush with the back legs (and shoe) at the bottom. Because ol the carvings, 1 shot for V211 thickness. I started the shaping by hollowing the back side with a gouge. When 1 got close to the line, 1 smoothed with the grain with a shallower gouge and finished with my spokeshaves. I found this job intimidating. MakingtheShoe You need a thick block of wood for the shoe. This is typically made from the legstixk waste. It's a short piece, beveled on either end to fit between the legs atop the rearseat rail. I'm going to shape it in a future article. I beveled the ends and cut a Vg" mortise about Vg* from its back. The mortise needs to be angled about 5° in the same direction as the chair back. That gives a little more strength to the mortise and a little less curvature to the splat. Rough work. I rough-shaped the curve in the back splat with a gouge. Even now. looking at this picture, this seems a preposterous way to shape this part. Surely there must be a better way with some sort of sled and a router perhaps? But truth be told, this didn't take that long. In not more than 10 minutes of fairly pleasant work, I had the splat gouged to shape. Five or W minutes later, my spokeshaves finished the job. I'll bet I could do it in half that time next time. The splat fits in the shoe with no shoulder in front. With that joint done, I put the chair together, placingthe top of the splat behind the crest rail. I knifed the interface. Three strategically placed tenons join the splat to the crest rail. At this joint, the lenons have shoulders only in front. The material between the lenons will get cut away later but t hat was no help to me. All this had to be tight and glued together before that work starts. Fitting the Whole Thing Together I don't want to mislead you. With lenons on the tops of the legs, the fit at the shoe, and the lenons at ihe top of the splat, 1 had to do some custom fitting. All of those joints had 10 be good and not just ai the surface. A lot of times, I undercut tenon shoulders 10 gel them to look nice ai the surface. Bui in this case, 1 needed good contact ai the shoulders through the full depth. I don't want my carving to reveal gappy joints. So I had to go around a couple limes and clean up my joints with a sharp chisel and a crosscut saw. Conclusion In the beginning of this series 1 talked about my fear of making chairs. And there is no chair thai scares me more than this one. But for this portion of ihe construction ai least, 1 fell fine making the basic frame structure. CONIINUID ON PACt 28 26 ■ Popul ar Woodworking November 2008 |


