Popular Woodworking 2008-11 № 172, страница 11
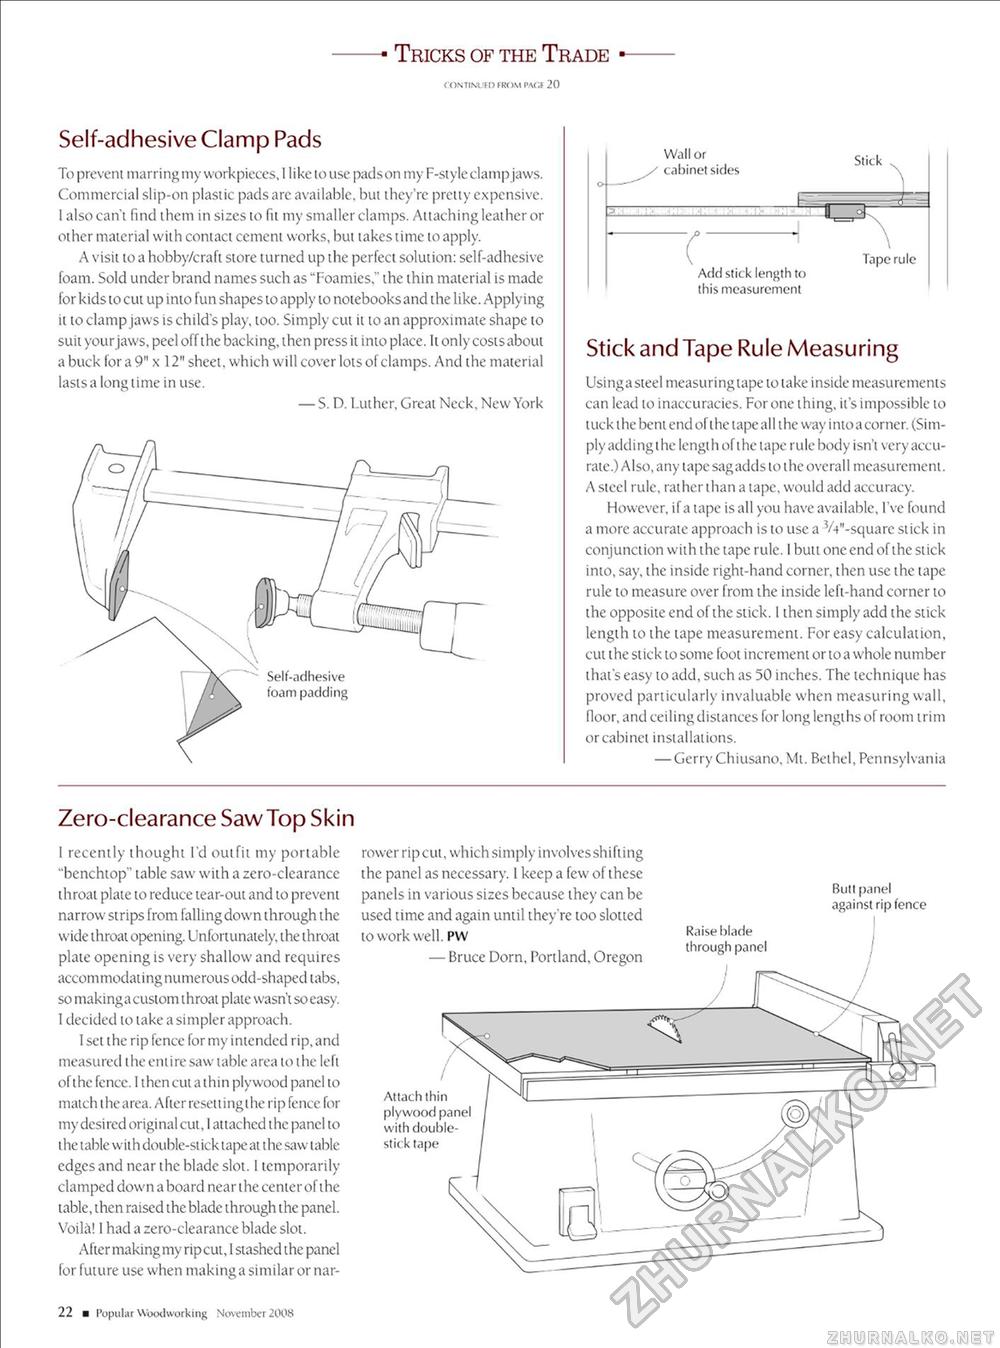
Tricks of the Trade CONTINUED FROM PACf 20 Self-adhesive Clamp Pads To prevent marring my workpieces, 11 i ke to use pads on my F-style clamp jaws. Commercial slip-on plastic pads are available, but they're pretty expensive. I also can't find them in sizes to fit my smaller clamps. Attaching leather or other material with contact cement works, but takes time to apply. A visit to a hobby/craft store turned up the perfect solution: self-adhesive foam. Sold under brand names such as "Foamies." the thin material is made for kids to cut up into fun shapes to apply to notebooks and the like. Applying it to clamp jaws is child's play, too. Simply cut it to an approximate shape to suit your jaws, peel off the backing, then press it into place. It only costs about a buck lor a 9" x 12" sheet, which will cover lots of clamps. And the material lasts a longtime in use. — S. D. Luther, Great Neck. New York Wall or cabinet sides Stick Add stick length to this measurement Stick and Tape Rule Measuring Usingasteel measuringtape to take inside measurements can lead to inaccuracies. For one thing, it's impossible to tuck the bent end of the tape all the way intoa corner. (Simply adding the length of the tape rule body isn't very accurate.) Also, any tape sag adds to the overall measurement. A steel rule, rather than a tape, would add accuracy. However, if a tape is all you have available, I've found a more accurate approach is to use a W'-square stick in conjunction with the tape rule. I butt one end of the stick into, say, the inside right-hand corner, then use the tape rule to measure over from the inside left-hand corner to the opposite end of the stick. I then simply add the stick length to the tape measurement. For easy calculation, cut the slick to some foot increment or 10 a whole number that's easy to add, such as 50 inches. The technique has proved particularly invaluable when measuring wall, floor, and ceiling distances for long lengths of room irim or cabinet installations. — Gerry Chiusano, Ml. Bethel, Pennsylvania Zero-clearance Saw Top Skin I recently thought I'd outfit my portable "benchtop" table saw with a zero-clearance throat plate to reduce tear-out and to prevent narrow strips from falling down through the wide throat opening. Unfortunately, the throat plate opening is very shallow and requires accommodaling numerous odd-shaped tabs, so making a custom throat plaie wasn't so easy. 1 decided to take a simpler approach. I sel the rip fence for my intended rip, and measured the entire saw table area to ihe left of the fence. I then cut a thin plywood panel lo match the area. After resettingthe rip fence for my desired original cut, I attached the panel to the table w it h double-stick tape at i he saw table edges and near the blade slot. 1 temporarily clamped down aboard nearthe centerof the table, then raised the blade through the panel. Voila! I had a zero-clearance blade slot. After making my ripcut. 1 stashed the panel lor future use when making a similar or nar rower ripcut, whichsimply involves shifting the panel as necessary. I keep a few of these panels in various sizes because they can be used time and again until they're too slotted to work well, pw — Bruce Dorn, Portland, Oregon Raise blade through panel But! panel against rip fence Attach thin plywood panel with double-stick tape 22 a Popular Woodworking November 2008 |


