Popular Woodworking 2008-11 № 172, страница 13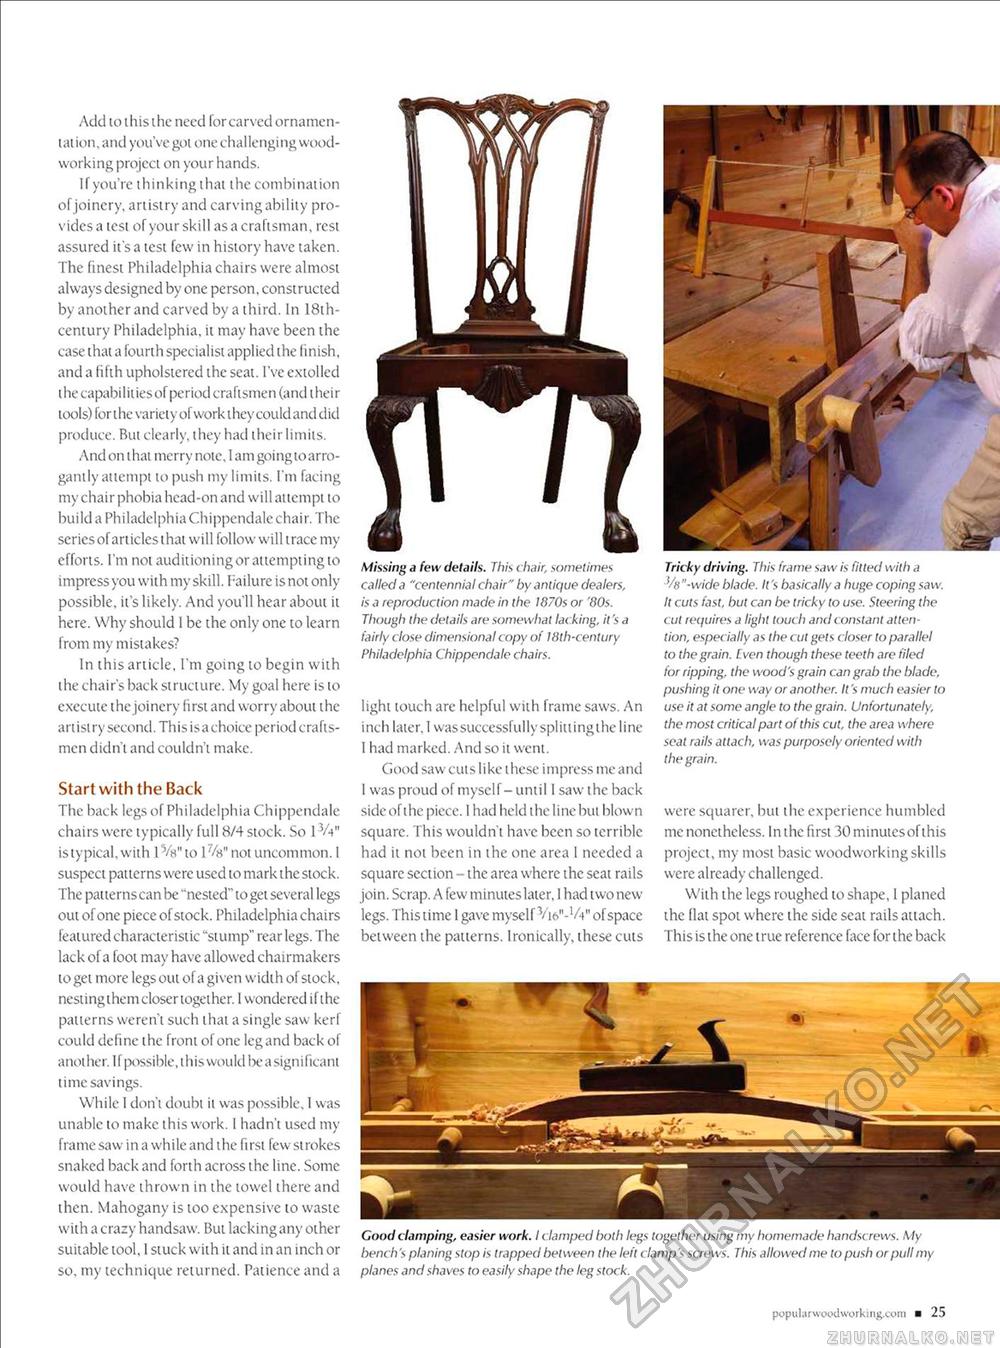
Add to ihis the need forcarved ornamentation, and you've got one challenging woodworking project on your hands. If you're thinking that ihe combination of joinery, artistry and carving ability provides a test of your skill as a craftsman, rest assured it's a test few in history have taken. The finest Philadelphia chairs were almost always designed by one person, constructed by another and carved by a third. In 18th-century Philadelphia, it may have been the case that a fourth specialist applied the finish, and a fifth upholstered the seat. I've extolled t he capabilities of period craftsmen (and t heir tools) for the variety of work they could and did produce. But clearly, they had their limits. And on t hat merry note, 1 am going to arrogant ly attempt to push my limits. I'm facing my chair phobia head-on and will attempt to build a Philadelphia Chippendale chair. The scries of articles that will follow will trace my efforts. I'm not auditioning or attempting to impress you with my skill, failure is not only-possible. it's likely. And you'll hear about it here. Why should I be the only one to learn from my mistakes? In this article, I'm going to begin with the chair's back structure. My goal here is to execute the joinery first and worry about the artistry second. Thisisachoice period craftsmen didn't and couldn't make. Start with the Back The back legs of Philadelphia Chippendale chairs were typically full 8/4 stock. So 1 -Vy is typical, with lVa"to 1%" not uncommon. 1 suspect patterns were used to mark the stock. The patterns can be "nested" to get several legs out of one piece of stock. Philadelphia chairs featured characteristic "stump" rear legs. The lack of a foot may have allowed chairmakers to get more legs out of a given width of stock, nestingthem closer together. I wondered if the patterns weren't such that a single saw kerf could define the front of one legand back of another. If possible, this would be a significant time savings. While I don't doubt it was possible, I was unable to make this work. I hadn't used my frame saw i n a wh i le and the fi rst few st rokes snaked back and forth across the line. Some would have thrown in the towel there and then. Mahogany is too expensive to waste with a crazy handsaw. Bui lacking any other suitable tool, 1 stuck with it and in an inch or so. my technique returned. Patience and a Missing a few details. This ( hair, sometimes called a "centennial chair" by antique dealers, is a reproduction made in the 1870s or '80s. Though the details are somewhat lac king, it's a fairly close dimensional copy of 18th-century Philadelphia Chippendale chairs. light louch are helpful with frame saws. An inch later. I was successfully spliuingthe line 1 had marked. And so it went. Good saw cuts like these impress me and 1 was proud of myself- until I saw the back side of the piece. I had held the line but blown square. This wouldn't have been so terrible had it not been in the one area I needed a square section - the area where the seat rails join. Scrap. A few minutes later, 1 had two new legs. This lime 1 gave myself V^-Vy of space between ihe patterns. Ironically, these cuts Tricky driving. This frame saw is fitted with a ^8"-wide blade. It's basically a huge coping saw. It cuts fast, but can be tricky to use. Steering the cut requires a light touch and < onstant attention, especially as the cut gets closer to parallel to the grain. Even though these teeth are filed for ripping, the wood's grain can grab the blade, pushing it one way or another. It's much easier to use it at some angle to the grain. Unfortunately, the most critical part of this cut, the area where seat rails attach, was purposely oriented with the grain. were squarer, but the experience humbled me nonetheless. In the first 30 minutesofthis project, my most basic woodworking skills were already challenged. With the legs roughed to shape, 1 planed the flat spot where the side seat rails auach. This is the one true reference face for the back Good clamping, easier work. I clamped both legs together using my homemade handscrews. My bench's planing stop is trapped between the left clamp's screws. This allowed me to push or pull my planes and shaves to easily shape the leg stock. popularwooclworking.com ■ 25 |


