Popular Woodworking 2008-11 № 172, страница 32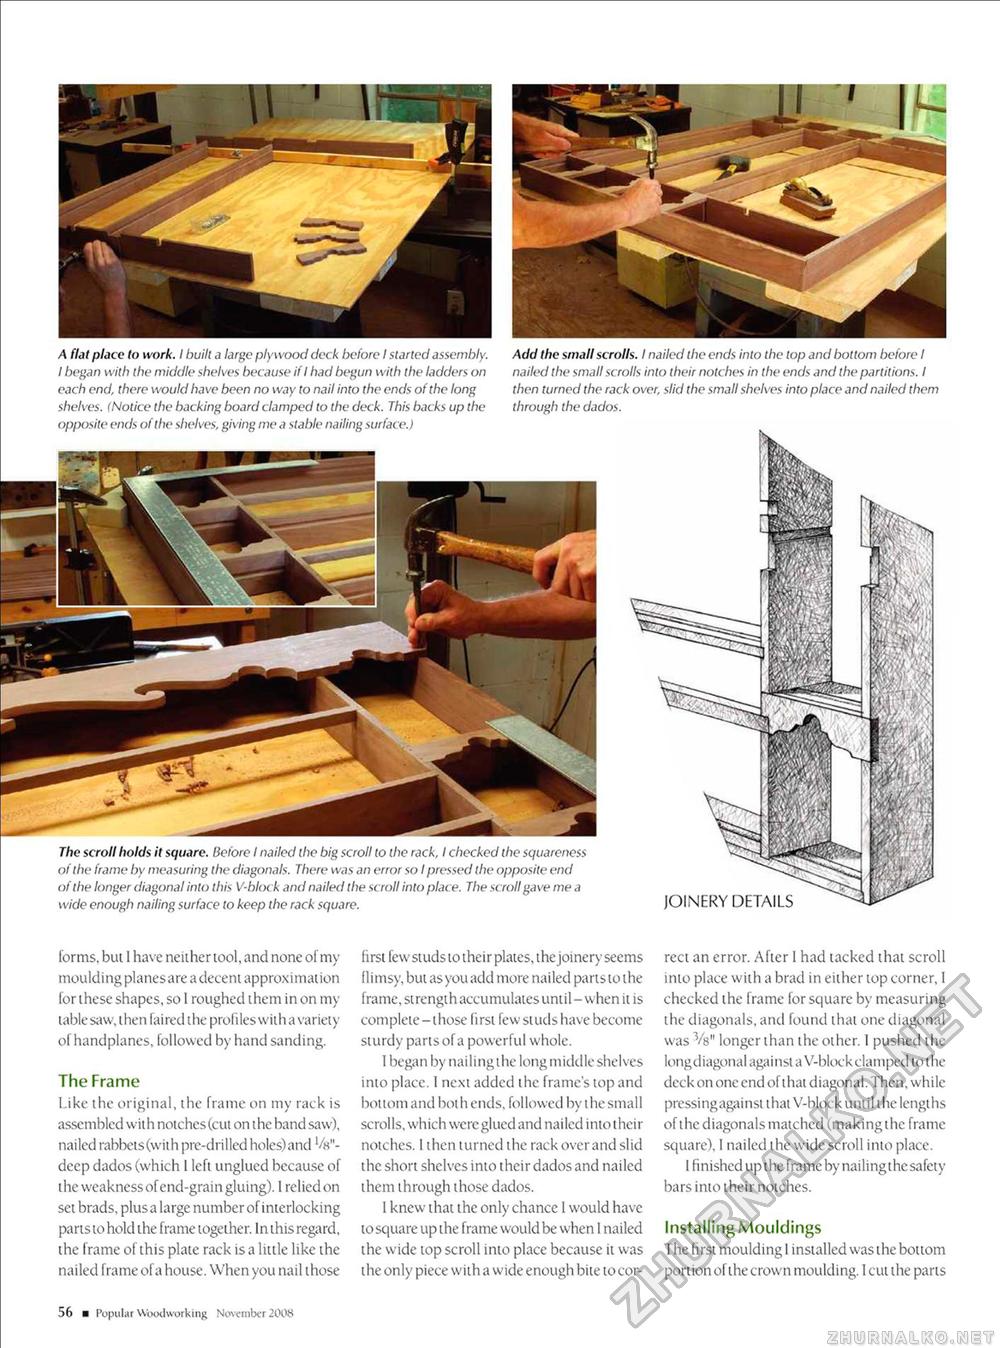
The scroll holds it square. Before I nailed the big scroll lo ilie rack, I checked ihe squareness of the frame by measuring the diagonals. There was an error so I pressed the opposite end of the longer diagonal into this V-block and nailed the scroll into place. The scroll gave me a wide enough nailing surface to keep the rack square. JOINERY DETAILS A flat place to work. I built a large plywood deck before I started assembly. I began with the middle shelves because if I had begun with the ladders on each end, there would have been no way to nail into the ends of the long shelves. I Notice the backing board clamped to the deck. This backs up the opposite ends of the shelves, giving me a stable nailing surface.) Add the small scrolls. I nailed the ends into the lop and bottom before I nailed the small scrolls into their notches in the ends and the partitions. I then turned the rack over, slid the small shelves into place and nailed them through the dados. forms, but 1 have neither tool, and none of my moulding planes are a decent approximation for these shapes, so 1 roughed them in on my table saw, then faired the profiles with a variety ol handplanes, followed by hand sanding. The Frame Like the original, the frame on my rack is assembled with notches(cut on the band saw), nailed rabbets(with pre-drilled holes)and l/«"-deep dados (which I left unglued because of the weakness of end-grain gluing). 1 relied on set brads, plusa large number of interlocking parts to hold the frame together. In this regard, the frame of this plate rack is a little like the nailed frame of a house. When you nail those 56 ■ Popul ar Woodworking November 2008 first lew studs to their plates, the joinery seems fl i msy, but as you add more nailed parts to the frame, strength accumulates until - when it is complete -1hose fi rst few si uds have become sturdy parts of a powerful whole. I began by nailingthe longmiddle shelves into place. 1 next added ihe frame's top and bottom and bothends, followed by the small scrolls, which were glued and nailed into their notches. 1 ihen turned the rack over and slid the short shelves into their dados and nailed them through those dados. I knew that the only chance 1 would have to square up the frame would be when I nailed the wide top scroll into place because it was the only piece with a wide enough bite to cor rect an error. After 1 had tacked that scroll into place with a brad in either top corner, I checked the frame for square by measuring the diagonals, and found that one diagonal was Vs" longer than the other. I pushed the longdiagonal against a V-block clamped to the deck on one end of that diagonal. Then, while pressingagainst that V-block until the lengths of the diagonals matched (makingthe frame square), 1 nailed the wide scroll into place. I finished up the frame by nailingthe safety bars into their notches. Installing Mouldings The first moulding 1 installed was the bottom portion of the crown moulding. 1 cut the parts |


