Popular Woodworking 2008-11 № 172, страница 33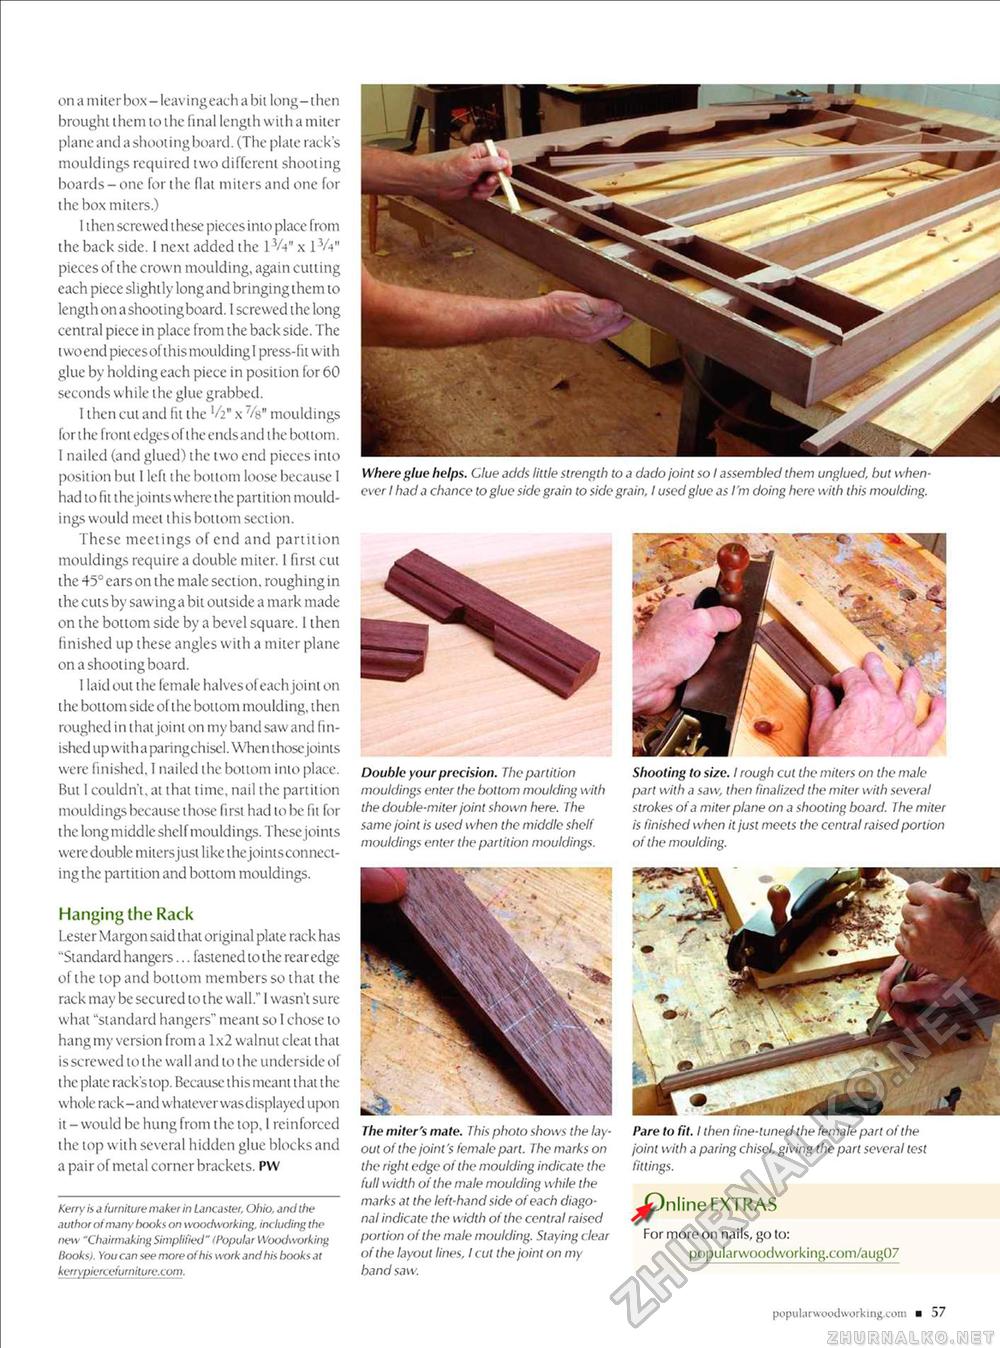
on a m iter box - leav i ngeach a bit long-1hen brought them to the final length with a miter plane and a shooting board. (The plate t ack's mouldings required two different shooting boards-one for the flat miters and one for the box miters.) I then screwed these pieces into place from the back side. I next added the 13A" x 13A" pieces of the crown moulding, again cutting each piece slightly longand bringing them to length onashootingboard. 1 screwed the long central piece in place from the back side. The two end pieces ofthis moulding I press-fit with glue by holding each piece in position for 60 seconds while the glue grabbed. I then cut and fit the '/2n x 7/s" mouldings for i he front edges oft he ends and t he bot torn. I nailed (and glued) the two end pieces into position hut I left the bottom loose because 1 had to fit the joints where the partition mouldings would meet this bottom section. These meetings of end and partition mouldings require a double miter. I first cut the 45° ears on the male section, roughing in the cuts by sawing a bit outside a mark made on the bottom side by a bevel square. I then finished up these angles with a miter plane on a shooting board. 1 laid out the female halves of each joint on the bottom side of the bottom moulding, then roughed in that joint on my band saw and finished up withaparingchisel.When those joints were finished. 1 nailed the bottom into place. But I couldn't, at that time, nail the partition mou Id i rigs because 11 lose fi rst had t o be fi t for the long middle shelf mouldings. Thescjoints were double miters just like t hejoi nt s con nect-ing the partition and bottom mouldings. Hanging the Rack Lester Margon said that original plate rack has "Standard hangers... fastened to the rear edge of the top and bottom members so that the rack may be secured to the wall." I wasn't sure what "standard hangers" meant so I chose to hang my version from a 1 x2 walnut cleat t hat is screwed to the wall and to the underside of the plate rack's top. Because this meant that the whole rack-and whatever wasdisplayed upon it - would be hung from the top, I reinforced the top with several hidden glue blocks and a pair of metal corner brackets. pw Kerry is a furniture maker in Lancaster, Ohio, and the author oimany hooks on woodworking, including the new "Chairmaking Simplified" 'Popular Woodworking Hooks). You can see more of his work and his hooks at kerrypiercefurniture.com. Where glue helps. Clue adds little strength to a dado joint so I assembled them unglued, but whenever I had a chance lo glue side grain to side grain, I used glue as I'm doing here with this moulding. Double your precision. The partition mouldings enter the bottom moulding with the double-miter joint shown here. The same joint is used when the middle shelf mouldings enter the partition mouldings. The miter's mate. This photo shows the layout of the joint's female part. The marks on the right edge of the moulding indicate the full width of the male moulding while the marks at the left-hand side of each diagonal indicate the width of the central raised portion of the male moulding. Staying clear of the layout lines, I cut the joint on my band saw. Shooting to size. I rough cut the miters on the male part with a saw, then finalized the miter with several strokes of a miter plane on a shooting board. The miter is finished when it just meets the central raised portion of the moulding. Pare to fit. I then fine-tuned the female part of the joint with a paring chisel, giving the part several test fittings. Jpnline EXTRAS For more on nails, go to: popularwoodworking.com/aug07 popularwooclworking.com ■ 57 |


