Popular Woodworking 2008-12 № 173, страница 57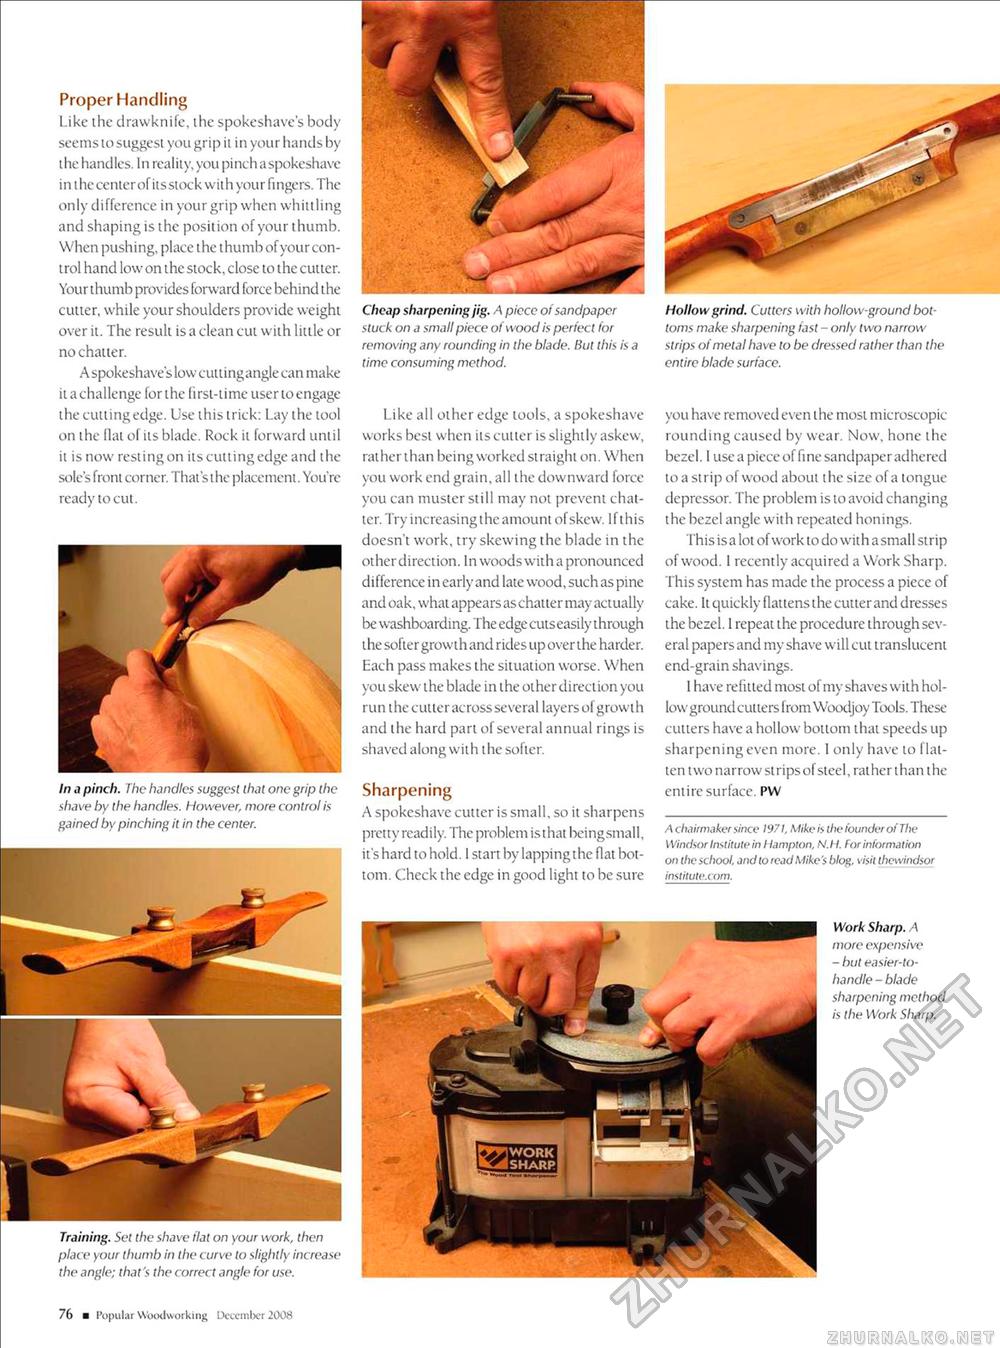
Proper Handling Like the drawknife, the spokeshave's body seems to suggest you grip it in your hands by the handles. I n reality, you pinch a spokeshave in the center of its stock with your fingers. The only difference in your grip when whittling and shaping is the position of your thumb. When pushing, place the thumb of your control hand low on the stock, close to the cutter. Your thumb provides forward force behind the cutter, while your shoulders provide weight over it. The result is a clean cut with little or no chatter. A spokeshave's low cuttingangle can make it a challenge for the first-time user to engage the cutting edge. Use this trick: Lay the tool on the Hat of its blade. Rock it forward until it is now resting on its cutting edge and the sole's front corner. That sthe placement. You're ready to cut. In a pinch. The handles suggest that one grip the shave by the handles. However, more control is gained by pinching it in the center. Cheap sharpening jig. A piece of sandpaper stuck on a small piece of wood is perfect for removing any rounding in the blade. Hut this is a time consuming method. Like all other edge tools, a spokeshave works best when its culler is slightly askew, rather than being worked straight on. When you work end grain, all the downward force you can muster still may not prevent chatter. Try increasing the amount of skew. If this doesn't work, try skewing the blade in the other direction. In woods with a pronounced difference in early and late wood, such as pine and oak, what appears as chatter may actually be washboarding. The edge cuts easily through the softer growth and rides up over the harder. Each pass makes the situation worse. When you skew the blade in the other direction you run the cutter across several layers of growth and the hard part of several annual rings is shaved along with the softer. Sharpening A spokeshave cutter is small, so it sharpens pretty readily. The problem is that beingsmall, it's hard to hold. I start by lapping the flat bottom. Check the edge in good light to be sure Hollow grind. Cutters with hollow-ground bottoms make sharpening fast - only two narrow strips of metal have to be dressed rather than the entire blade surface. you have removed even the most microscopic rounding caused by wear. Now, hone the bezel. I useapieceoffinesandpaperadhered to a strip of wood about the size of a tongue depressor. The problem is to avoid changing the bezel angle with repeated honings. This isa lot ofwork to do with asmall strip of wood. I recently acquired a Work Sharp. This system has made the process a piece of cake. It quickly flattens the cutter and dresses the bezel. 1 repeat the procedure through several papers and my shave will cut translucent end-grain shavings. 1 have refitted most of my shaves with hollow ground cutters from Woodjoy Tools. These cutters have a hollow bottom that speeds up sharpening even more. 1 only have to flatten two narrow strips of steel, rathcrthan the entire surface. PW Achairmaker since 1971, Mike is the founder ol The Windsor Institute in I tampton, N.I I. For information on the school, and to read Mike's blog. visit thewindsor institute.com. Work Sharp. A more expensive - but easier-to-handle - blade sharpening method is the Work Sharp. Training. Set the shave flat on your work, then place your thumb in the curve lo slightly increase the angle; that's the correct angle for use. 76 ■ Popul ar Woodworking December 2008 |


