Popular Woodworking 2008-12 № 173, страница 55
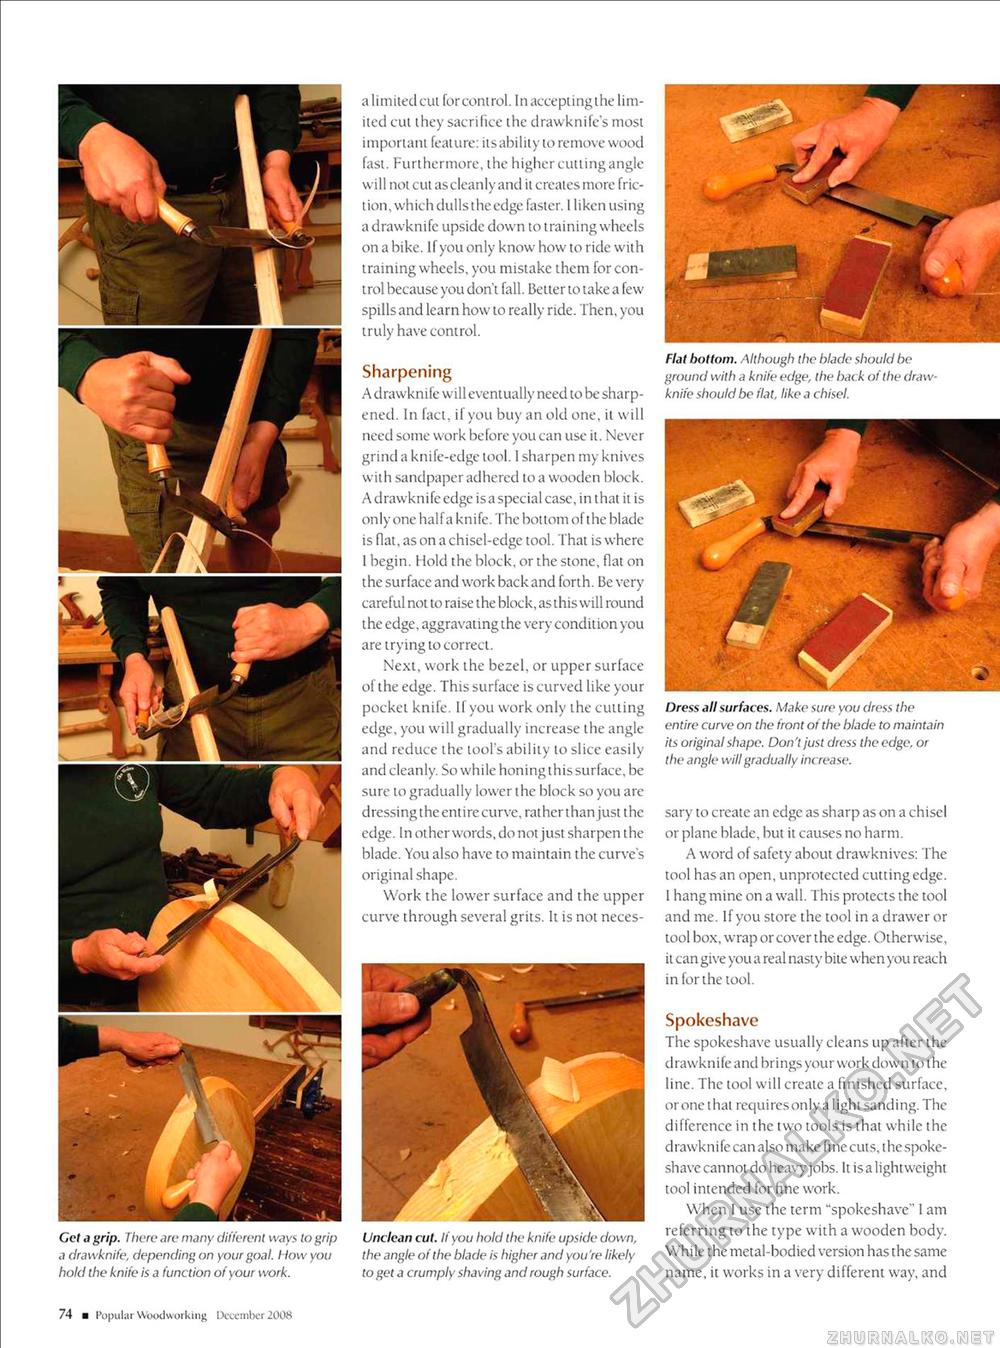
Gel a grip. There are many different ways lo grip a drawknife, depending on your goal. I low you hold the knife is a function of your work. a 1 i miied cui for control. I n accepting the lim-ited cut they sacrifice the drawknife's most important feature: its ability to remove wood fast. Furthermore, the higher cutting angle will not cut as cleanly and it creates more friction, which dulls the edge faster. 1 liken using a drawknife upside down to training w heels on a bike. If you only know how to ride with training wheels, you mistake them for control because you don't fall. Better to take a few spillsand learn how to really ride. Then, you truly have control. Sharpening A drawknife will eventually need to be sharpened. In fact, if you buy an old one, it will need some work before you can use it. Never grind a knife-edge tool. I sharpen my knives with sandpaper adhered lo a wooden block. A drawknife edge isa special case, in thai it is only one half a knife. The bottom of the black-is fiat, as on a chisel-edge tool. That is where 1 begin. Hold the block, or the stone, flat on the surface and work back and forth. Be very-careful noi to raise the block, as this will round ihe edge, aggravating the very condition you are trying lo correct. Next, work the bezel, or upper surface of the edge. This surface is curved like your pocket knife. If you work only the cutting edge, you will gradually increase the angle and reduce the tool's ability to slice easily and cleanly. So while honing this surface, be sure to gradually lower the block so you are dressing the entire curve, ratherthan just the edge. In other words, do not just sharpen the blade. You also have to maintain the curve's original shape. Work the lower surface and the upper curve through several grits. It is not neces- Flal bottom. Although the blade should be ground with a knife edge, the back of Ihe drawknife should be flat, like a chisel. Unclean cut. If you hold the knife upside down, the angle of the blade is higher and you're likely to get a crumply shaving and rough surface. Dress all surfaces. Make sure you dress the entire curve on the front of the blade to maintain its original shape. Don't just dress the edge, or ihe angle will gradually increase. sary to create an edge as sharp as on a chisel or plane blade, but it causes no harm. A word of safety about drawknives: The tool has an open, unprotected cutting edge. 1 hang mine on a wall. This protects the tool and me. If you store the tool in a drawer or tool box, wrap or cover the edge. Otherwise, it can give you a real nasty bite when you reach in for the tool. Spokeshave The spokeshave usually cleans up after the drawknife and brings your work down to i he line. The tool will create a finished surface, or one t hat requires only a 1 ight sanding. The difference in the two tools is that while the drawknife can also make fine cuts, lhe spokeshave cannot do heavy jobs. It is a lightweight tool intended for fine work. When 1 use the term "spokeshave" I am referring to the type with a wooden body. While the metal-bodied version has the same name, it works in a very different way, and 74 ■ Popul ar Woodworking December 2008 |


