Popular Woodworking 2009-02 № 174, страница 36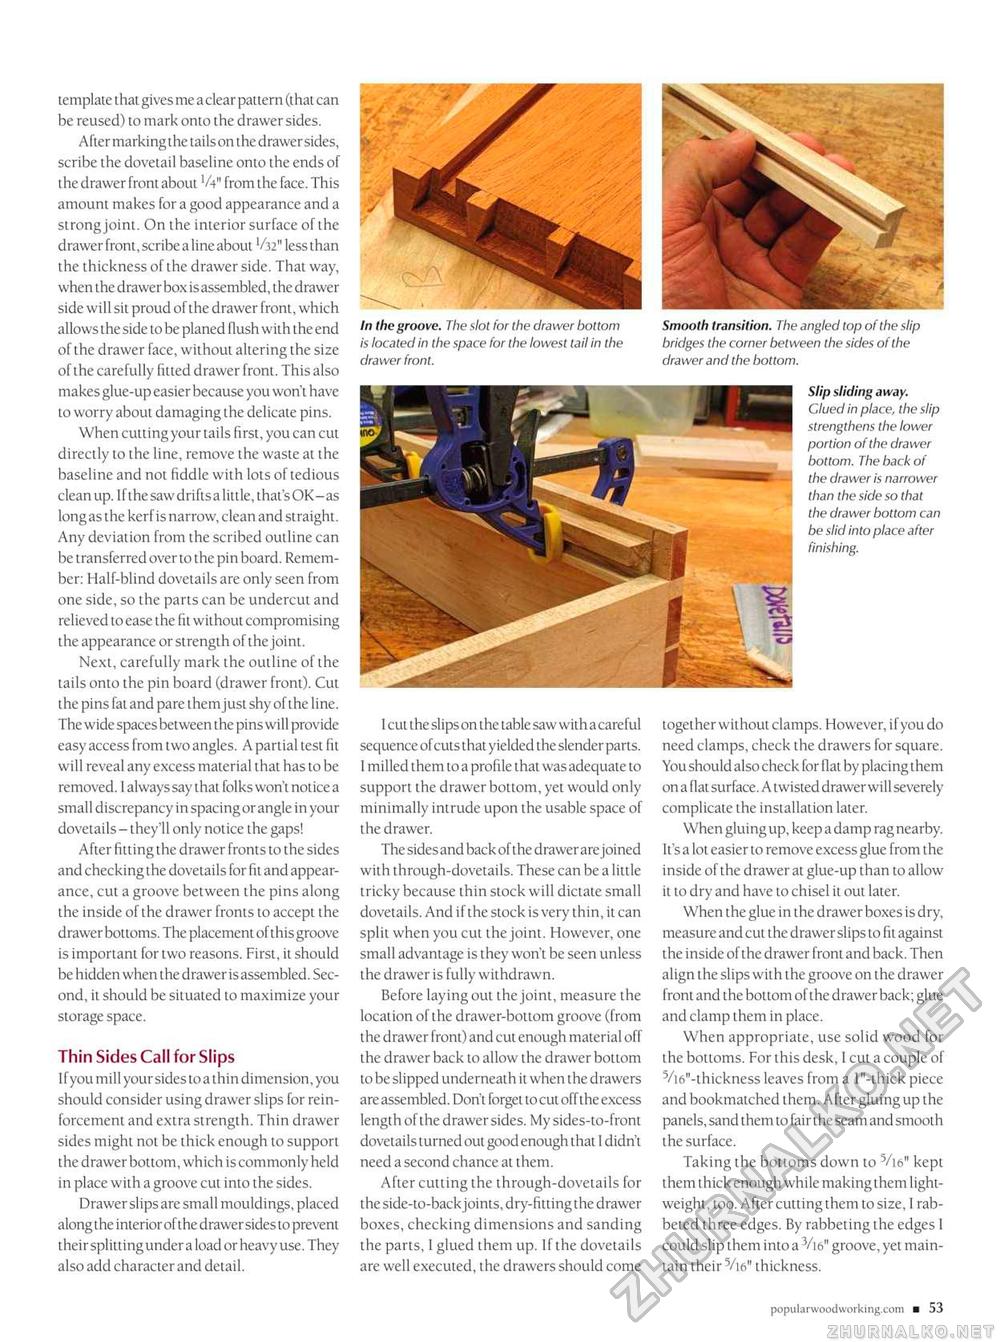
template that gives me a clear pattern (that can be reused) to mark onto the drawer sides. Aftermarkingthe tails on thedrawersides, scribe the dovetail baseline onto the ends of the drawer front about 'A" from the face. This amount makes for a good appearance and a strong joint. On the interior surface of the drawer front, scribe a line about '/32n less than the thickness of the drawer side. That way, when the drawer box is assembled, the drawer side will sit proud of the drawer front, which allows the side to be planed flush with the end of the drawer face, without altering the size of the carefully fitted drawer front. This also makes glue-up easier because you won't have to worry about damaging the delicate pins. When cutting your tails first, you can cut directly to the line, remove the waste at the baseline and not fiddle with lots of tedious cleanup. If the saw driftsa little, that's OK-as long as the kerf is narrow, clean and straight. Any deviation from the scribed outline can be transferred overto the pin board. Remember: Half-blind dovetails are only seen from one side, so the parts can be undercut and relieved to ease the fit without compromising the appearance or strength of the joint. Next, carefully mark the outline of the tails onto the pin board (drawer front). Cut the pins fat and pare them just shy of the line. The wide spaces between the pins will provide easy access from two angles. A partial test fit will reveal any excess material that has to be removed. I always say that folks won't notice a small discrepancy in spacing or angle in your dovetails—they'll only notice the gaps! After fitting the drawer fronts to the sides and checking the dovetails for fit and appearance, cut a groove between the pins along the inside of the drawer fronts to accept the drawer bottoms. The placement of this groove is important for two reasons. First, it should be hidden when the drawer is assembled. Second, it should be situated to maximize your storage space. Thin Sides Call for Slips Ifyou mill your sides to a thin dimension, you should consider using drawer slips for reinforcement and extra strength. Thin drawer sides might not be thick enough to support the drawer bottom, which is commonly held in place with a groove cut into the sides. Drawer slips are small mouldings, placed along the interior of the drawer sides to prevent their splitting under a load or heavy use. They also add character and detail. In Ihe groove. The slot for the drawer bottom is located in the space for the lowest tail in the drawer front. I cut the slips on the table saw with a careful sequence of cuts that yielded the slender parts. 1 milled them to a profile that was adequate to support the drawer bottom, yet would only minimally intrude upon the usable space of the drawer. The sidesand back of the drawer are joined with through-dovetails. These can be a little tricky because thin stock will dictate small dovetails. And if the stock is very thin, it can split when you cut the joint. However, one small advantage is they won't be seen unless the drawer is fully withdrawn. Before laying out the joint, measure the location of the drawer-bottom groove (from the drawer front) and cut enough material off the drawer back to allow the drawer bottom to be slipped underneath it when the drawers are assembled. Don't forget to cut off the excess length of the drawer sides. My sides-to-front dovetails turned out good enough that I didn't need a second chance at them. After cutting the through-dovetails for the side-to-back joints, dry-fitting the drawer boxes, checking dimensions and sanding the parts, I glued them up. If the dovetails are well executed, the drawers should come Smooth transition. The angled top of the slip bridges the corner between the sides of the drawer and the bottom. Slip sliding away. Clued in place, the slip strengthens the lower portion of the drawer bottom. The back of the drawer is narrower than the side so that the drawer bottom can be slid into place after finishing. together without clamps. However, ifyou do need clamps, check the drawers for square. You should also check for flat by placing them on a flat surface. A twisted drawer will severely complicate the installation later. When gluing up, keep a damp rag nearby. It's a lot easier to remove excess glue from the inside of the drawer at glue-up than to allow it to dry and have to chisel it out later. When the glue in the drawer boxes is dry, measure and cut the drawer slips to fit against the inside of the drawer front and back. Then align the slips with the groove on the drawer front and the bottom of the drawer back; glue and clamp them in place. When appropriate, use solid wood for the bottoms. For this desk, 1 cut a couple of Vi6"-thickness leaves from a l"-thick piece and bookmatched them. After gluing up the panels, sand them to fair the seam and smooth the surface. Taking the bottoms down to Vi6" kept them thick enough while making them lightweight, too. After cutting them to size, I rabbeted three edges. By rabbeting the edges I could slip them into a 3/i6" groove, yet maintain their 5/i6" thickness. populara-oodworking.com ■ 53 |


