Popular Woodworking 2009-02 № 174, страница 37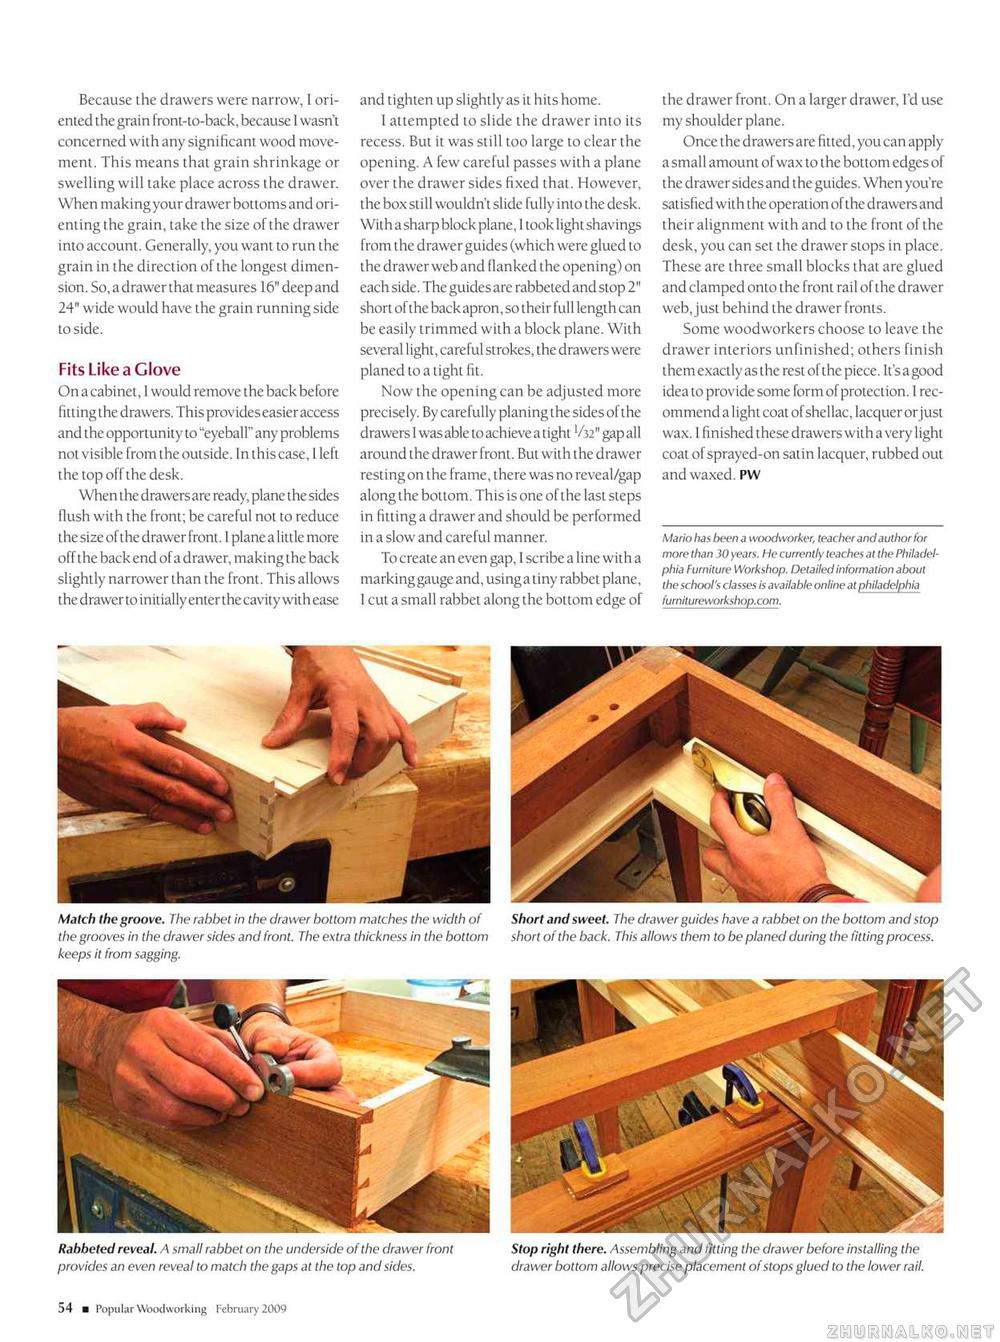
Because the drawers were narrow, I oriented the grain front-to-back, because I wasn't concerned with any significant wood movement. This means that grain shrinkage or swelling will take place across the drawer. When makingyour drawer bottoms and orienting the grain, take the size of the drawer into account. Generally, you want to run the grain in the direction of the longest dimension. So, a drawer that measures 16"deepand 24" wide would have the grain running side to side. Fits Like a Glove On a cabinet, I would remove the back before fitting the drawers. This provides easier access and the opportunity to "eyeball" any problems not visible from the outside. In this case, I left the top off the desk. When the drawers are ready, plane the sides flush with the front; be careful not to reduce the size of the drawer front. 1 plane a little more off the back end of a drawer, making the back slightly narrower than the front. This allows the drawer to initially enter the cavity with ease and tighten up slightly as it hits home. 1 attempted to slide the drawer into its recess. But it was still too large to clear the opening. A few careful passes with a plane over the drawer sides fixed that. However, the box still wouldn't slide fully into the desk. With a sharp block plane, I took light shavings from the drawer guides (which were glued to the drawer web and flanked the opening) on each side. The guides are rabbeted and stop 2" short of the back apron, so their full length can be easily trimmed with a block plane. With severallight, careful strokes, the drawers were planed to a tight fit. Now the opening can be adjusted more precisely. By carefully planing the sides of the drawers 1 was able to achieve a tight V32" gap all around the drawer front. But with the drawer resting on the frame, there was no reveal/gap along the bottom. This is one of the last steps in fitting a drawer and should be performed in a slow and careful manner. To create an even gap, I scribe a line with a marking gauge and, usinga tiny rabbet plane, 1 cut a small rabbet along the bottom edge of the drawer front. On a larger drawer, I'd use my shoulder plane. Once the drawers are fitted, you can apply a small amount of wax to the bottom edges of the drawer sides and the guides. When you're satisfied with the operation of the drawers and their alignment with and to the front of the desk, you can set the drawer stops in place. These are three small blocks that are glued and clamped onto the front rail of the drawer web, just behind the drawer fronts. Some woodworkers choose to leave the drawer interiors unfinished; others finish them exactly as the rest of the piece. It's a good idea to provide some form of protection. 1 recommend a light coat of shellac, lacquer orjust wax. I finished these drawers with a very light coal of sprayed-on satin lacquer, rubbed out and waxed. PW Mario has been a woodworker, teacher and author for more than 30 years. He currently teaches at the Philadelphia Furniture Workshop. Detailed information about the school's classes is available online at Philadelphia furnilureworkshop.com. Match the groove. The rabbet in the drawer bottom matches the width of the grooves in the drawer sides and front. The extra thickness in the bottom keeps it from sagging. Short and sweet. The drawer guides have a rabbet on the bottom and stop short of the back. This allows them to be planed during the fitting process. 54 ■ Popular Woodworking February 2009 |


