Popular Woodworking 2009-04 № 175, страница 11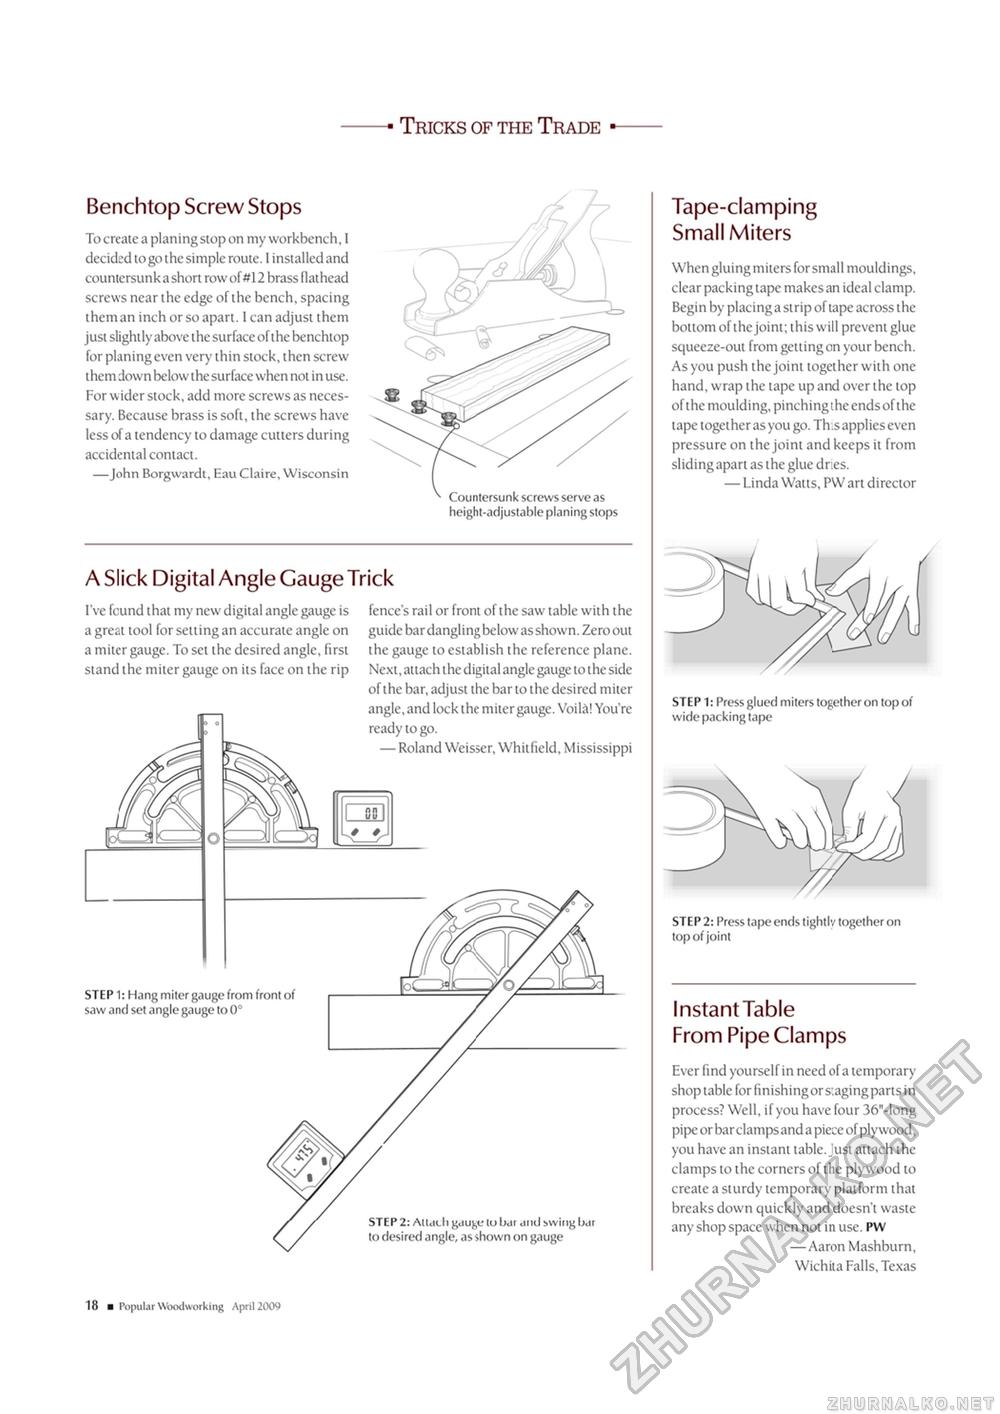
Tricks of the Trade Benchtop Screw Stops To create a planing stop on my workbench, I decided to go the simple route. I installed and countersunk a short row of #12 brass flathead screws near the edge of the bench, spacing them an inch or so apart. 1 can adjust them just slightly above the surface of the benchtop for planing even very thin stock, then screw them down below the surface when not in use. For wider stock, add more screws as necessary. Because brass is soft, the screws have less of a tendency to damage cutters during accidental contact. —John Borgwardt, Eau Claire, Wisconsin Countersunk screws serve as height-adjustable planing stops Tape-clamping Small Miters When gluing miters for small mouldings, clear packing tape makes an ideal clamp. Begin by placing a strip of tape across the bottom of the joint; this will prevent glue squeeze-out from getting on your bench. As you push the joint together with one hand, wrap the tape up and over the top ofthe moulding, pinching the ends of the tape together as you go. Th.s applies even pressure on the joint and keeps it from sliding apart as the glue dries. — Linda Watts, PW art director A Slick Digital Angle Gauge Trick I've fcund that my new digital angle gauge is fences rail or front of the saw table with the agreat tool for setting an accurate angle on guide bar dangling below as shown. Zero out a miter gauge. To set the desired angle, first the gauge to establish the reference plane, stand the miter gauge on its face on the rip Next, attach the digital angle gauge to the side ofthe bar, adjust the bar to the desired miter STEP 1: Press glued miters together on top of wide packing tape STEP 2: Press tape ends tightly together on top of joint Instant Table From Pipe Clamps Ever find yourself in need of a temporary shop table for finishing or s.aging parts in process? Well, if you have four 36"-long pipe or bar clamps and a piece of ply wood, you have an instant table. Just attach the clamps to the corners of the plywood to create a sturdy temporary platform that breaks down quickly and doesn't waste any shop space when not in use. PW — Aaron Mashburn, Wichita Falls, Texas STEP 1: Hang miter gauge from front of saw and set angle gauge to 0° STEP 2: AIMlIi gau^e lu bur and swing bar to desired angle, as shown on gauge 10 ■ Popular Woodworking April 2009 |


