Popular Woodworking 2009-04 № 175, страница 18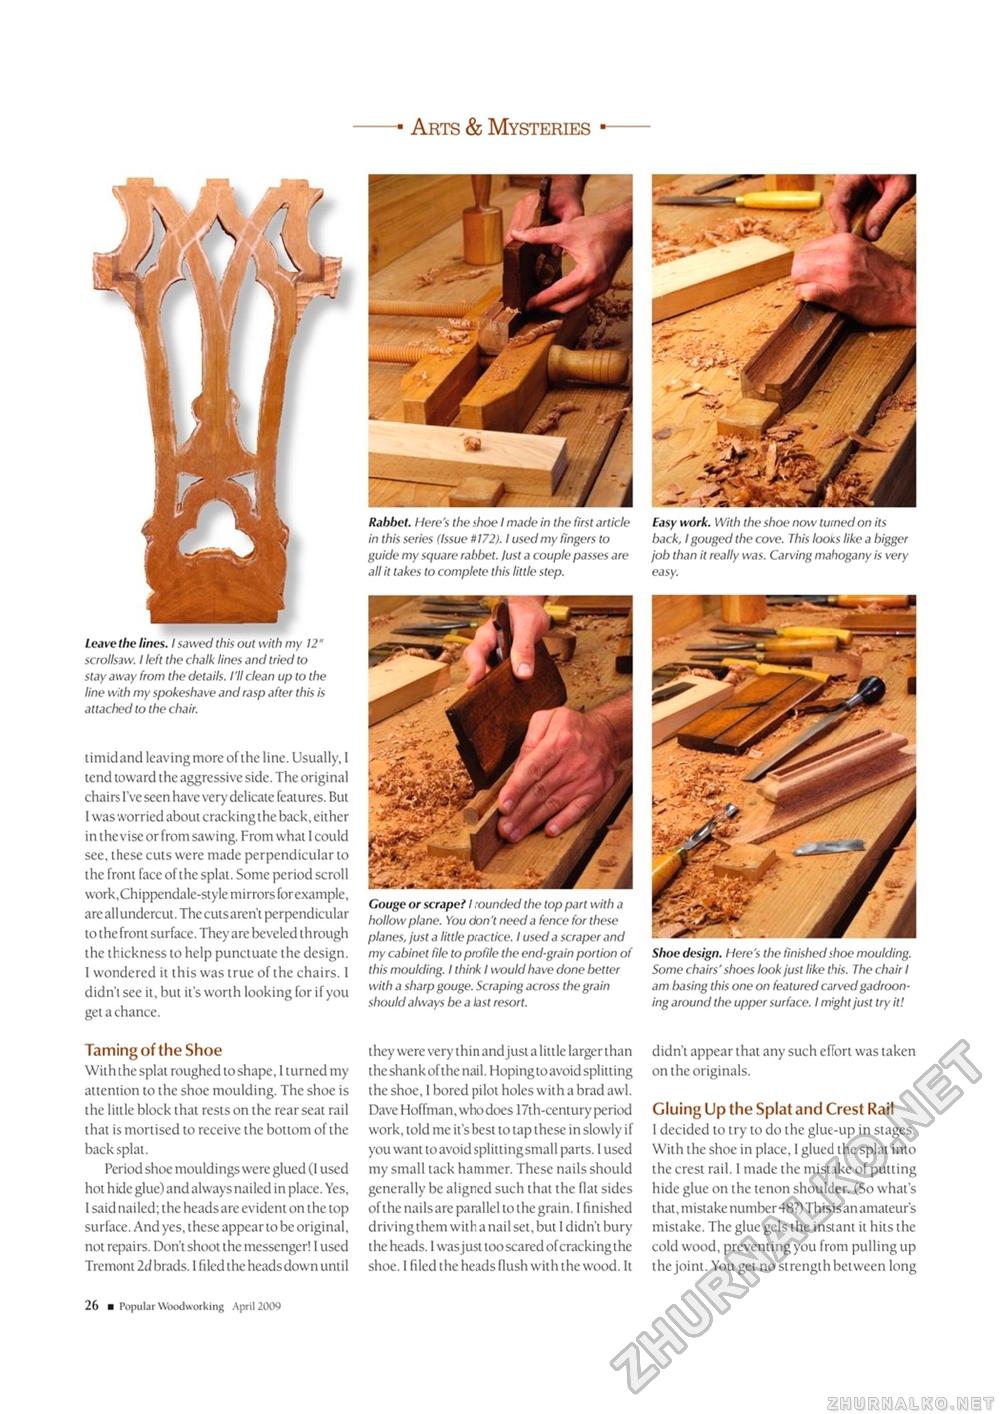
Arts & Mysteries Leave the lines. I sawed this out with my 12" scrollsaw. I left the chalk lines and tried to stay away from the details. I'll clean up to the line with my spokeshave and rasp after this is attached to the chair. timidand leaving more of the line. Usually, I tend toward the aggressive side. The original chairs I've seen have very delicate features. But 1 was worried about cracking the back, either intheviseorfrom sawing. From what 1 could see, these cuts were made perpendicular to the front face of the splat. Some period scroll work, Chippendale-style mirrors for example, are all undercut. Thecutsaren't perpendicular to the front surface. They are beveled through the thickness to help punctuate the design. 1 wondered it this was true of the chairs. 1 didn't see it, but it's worth looking for if you get a chance. Taming of the Shoe With the splat roughed to shape, I turned my attention to the shoe moulding. The shoe is the little block that rests on the rear seat rail that is mortised to receive the bottom of the back splat. Period shoe mouldings were glued (1 used hot hide glue) and always nailed in place. Yes, I said nailed; the heads are evident on the top surface. And yes, these appear to be original, not repairs. Don't shoot the messenger! I used Tremont 2d brads. 1 filed the heads down until Rahhet. Here's the shoe I made in the first article in this series (Issue # 172). I used my fingers to guide my square rabbet, lust a couple passes are all it takes to complete this little step. Gouge or scrapei I rounded the top part with a hollow plane. You don't need a fence for these planes, just a little pcactice. I used a scraper and my cabinet file to profile the end-grain portion of this moulding. I think I would have done better with a sharp gouge. Scraping across the grain should always be a last resort. they were very thin and just a little larger than the shank of the nail. Hoping to avoid splitting the shoe, 1 bored pilot holes with a brad awl. Dave Hoffman, whodoes 17th-century period work, told me it's best to tap these in slowly if you want to avoid splitting small parts. 1 used my small tack hammer. These nails should generally be aligned such that the flat sides of the nailsare parallel to the grain. I finished driving them with a nail set, but 1 didn't bury the heads. I wasjust too scared of cracking the shoe. I filed the heads flush with the wood. It Shoe design. Here's the finished shoe moulding. Some chairs'shoes look just like this. The chair I am basing this one on featured carved gadroon-ing around the upper surface. I might just try it! didn't appear that any such effort was taken on the originals. Gluing Up the Splat and Crest Rail 1 decided to try to do the glue-up in stages. With the shoe in place, 1 glued the splat into the crest rail. 1 made the mistake of putting hide glue on the tenon shoulder. (So what's that, mistake number 48?) Thisisan amateur's mistake. The glue gels the instant it hits the cold wood, preventing you from pulling up the joint. You get no strength between long 10 ■ Popular Woodworking April 2009 |


