Popular Woodworking 2009-04 № 175, страница 40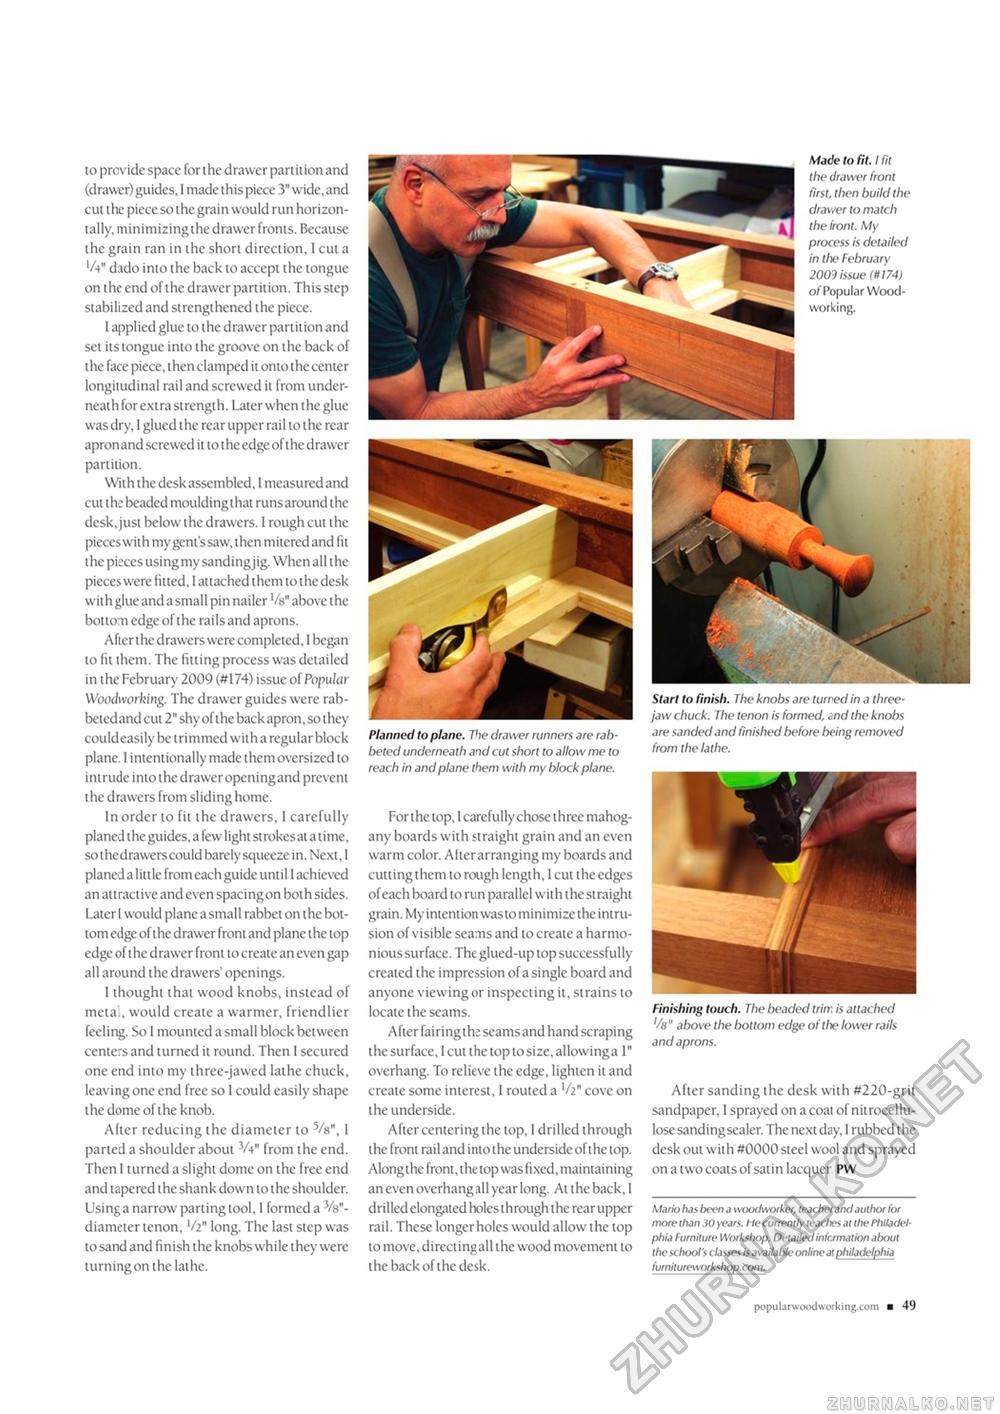
to provide space for the drawer partition and (drawer) guides, I made this piece 3" wide, and cut the piece so the grain would run horizontally, minimizing the drawer fronts. Because the grain ran in the short direction, 1 cut a V4" dado into the back to accept the tongue on the end of the drawer partition. This step stabilized and strengthened the piece. I applied glue to the drawer partition and set its tongue into the groove on the back of the face piece, then clamped it onto the center longitudinal rail and screwed it from underneath for extra strength. Later when the glue was dry, I glued the rear upper rail to the rear apronand screwed it to the edge of the drawer partition. With the desk assembled, 1 measured and cut the beaded moulding that runs around the desk, just below the drawers. I rough cut the pieces with my gent'ssaw, then mitered and fit the pieces using my sandingjig. When all the pieces were fitted, I attached them to the desk with glue and a small pin nailer V»" above the bottom edge of the rails and aprons. After the drawers were completed, 1 began to fit them. The fitting process was detailed in the February 2009 (#174) issue of Popular Woodworking. The drawer guides were rab-betedand cut 2" shy of the back apron, so they could easily be trimmed with a regular block plane. 1 intentionally made them oversized to intrude into the drawer opening and prevent the drawers from sliding home. In order to fit the drawers, I carefully planed the guides, a few light strokes at a time, so thedrawerscould barely squeeze in. Next, I planed a little from each guide until I achieved an attractive and even spacing on both sides. Later I would plane a small rabbet on the bottom edge of the drawer front and plane the top edge of the drawer front to create an even gap all around the drawers' openings. 1 thought that wood knobs, instead of meta., would create a warmer, friendlier feeling. So I mounted a small block between centers and turned it round. Then I secured one end into my three-jawed lathe chuck, leaving one end free so I could easily shape the dome of the knob. Alter reducing the diameter to Vs", I parted a shoulder about 3A" from the end. Then I turned a slight dome on the free end and tapered the shank down to the shoulder. Using a narrow parting tool, 1 formed a Vs"-diameter tenon, V2" long. The last step was to sand and finish the knobs while they were turning on the lathe. Made to fit. I fit the drawer front first, then build the drawer to match the iront. My process is detailed in the February 2009 issue (it 174) of Popular Woodworking. Planned to plane. Pie drawer runners are rabbeted underneath and cut short to allow me to reach in and plane them with my block plane. For the top, I carefully chose three mahogany boards with straight grain and an even warm color. Alter arranging my boards and cutting them to rough length, 1 cut the edges of each board to run parallel with the straight grain. My intention was to minimize the intrusion of visible seams and to create a harmonious surface. The glued-up top successfully created the impression of a single board and anyone viewing or inspecting it, strains to locale the seams. After fairingthe seams and hand scraping the surface, I cut the top to size, allowinga 1" overhang. To relieve the edge, lighten it and create some interest, I routed a l/2" cove on the underside. After centering the top, 1 drilled through the front rail and into the underside of the top. Alongthe front, the top was fixed, maintaining an even overhang all year long. At the back, I drilled elongated holes through the rear upper rail. These longer holes would allow the top to move, directingall the wood movement to the back of the desk. Mario has been a woodworker, teacher and author for more than 30 years. He currently teaches at the Philadelphia Furniture Workshop. Detailed information about the school's classes is available online af Philadelphia fumitureworkshop.com. Finishing touch. The beaded trirr, is attached above the bottom edge of the lower rails and aprons. After sanding the desk with #220-grit sandpaper, 1 sprayed on a coat of nitrocellulose sanding sealer. The next day, 1 rubbed the desk out with #0000 steel wool and sprayed on a two coats of satin lacquer PW Start to finish. The knobs are turned in a three-jaw chuck. The tenon is formed, end the knobs are sanded and finished before being removed from the lathe. popular wxxiworki ng.com ■ 49 |


