Popular Woodworking 2009-04 № 175, страница 46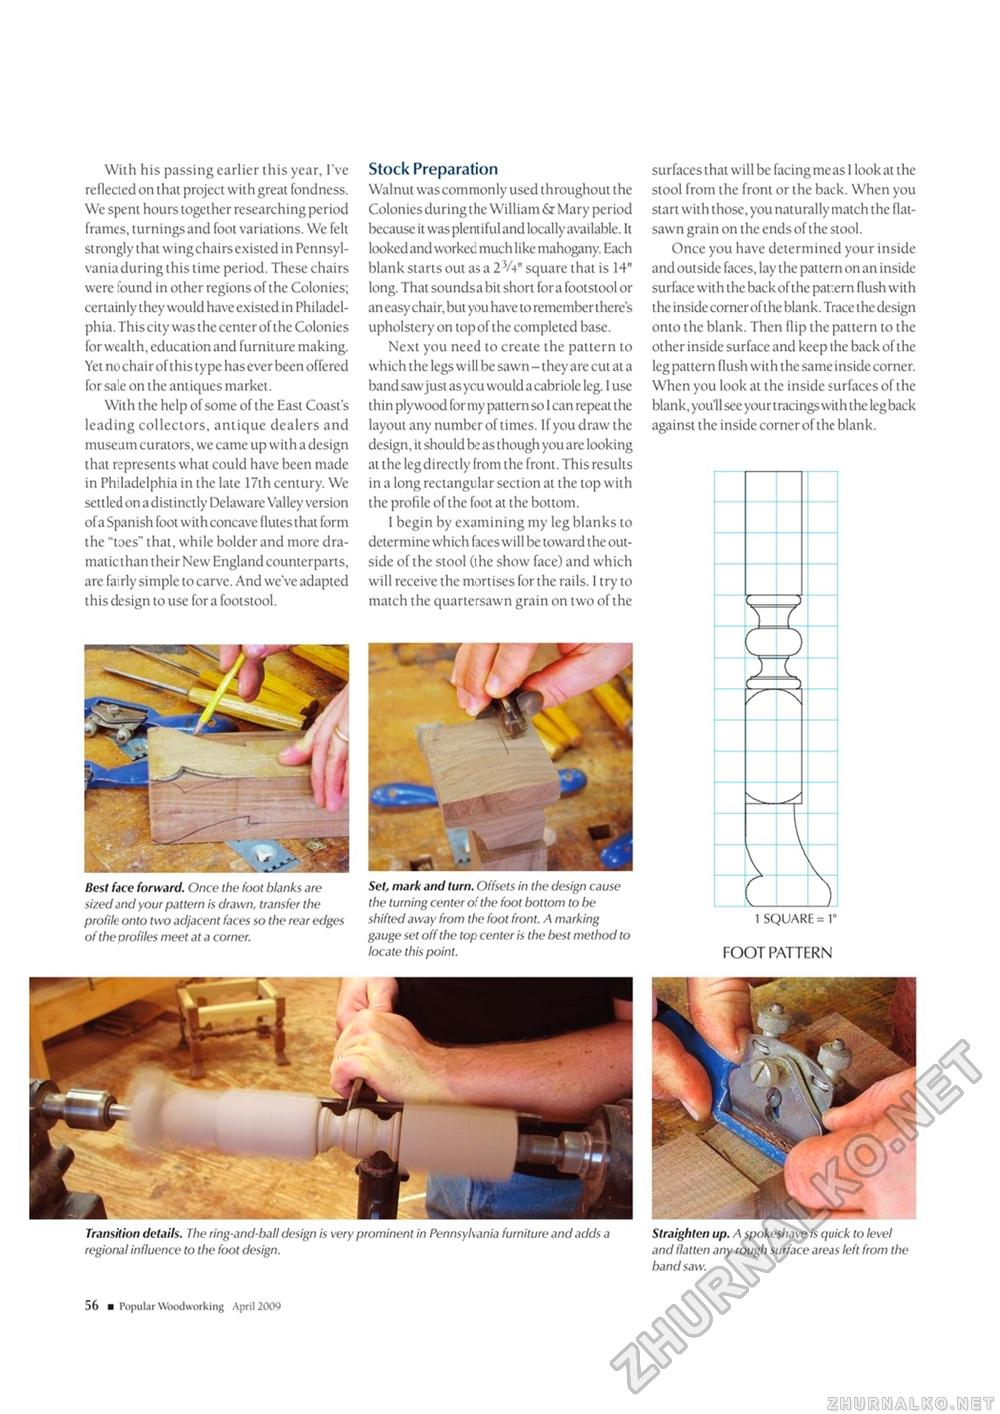
With his passing earlier this year, I've reflected on that project with great fondness. We spent hours together researching period frames, turnings and foot variations. We felt strongly that wing chairs existed in Pennsylvania during this time period. These chairs were found in other regions of the Colonies; certainly they would have existed in Philadelphia. This city was the center of the Colonies for wealth, education and furniture making. Yet no chair of this type has ever been offered for sale on the antiques market. With the help of some of the East Coast's leading collectors, antique dealers and museum curators, we came up with a design that represents what could have been made in Philadelphia in the late 17th century. We settled on a distinctly Delaware Valley version of a Spanish foot with concave flutes that form the "toes" that, while bolder and more dra-maticthan their New England counterparts, are fairly simple to carve. And we've adapted this design to use for a footstool. Stock Preparation Walnut was commonly used throughout the Colonies during the William &r Mary period because it was plentiful and locally available. It looked and workeci much like mahogany. Each blank starts out as a 23/y square that is 14" long. That soundsa bit short for a footstool or an easy chair, but you have to remember there's upholstery on top of the completed base. Next you need to create the pattern to which the legs will be sawn - they are cut at a band saw just as you would a cabriole leg. 1 use thin plywood for my pattern so I can repeat the layout any number of times. If you draw the design, it should be as though you are looking at the legdirectly from the front. This results in a long rectangular section at the top with the profile of the foot at the bottom. I begin by examining my leg blanks to determine which faces will be toward the outside of the stool (the show face) and which will receive the mortises for the rails. 1 try to match the quartersawn grain on two of the Best face forward. Once the foot blanks are sized and your pattern is drawn, transfer the profile onto two adjacent faces so the rear edges of the profiles meet at a corner. Set, mark and turn. Offsets in the design cause the turning center of the foot bottom to be shifted away from the foot front. A marking gauge set off the top center is the best method to locate this point. Transition details, fhe ring-and-ball design is very prominent in Pennsylvania furniture and adds a regional influence to the foot design. 10 ■ Popular Woodworking April 2009 surfaces that will be facing me as I look at the stool from the front or the back. When you start with those, you naturally match the flat-sawn grain on the ends of the stool. Once you have determined your inside and outside faces, lay the pattern on an inside surface with the back of the par.ern flush with the inside corner of the blank. Trace the design onto the blank. Then flip the pattern to the other inside surface and keep the back of the leg pattern flush with the same inside corner. When you look at the inside surfaces of the blank, you'll see your tracings with the leg back against the inside corner of the blank.
1 SQUARE = 1" FOOT PATTERN 1 SQUARE = 1" FOOT PATTERN Straighten up. A spokeshave is quick to level and flatten any rough surface areas left from the band saw. |


