Popular Woodworking 2009-04 № 175, страница 49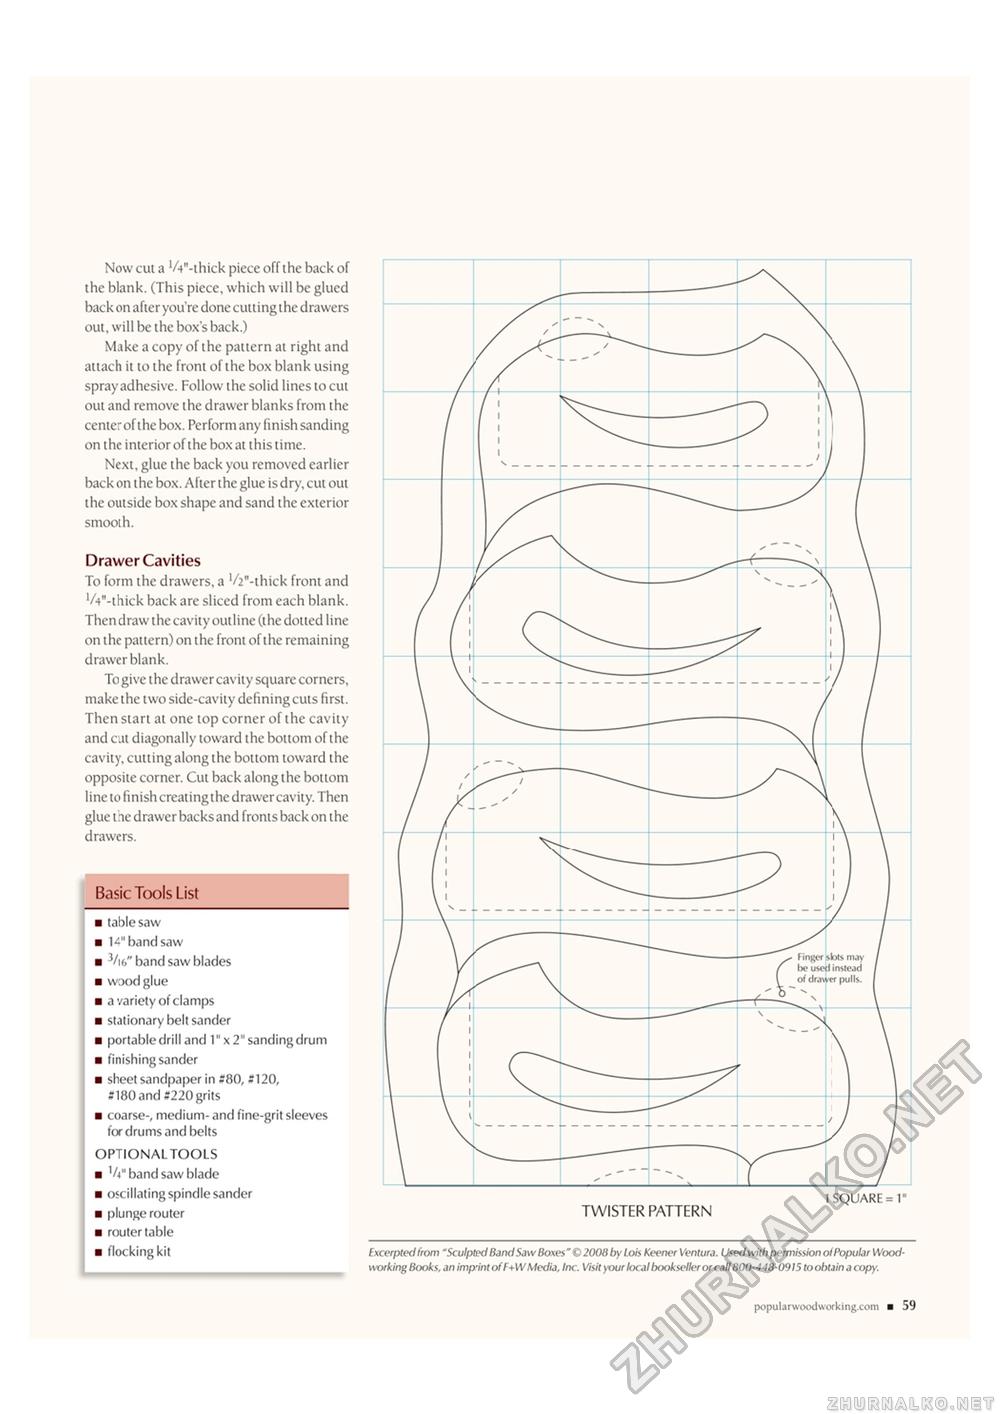
Now cut a VV-thick piece off the back of the blank. (This piece, which will be glued back on after you're done cuttingthe drawers out, will be the box's back.) Make a copy of the pattern at right and attach it to the front of the box blank using spray adhesive. Follow the solid lines to cut out and remove the drawer blanks from the center of the box. Perform any finish sanding on the interior of the box at this time. Next, glue the back you removed earlier back on the box. After the glue is dry, cut out the outside box shape and sand the exterior smooth. Drawer Cavities To form the drawers, a '^"-thick front and VV'-thick back are sliced from each blank. Then draw the cavity outline (the dotted line on the pattern) on the front of the remaining drawer blank. To give the drawer cavity square corners, make the two side-cavity defining cuts first. Then start at one top corner of the cavity and cut diagonally toward the bottom of the cavity, cutting along the bottom toward the opposite corner. Cut back along the bottom line to finish creating the drawer cavity. Then glue the drawer backs and fronts back on the drawers. Basic Tools List ■ table saw ■ band saw ■ 3/i6" band saw blades ■ wood glue ■ a variety of clamps ■ stationary belt sander ■ portable drill and 1" x 2" sanding drum ■ finishing sander ■ sheet sandpaper in 580, 5120, 5180 and 5220 grits ■ coarse-, medium- and fine-grit sleeves for drums and belts OPTIONAL TOOLS ■ Vv band saw blade ■ oscillating spindle sander ■ plunge router ■ router table ■ flocking kit £xcerpted from "Sculpted Band Saw Boxes " €> 2008 by Lois Keener Ventura. Used with permission olPopular Woodworking Books, animp'intofF+WMedia, Inc. Visit your local bookseller or call800-448-0915 to obtain a copy. popular wxxiworki ng.com ■ 59 |


