Popular Woodworking 2009-04 № 175, страница 47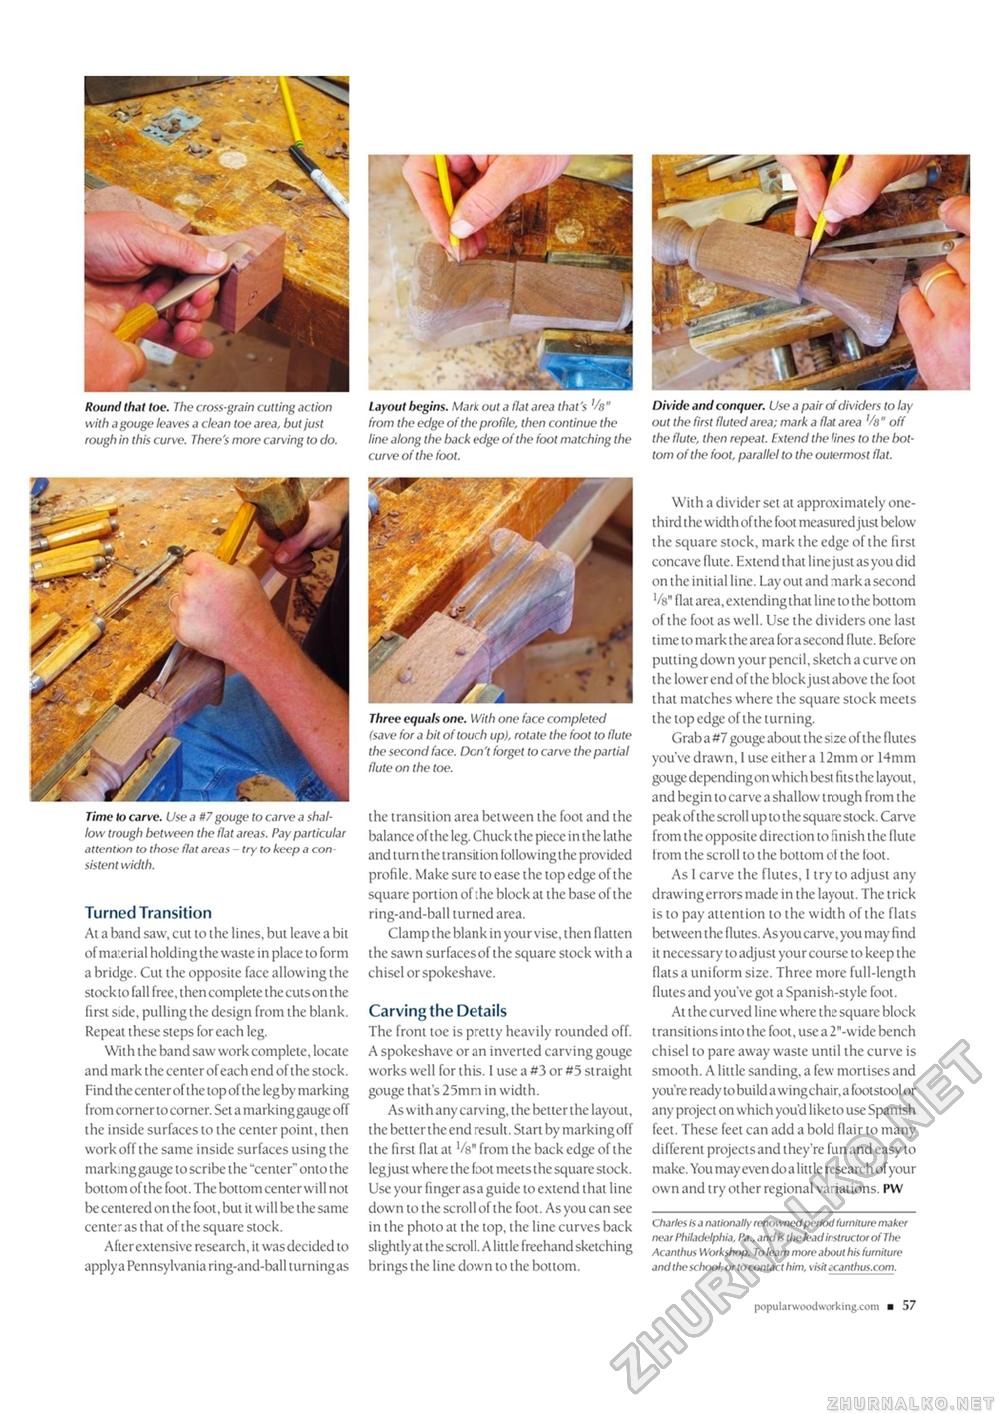
Round that toe. The cross-grain cutting action with a gouge leaves a clean toe area, but just rough in this curve. There's more carving to do. Time to carve. Use a #7 gouge to carve a shallow trough between the flat areas. Pay particular attention to those flat areas - try to keep a consistent width. Turned Transition At a band saw, cut to the lines, but leave a bit of material holdingthe waste in place to form a bridge. Cut the opposite face allowing the stock to fall free, then complete the cuts on the first side, pulling the design from the blank. Repeat these steps for each leg. With the band saw work complete, locate and mark the center of each end of the stock. Find the center of the topof the leg by marking from corner to corner. Set a markinggauge off the inside surfaces to the center point, then work off the same inside surfaces using the markinggauge to scribe the "center" onto the bottom of the foot. The bottom center will not be centered on the foot, but it will be the same center as that of the square stock. After extensive research, it was decided to applya Pennsylvania ring-and-ball turning as Layout begins. Mark out a flat area that's '/s" from the edge of the profile, then continue the line along the back edge of the foot matching the curve of the foot. Divide and conquer. Use a pair of dividers to lay out the first fluted area; mark a flat area 8 " off the flute, then repeat. Extend the lines to the bottom of the foot, parallel to the outermost flat. Three equals one. With one face completed (save for a bit of touch up), rotate the foot to flute the second face. Dcn't forget to carve the partial flute on the toe. the transition area between the foot and the balance of the leg. Chuck the piece in the lathe and turn the transition lollowingthe provided profile. Make sure to ease the top edge of the square portion of the block at the base of the ring-and-ball turned area. Clamp the blank in your vise, then flatten the sawn surfaces of the square stock with a chisel or spokeshave. Carving the Details The front toe is pretty heavily rounded off. A spokeshave or an inverted carving gouge works well for this. 1 use a #3 or #5 straight gouge that's 25mn in width. As with any carving, the better the layout, the better the end result. Start by marking off the first flat at Vs" from the back edge of the legjust where the foot meets the square stock. Use your finger asa guide to extend that line down to the scroll of the foot. As you can see in the photo at the top, the line curves back slightly at the scroll. A little freehand sketching brings the line down to the bottom. With a divider set at approximately one-third the width of the foot measured just below the square stock, mark the edge of the first concave flute. Extend that line just as you did on the initial line. Lay out and mark a second Vq* flat area, extending that line to the bottom of the foot as well. Use the dividers one last time to mark the area for a second flute. Before putting down your pencil, sketch a curve on the lower end of the block just above the foot that matches where the square stock meets the top edge of the turning. Grab a #7 gouge about the size of the flutes you've drawn, I use either a 12mm or 14mm gouge depending on which best fits the layout, and begin to carve a shallow trough from the peak of the scroll up to the square stock. Carve from the opposite direction to finish the flute Irom the scroll to the bottom cl the toot. As I carve the flutes, 1 try to adjust any drawing errors made in the layout. The trick is to pay attention to the width of the flats between the flutes. As you carvc, you may find it necessary to adjust your course to keep the flats a uniform size. Three more full-length flutes and you've got a Spanish-style foot. At the curved line where the square block transitions into the foot, use a 2"-wide bench chisel to pare away waste until the curve is smooth. A little sanding, a few mortises and you're ready to build a wing chair, a footstool or any project on which you'd like to use Spanish feet. These feet can add a bold flair to many different projects and they're fun and easy to make. You may even do a little research of your own and try other regional variations. PW Charles is a nationally renowned period furniture maker near Philadelphia, Pa., and is the lead instructor of The Acanthus Workshop. To learn more alxxit his furniture and the school, or to contact him, visit icanthus.com. popular wxxiworki ng.com ■ 57 |


