Popular Woodworking 2009-06 № 176, страница 17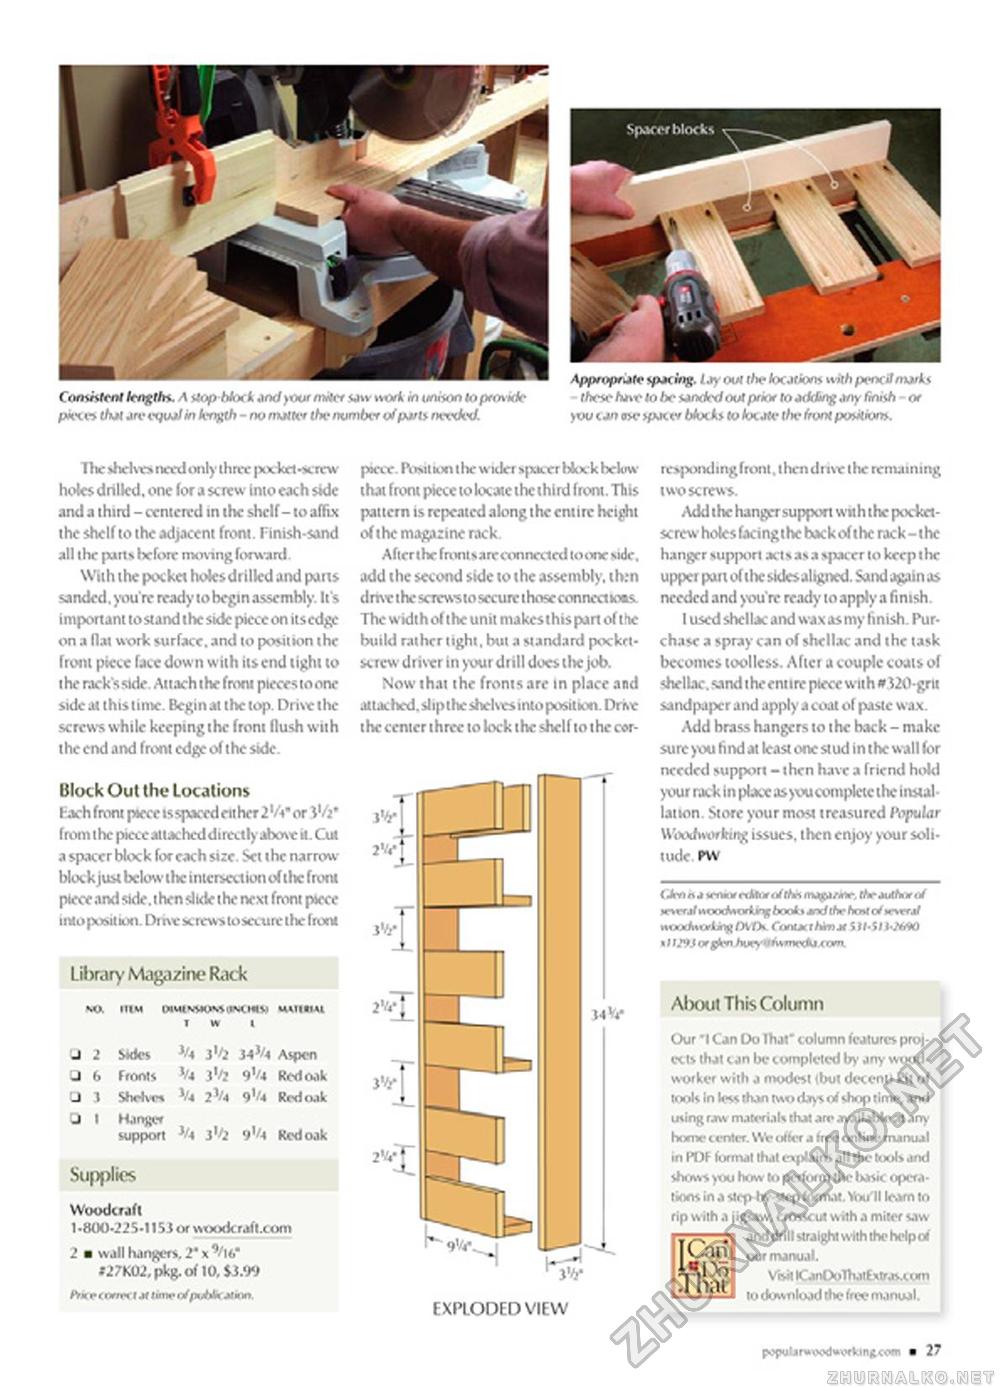
The shelve* need only three pocket-screw holes drilled, one for a screw Into each side and a thud - centered in the shelf- to affix the shelf to the adjacent front. Finish-sand all the parts before moving forward With the pocket hoksdrilled and pans sanded. you're ready to begin assembly. It's imponant to stand the side piece on itsedge on a flat work surface, and to position the front piece facedown with its end tight to the rack's side. Attach the from piecestoone side at this time. Begin at the top. Drive the screws while keeping the front flush with the end and front edge of the side. Block Out the Locations Fach front piece is spaced eit her 21 A* or i'/j * from the piece attacheddirectly above it. Cut a spacer block for each size. Set the narrow-block just below the intersection of ihc front piece and side, t hen slide the next front piece into posit ion. Drive screws to secure the front Library Magazine Rack □ 2 Sides WA Aspen □ 6 Fronts l>* i1^ 9''4 Red oak □ 3 Shelves V. 2V4 9V4 RrdoA support 3'1 Red oak Supplies Woodcraft 1-800-22S-1IS3 or vvwjdcraft.com 2 ■ wall hangers. 2'x'/if '27K02, pkg. of 10,13.99 piece. I\jwIhi the wider spacer block below that front piece 10 locate the third front. This pattern is repeated along the entire height of the magazine rack. After the fronlsanr connected to one side, add the second side to the assembly. th:n dnvcihcscTrwstosccureihoseconncctkws. The width of the unit makesthispan of the build rather tight. but a standard pocket-screw driver in your drill does ihc job. Now thai the fronts are in place and attached.sliptheshelvesinto position. Drue the center three to lock the shelf 10 the cor- EXPLODED VIEW responding front, then dm* the remaining two screws. Add the hanger support wit h ihc pocket-screw holes facing t he back of t he rack -1 he hanger support act s as a spacer to keep 1 he upper part of the skksaligned. Sand a>y 111 as needed and you're ready to apply a finish. I used shellac and wax as my finish. Purchase a spray can of shellac and the task becomes toollcss. After a couple coais of shellac, sand the entire piece with # 320-gm sandpaper and apply a coat of paste wax. Add brass hangers to the back - make sure )k*i find at kast one stud in the wall (or needed support - then have a friend hold your rack in place as>vucomplete the installation. Store your most treasured ftyulor Woodworking issues, then enjoy your solitude PW mwWLryOVTX Conn ittmjiS tf-SJ iW/O • 1119) orgkn About This Column Our *l Can Do That" column features projects that can be completed by jny woodworker with a modest (but decent) kit of took In less than two days erf shop time, and using raw materials thai are available at any home center. We offer a free online manual in PDF format thai csplaim all tin- tools and shows you how to pedorm Ihc basic operations in a strp hy-strp (omul. Vnu'll loam to rip with a jigsaw, crosscut with a miter saw and drill straight with the help of our manual. Visit ICanOolKitFstrav.com to download the free manual. ICari !»1 x> That |


