Popular Woodworking 2009-06 № 176, страница 61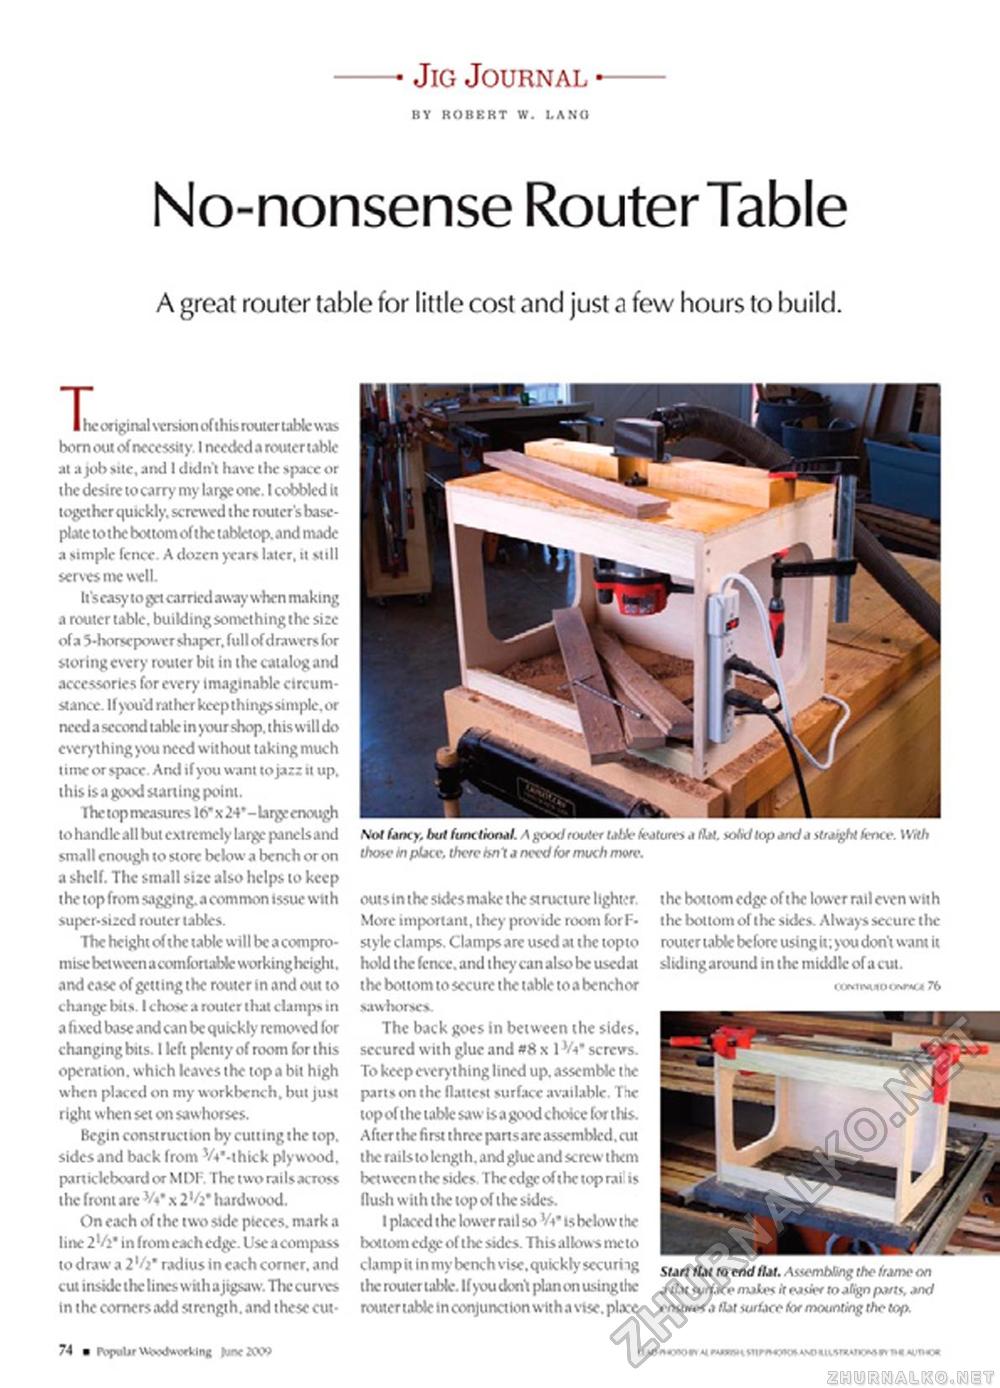
— Jig Journal -— No-nonsense RouterTableA great router table for little cost and just a few hours to build. I he original version of this rouicr tabic was born out of necessity. I needed arouter table at a job Mtc, and I didn't have the space or the desire to carry my large one. I cobbled U together quickly, screwed the router's base -plate to the bottom of the tablet op. and made a simple fence. A dozen >xar* later, it Mill serves roe well It'seasy logo earned away when making a router table, building something the size of a 5-borse power shaper. full of drawers for storing every router bit in the catalog and accessories for every imaginable circumstance. If you'd rather keepthingssimple.or need a second table in >our shop, this will do everything you need without taking much time or space And if you want top ir it up. this isa good starting point. The top measures 1ft'x 24* - larjjr enough to handle all but extremely large panels and small enough to store below a bench or on a shell. The small size also helps to keep the top from sagging, a common issue with super-sized router tables. The height of the table will be a compromise between a comfortable working height, and ease of getting the router in and out to change bus. I chosc a router thai clamps in a fixed base and can be qukkly removed for changing bits. I left plenty of room for this operation, which leaves the topa bit high when placed on my workbench, but just right when set on saw horses. Begin construction by cutting the top. sides and back from ViMhick plywood, panic IcfxtardoT SUM The two rails across the front are Vt' x 2^2' hardwood. On each of the two side pieces, mark a line 2'/j* in from each edge. Use a compass to draw a 2 radius in each corner, and cut inside the lines with a jigsaw. The curves in the comers add strength, and these cut- Not Unc y. but func Iktrul. A good router tMe feature* a A*I. xMtop W a itiMght fence. With thotv lo pine, there hr11 a need for much more. outsln the sides make the structure lighter, the bottom edge of the lower rail even with More important, they provide room forF- the bottom of tlte sides. Always secure lite style clamps. Clamps are used at t he topto rouicr table before using it ; you don't want it hold the fencc. and they can also be uscdat slidingaround in the middle of a cut. the bottom to secure t he table to a benchor «MNuou<nu 76 sawTwrxr* The back goes in between the sldts. secured with glue and #8 x 1screws. To keep everything lined up. assemble the parts on the flattest surface available. The top of t he t able saw Is a good c hoke for t his. After the first three pinsare assembled, cut the rails to length, and glue and screw them between the sides The edge of the top rai! is flush with the top of the sides. I placed the lower rail so W is below the bottom edge of the sides. This allows me to clamp it in my bench vise, quickly securing fo end(Ui. Aatmbb* ,hc frame <vi the rouicr table. If >«u don't plan on using the j ibr wrixe /rulw It easier toitignptny and router table in conjunct ion with a vise, place enwre*.»Oat uuUce for mounting the top. 74 a fpfwbr wiMtfwoftdng Mv .W |


