Popular Woodworking 2009-08 № 177, страница 12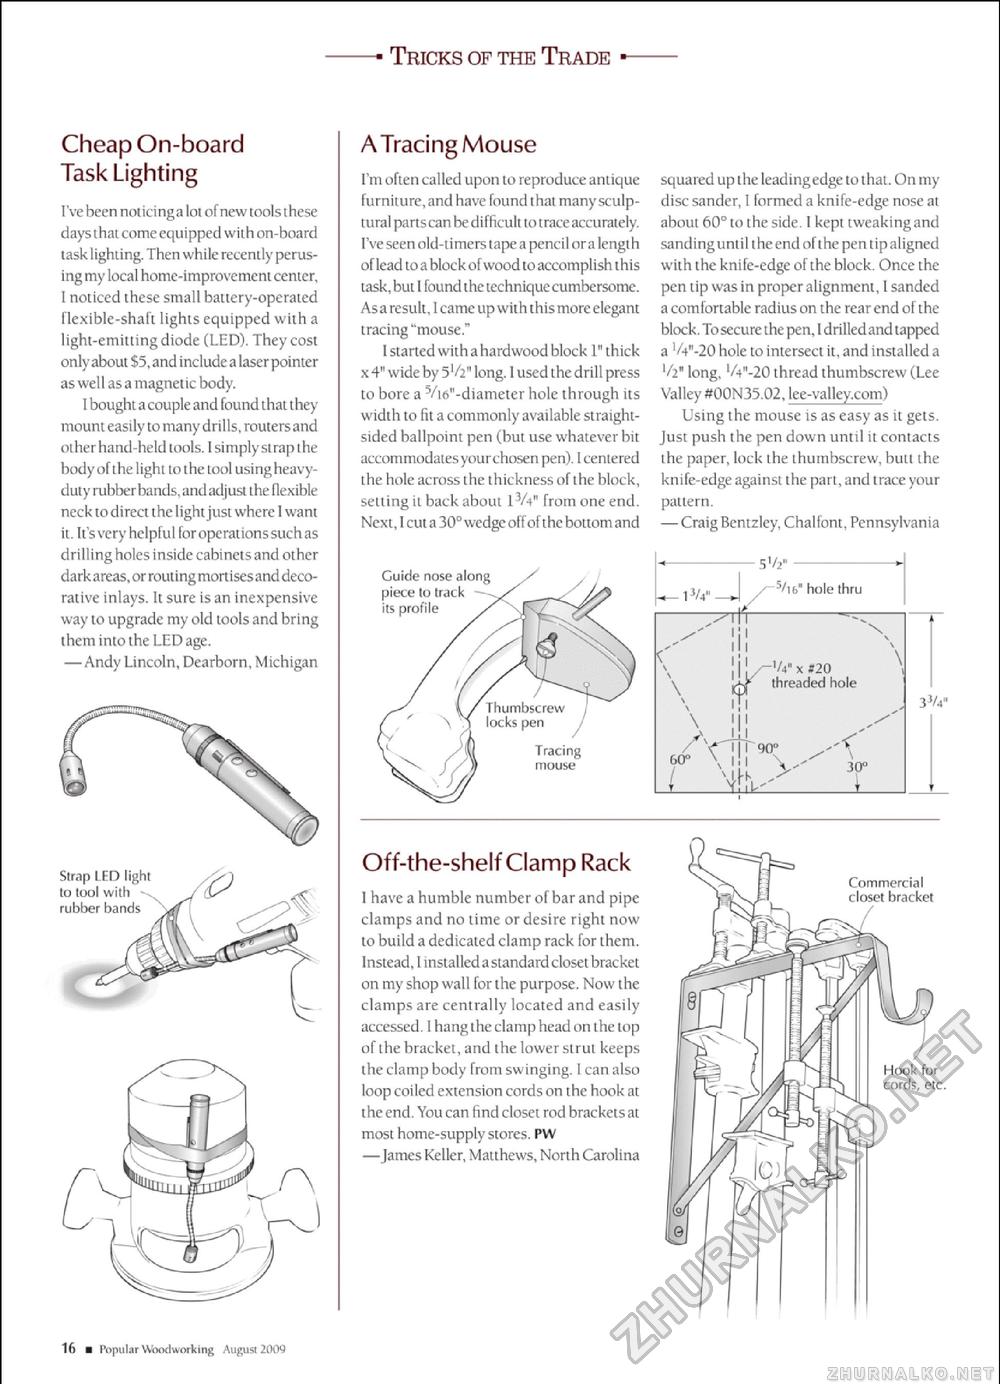
Tricks op the Trade Cheap On-board Task Lighting I've been noticing a lot of new tools these daysthat come equipped with on-board tasklighting. Then while recently perusing my local home -i mprove ment center, I noticed these small battery-operated flexible-shaft lights equipped with a light-emitting diode (LED). They cost only about S5,andincludea laserpointer as well as a magnetic body. I bought a couple and fou nd that t hey mount easily to many drills, routersand other hand held tools. I simplyslrapthe bodyof the light to the tool usingheavy-duty rubber bands, and adjust the flexible neck todirect the light just where I want it. It's very helpful for ope rat ions such as drilling holes inside cabinets and other darkareas, or routing mortisesand decorative inlays. It sure is an inexpensive way to upgrade my old tools and bring them into the LED age. — Andy Lincoln, Dearborn, Michigan A Tracing Mouse I'm often called upon to reproduce antique furniture, and have found that many sculptural pa rts can be difficult to trace accurately I've seen old-timers tape a pencil ora length of lead toa blockofwood to accomplish this task, but 1 found the technique cumbersome. Asa result, 1 came up with this more elegant tracing "mouse." I started wit h a hardwood block 1" t hick x4" wide by 5V2" long. I used thedrillpress to bore a Vi6"-diameter hole through its width to fit a commonly available straight-sided ballpoint pen (but use whatever bit accommodatesyour chosen pen). I centered the hole across the thickness ofthe block, setting it back about 13A* from one end. Next, I cut a 30° wedge off of the bottom and squared up the leadingedge to that. On my disc sander, I formed a knife-edge nose at about 60° to the side. 1 kept tweaking and sandinguntil the end ofthe pentipaligned with the knife-edge of Lhe block. Once the pen Lip was in proper alignment, 1 sanded a comfortable radius on the rear end of the block. To secure the pen, 1 d ril led and lapped a ^+"-20 hole to intersect it, and installed a 'A" long, 'A"-20 thread thumbscrew (Lee Val ley #00N35.02, lee-valley.com) Using the mouse is as easy as it gets Just push the pen down until it contacts the paper, lock the thumbscrew, butt the knife-edge against the part, and trace your pattern. — Craig Bemzley, Chalfont, Pennsylvania
Strap LED light to iool with rubber bands Off-the-shelf Clamp Rack 1 have a humble number of bar and pipe clamps and no time or desire right now to build a dedicated clamp rack for them. Instead, I installeda standard closetbracket on my shop wall for the purpose. Now I he clamps are centrally located and easily accessed. 1 hang the clamp head on the top ofthe bracket, and the lower strut keeps the clamp body from swinging. I can also loop coiled extension cords on the hook at the end. You can find closet rod brackets at most home-supply stores. P W —James Keller, Matthews, North Carolina Guide nose along piece to track its profile Tracing mouse Commercial closet bracket Hook for cords, etc. |
||||||||


