Popular Woodworking 2009-08 № 177, страница 11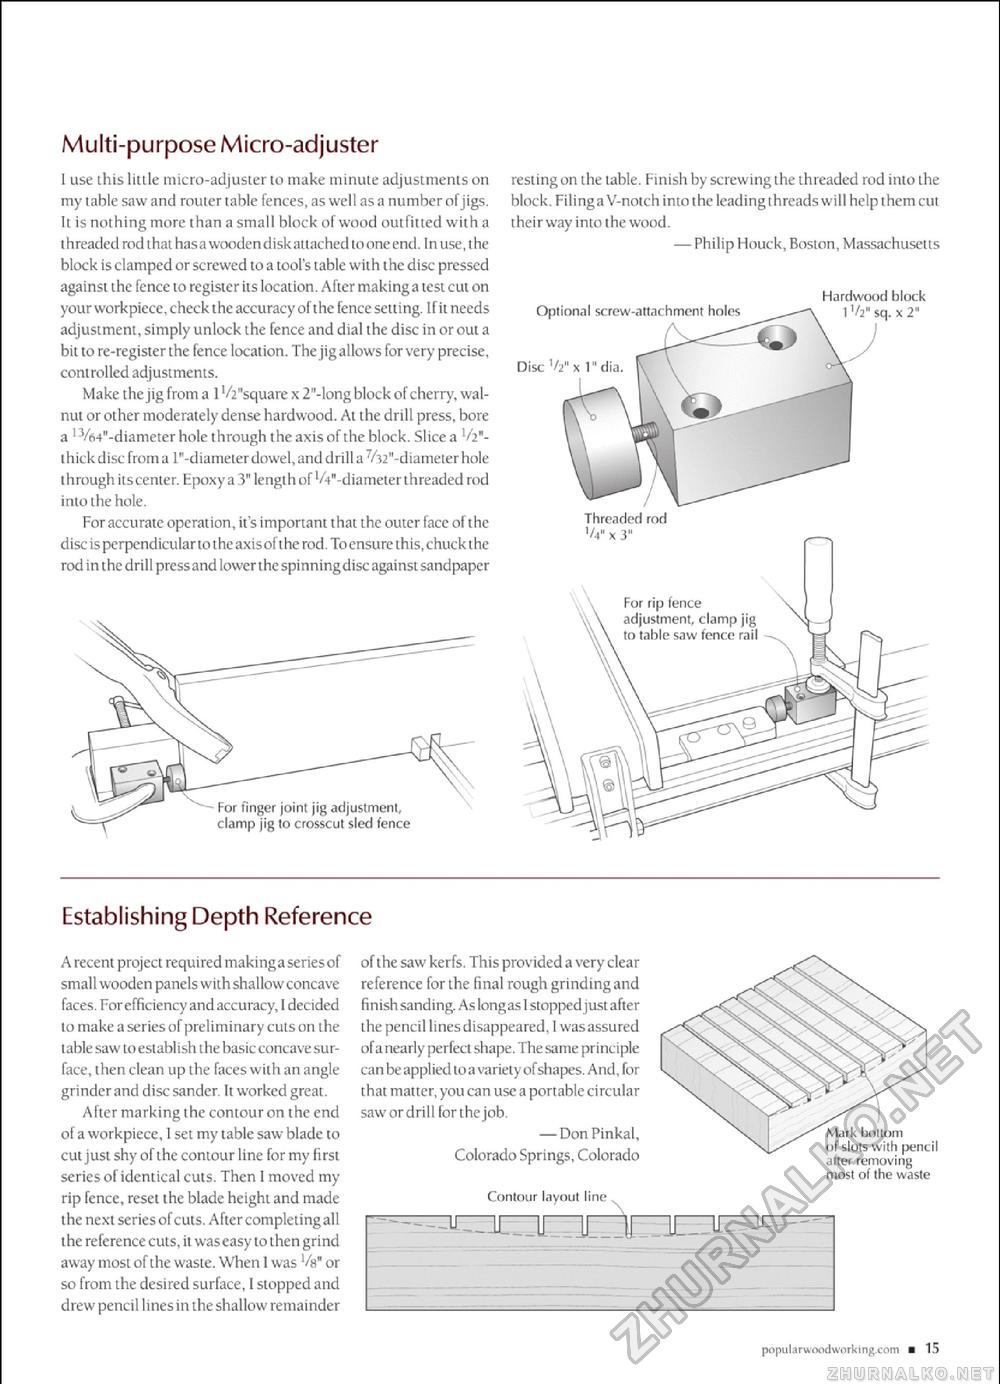
Multi-purpose Micro-adjuster I use this little micro-adjuster to make minute adjustments on my table saw and router table fences, as well as a number of jigs It is nothing more than a small block of wood outfitted with a threaded rod that has a wooden diskaitachedlo one end. Inuse, the block isdamped or screwed 10 a tool's Lable with the disc pressed against the fence to register its location. After makinga test cut on your workpiece, check the accuracy of the fence setting. I fit needs adjustment, simply unlock the fence and dial the disc in or out a bit to re-register the fence location. The jig allows for very precise, controlled adjustments. Make the jig from a 1 '^"square x 2"-long block of cherry, walnut or other moderately dense hardwood. At the drill press, bore a 'Vs4"-diameterhole through the axis of the block. Slice a V2"-thick disc from a l' -diameter dowel, and drill a V32" diameter hole through its center. Epoxy a 3" length of 'A" diameter threaded rod into the hole. For accurate operation, it'simportant that the outer face of the disc. 5 pc rpendicu lar to t he axisofthe rod. Toensure this, chuck the rod in thedrill pressand lower the spinningdisc against sandpaper resting on the table. Finish by screwing the threaded rod into the block Filinga V-notch into the leading threads will help them cut their way into the wood. — Philip Houck, Boston, Massachusetts Establishing Depth Reference A recent project required makingaseriesof small wooden panel s with shallow concave faces. For efficiency and accuracy, I decided to make a series of preliminary cuts on the t able saw to est ablish the basic concave su r-face, then clean up the faces with an angle grinderand disc sander. It worked great. After marking the contour on the end of a workpiece, 1 set my table saw blade to cut just shy of the contour line for my first series of identical cuts, Then I moved my rip fence, reset the blade height and made the next series of cuts. After completingall the reference cuts, it was easy to then grind away most of the waste. When 1 was vh" or so from the desired surface, 1 stopped and drew pencil lines in the shallow remainder of the saw kerfs. This provided a very clear reference for the final rough grinding and finish sanding. As long as 1 stoppedjustafler the pencil lines disappeared, I wasassured of a nearly perfect shape. The same principle can be applied to a varietyofshapes. And, for that matter, you can use aportable circular saw or drill for the job — DonPinkal, Colorado Springs, Colorado Contour layout line 11-.-U.. li U I! J .-U.- J§ popul a rwoodwork ing.com ■ 15 Threaded rod Disc V2" x 1" dia. Optional screw-attachment holes Hardwood block 1V2" sq. x 2" Mark bottom of slots with pencil after removing most of the waste |


