Popular Woodworking 2009-08 № 177, страница 19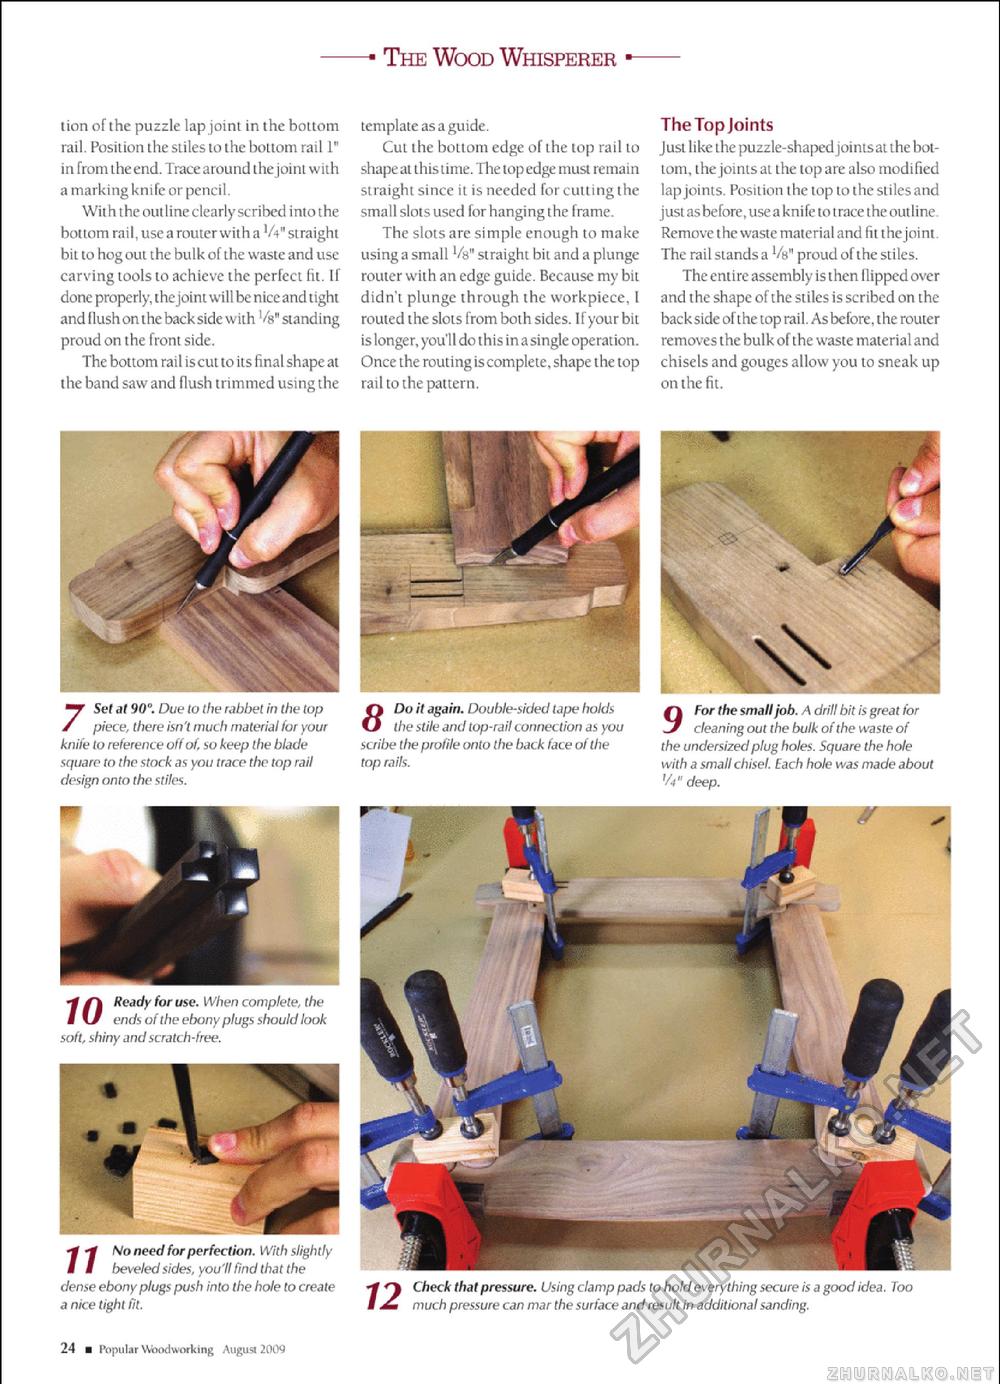
The Wood Whisperer lion of the puzzle lap joint in the bottom rail, Position the stiles to the bottom rail 1" i n from the end. Trace a round the j oint with a marki ng kni fe or penci I Withthe outline clearly scribed into the bottom rail , usea router with a 'A" straight bit to hogouLthebulkof the waste and use carving tools to achieve the perfect fit. If done properl y, the joint wil I be nice and t ight and flush on the backside wiLh 'a' standing proud on the front side. The bottom rail is cut to its final shape at the band saw and flush irimmed using the template as a guide. Cut the bottom edge of the top rail to shape at this time. The top edge must remain straight since it is needed for cutting the small slots used for hanging the frame. The slots are simple enough to make using a small Va" straight bit and a plunge router with an edge guide. Because my bit didn't plunge through the workpiece, I routed the slots from both sides. If your bit is longer, you'l I do this in a single operation. Once the routing iscomplete, shape the top rail to the pattern. The Top Joints Just like the puzzle-shaped jointsatthe bottom, the joints at the top are also modified lap joints. Position the top to the stiles and justasbefore.useaknife to trace theoutLine. Remove the waste mate rial and fit the j oint. The railsLandsa Vs" proud of the stiles. Theentireassemblyisthenflippedover and the shape ofthe stiles is scribed on the backside ofthe top rail. As before, the router removes the bulk of the waste material and chisels and gouges allow you to sneak up on the fit. 7 Set at 90°. Due to the rabbet in the top piece, there isn't much material for your knife to reference off of, so keep the blade square to the stocfr as you trace the top rail design onto the stiles. Do it again. Double-sided tape holds the stile and top-rail connection as you scribe the profile onto the back face of the top raits. 9 For the small job. A drill bit is great for cleaning out the bulk of the waste of the undersized plug holes. Square the hole with a small chisel. Each hole was made about 'A" deep. Check that pressure. Using clamp pads to hold everything secure is a good idea. Too much pressure can mar the surface and result in additional sanding. ■tfA Ready for use. When complete, the i Lf ends of the ebony plugs should look soft, shiny and scratch-free. n So need for perfection, with sligh tly beveled sides, you'll find that the dense ebony plugs push into the hole to create a nice tight fit. 24 ■ Popular Woodworking Augusi20t)9 |


