Popular Woodworking 2009-08 № 177, страница 46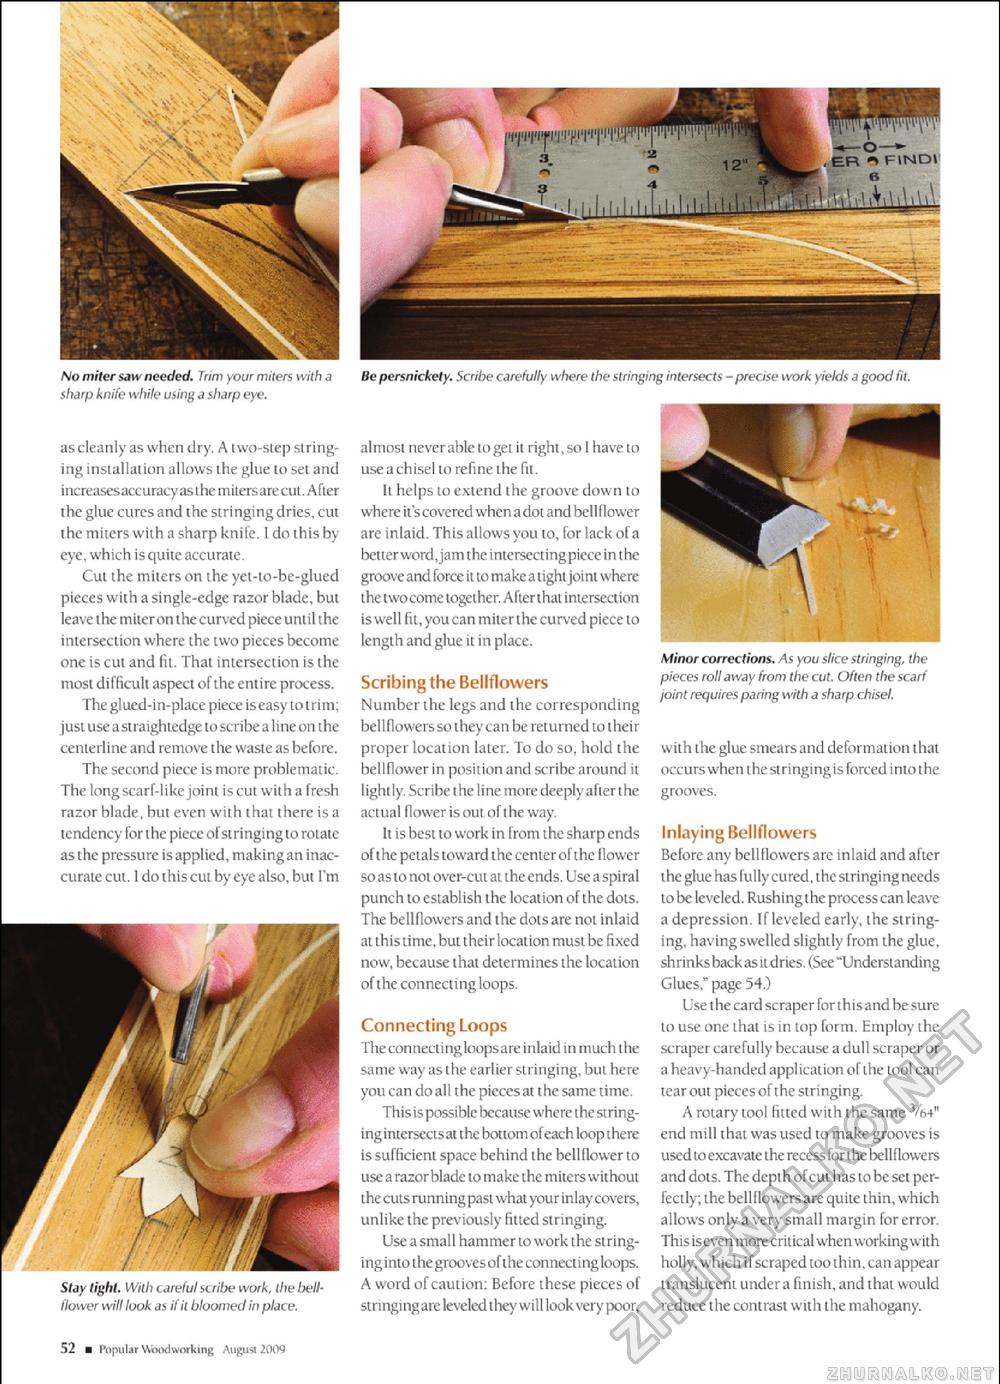
/it' persnickety. Scribe carefully where the stringing intersects - precise work yields a good fit. So miter saw needed. Trim your miters with a sharp knife while using a sharp eye. as cleanly as when dry. A two-step stringing installation allows the glue to set and increasesaccuracy as t he miters are cut. After t he glue cures and the stringingdries, cut the miters with a sharp knife. 1 dothisby eye, which is quite accurate. Cut the miters on the yet-to-be-glued pieces with a single-edge razor blade, but leave the miter onthecurved piece until the intersection where the two pieces become one is cut and fit, That intersection is the most difficult aspect of the entire process. The gl ued-i n-place p iece iseasytotrim; just use a straightedge to sc ribe a 1 i ne on the centerline and remove the waste as before. The second piece is more problematic. The long scarf-like joint is cut with a fresh razor blade, but even with that there is a tendency forthe piece of stringing to roLate as the pressure is applied, making an inaccurate cut. f do this cul by eye also, but I'm Slay tight. With careful scribe work, the bell-flower will look as if it bloomed in place. almost neverable to get it right, so I have to use a chisel to refine the fit. It helps to extend the groove down to where it'scovered when adotand bellflower are inlaid. This allows you to, for lack of a betterword.jam the intersectingpiece inthe groove and force it to make a t ighl joi nt where the two come together. After that intersection is well fit, you can miter the curved piece to length and glue it in place. Scribing the Bellflowers Number the legs and the corresponding bell flowers so they can be returned to their proper location later. To do so, hold the bellflower in position and scribe around it lightly. Scribe the line more deeply after the actual (lowerisout of the way It is best to work in from the sharp ends orthe petals toward the cemerofthe (lower so as to not over-cut at the ends. Use aspiral punchtoestablishthelocationofthedots. The bellflowers and the dots are not inlaid at this time, but their location must be fixed now, because that determines the location ofthe connecting loops Connecting Loops The connecting loops are inlaid in much the same way as the earlier stringing, but here you can do all the pieces at the same time. This is possible because where the string-ingintersects at the bottom of each loop there is sufficient space behind the bellflower to use a razor blade to make the miters without the cuts running past what your inlay covers, unlike the previously fitted stringing. Useasmall hammer to work the stringing into the grooves of the connecting loops. A word of caution: Before these pieces of stri nging are leveled t hey wil I look wry poor, I Minor corrections. As you slice stringing, the pieces roll away from the cut. Often the scarf joint requires paring with a sharp chisel. with the glue smears and deformation that occurs when the stringing is forced into the grooves. Inlaying Bellflowers Before any bellflowers are inlaid and afier the glue has fully cured, the stringing needs to be leveled. Rushingthc process can leave a depression If leveled early, the stringing, havingswelled slightly from the glue, shrinks back asitdries. (See "Understanding Glues," page 54.) Use the card scraper forthisand besure to use one that is in top form. Employ the scraper carefully because a dull scraper or a heavy-handed application of the tool can tear out pieces ofthe stringing. A rotary tool fitted with the same Ym" end mill that was used to make grooves is used to excavate the recess for the bell flowe rs and dots. The depth of cut has to be set perfectly; the bellflowers are quite thin, which allows only a very small margin for error This is even morecritical when working with holly, which if scraped too thin, can appear translucent undera finish, and that would reduce the contrast with the mahogany. 52 m Popular Wood working August 2009 |


